Tea Temperature Alarm
Every time I make a cup of tea, I forget about it while I wait for it to cool, until it’s too cold.
This project solves that problem and lets me drink my tea in the perfect temperature every time.
The idea is simple. A thermometer with an alarm set to a specific temperature. Now let’s overengineer it with a ton of features ;)
The Perfect Drinking Temperature
After polling a brand new boiling cup of tea and sipping every few minutes, I reached the conclusion that 60C is the temperature at which I like to start drinking my tea. It’s a bit too hot to take big swigs, but perfect for gentle sipping and after a couple of sips, it gets to normal sipping temperature.
Just Add Cold Water
Most people solve this problem by adding cold water to their tea. But that dilutes the tea and changes it’s flavor. Over steeping the tea to make it stronger to compensate doesn’t taste the same.
It’s like telling someone to put cold water in their espresso to cool it down. It doesn’t really work. Especially if we’re talking higher end teas.
Just Count To 10
From my experience, boiling water (at sea level) in a standard ceramic cup, in an air conditioned office, should reach 60C in about 10 minutes. So why not just set a timer for 10 minutes and call it a day?
If I only drank from the same cup in the same place with the same water, that would work well enough, but this is not the case.
I may use different cups with different volumes, insulation levels and opening sizes (surface area in contact with the air). I don’t drink tea only in the office, so the ambient temperature can vary a lot. But the thing that affects the time the most is the fact that I drink different teas at different temperatures and keeping a conversion table of starting temperatures and wait times is not something I want (maybe that’s a good idea as a print on a cup).
Measuring the temperature is not a hard thing to do and the results will be perfect conditions every time, so I think it’s well worth it and covers all unknown factors.
Must Have Features
Auto Detect New Drink
I don’t want to press a button or interact with anything to tell it to start (apart from the switch to turn it on) and I don’t want to have to turn it off and on again to start a new session.
A simple definition of a session could be: From the moment hot water was poured into the cup (the temperature rose rapidly and crossed the target temperature) until when the cup is empty (room temperature, or at lease very low temperature to account for residual heat in the cup).
This way, the alarm can be re-armed when I’m ready for another session, but there are some edge cases that this doesn’t cover.
Probe reinsertion is one such case. I might pull the probe out and put it back in before the target temperature was reached. The probe will detect a drop in temperature and will trigger the alarm. Moreover, when I’ll insert the probe back, it will detect another rise and crossing of the target, causing another session to start. This can be solved by a cooldown timer that will prevent the alarm triggering if not enough time has passed from the start of the session. I could also detect the rapid drop in temperature and ignore it because it’s clearly not an organic drop in tea temperature, but we’ll see if that’s needed.
Premature cup refilling could be another case like that. The temperature dropped below the target, but because it didn’t reach room temp or a temp low enough to trigger the session end before I topped off the cup with more hot tea, it will not start a new session and will not re-arm the alarm to notify me when it reaches the target again.
This is dealt with by removing the minimum temperature condition. By just detecting the crossing of the target from the bottom and a timer, we can account for both cases and have a simpler implementation.
No App Or Internet Dependency
I don’t want to have to have my phone on me or be in range of Wifi reception for the device to work. It has to be able to function by itself and not need connectivity or some app interface to work and be useful. If all I have is a cup of tea and the device, I should be able to know when the tea is drinkable.
This means that it has to have some indication of reaching the target temperature on the device itself. This could be a light, a sound, a vibration, etc.
Wifi for notifications and automations
When I’m in the office and when I’m at home, I have different usage patterns and different systems that I interact with, so I want the notification to integrate into the existing systems and not introduce any new apps or flows.
I can detect where I am according to the available Wifi networks. If I can connect to the office Wifi, I know I’m in the office. If I can connect to my home Wifi, I know I’m at home. I can also detect when I don’t have any known connection available and change the alarm behavior accordingly.
@ The office
When I’m at the office, I’m usually available on Slack. I have it on my computer and on my phone.
I couldn’t get approval to use a personal bot on the company Slack organization, so I made a new free organization and added it to my workspace so that everything is in the same place.
Now, when the device connects to the work Wifi, it sends slack messages with the notifications for session start and target temperature reach.
@ Home
When I’m at home, I have a few things that can notify me. I chose to integrate the device into my Home Assistant system and have it trigger automations. I have included a MQTT client in the device’s code, so it can send MQTT messages directly without having another service or machine translating and forwarding. Now, when the device connects to the home Wifi, it triggers a light to change color and a message to be sent to my phone via the system.
I could make it even smarter, utilizing my presence sensors to trigger changes in the room that I’m in or even give more granular information to the system and have it display the temperature and time on some devices or maybe change an RGB light to reflect the temperature.
Auto Detect Forgotten Tea
A complement to the new session detection is an expired session detection.
I want another notification for when I still forget about my tea and it’s already too cold.
The device will detect when the temperature has fallen below some threshold outside the initial timed debounce (again, to account for probe-out-of-cup false positive). It will then send a message saying I need to make a new cup.
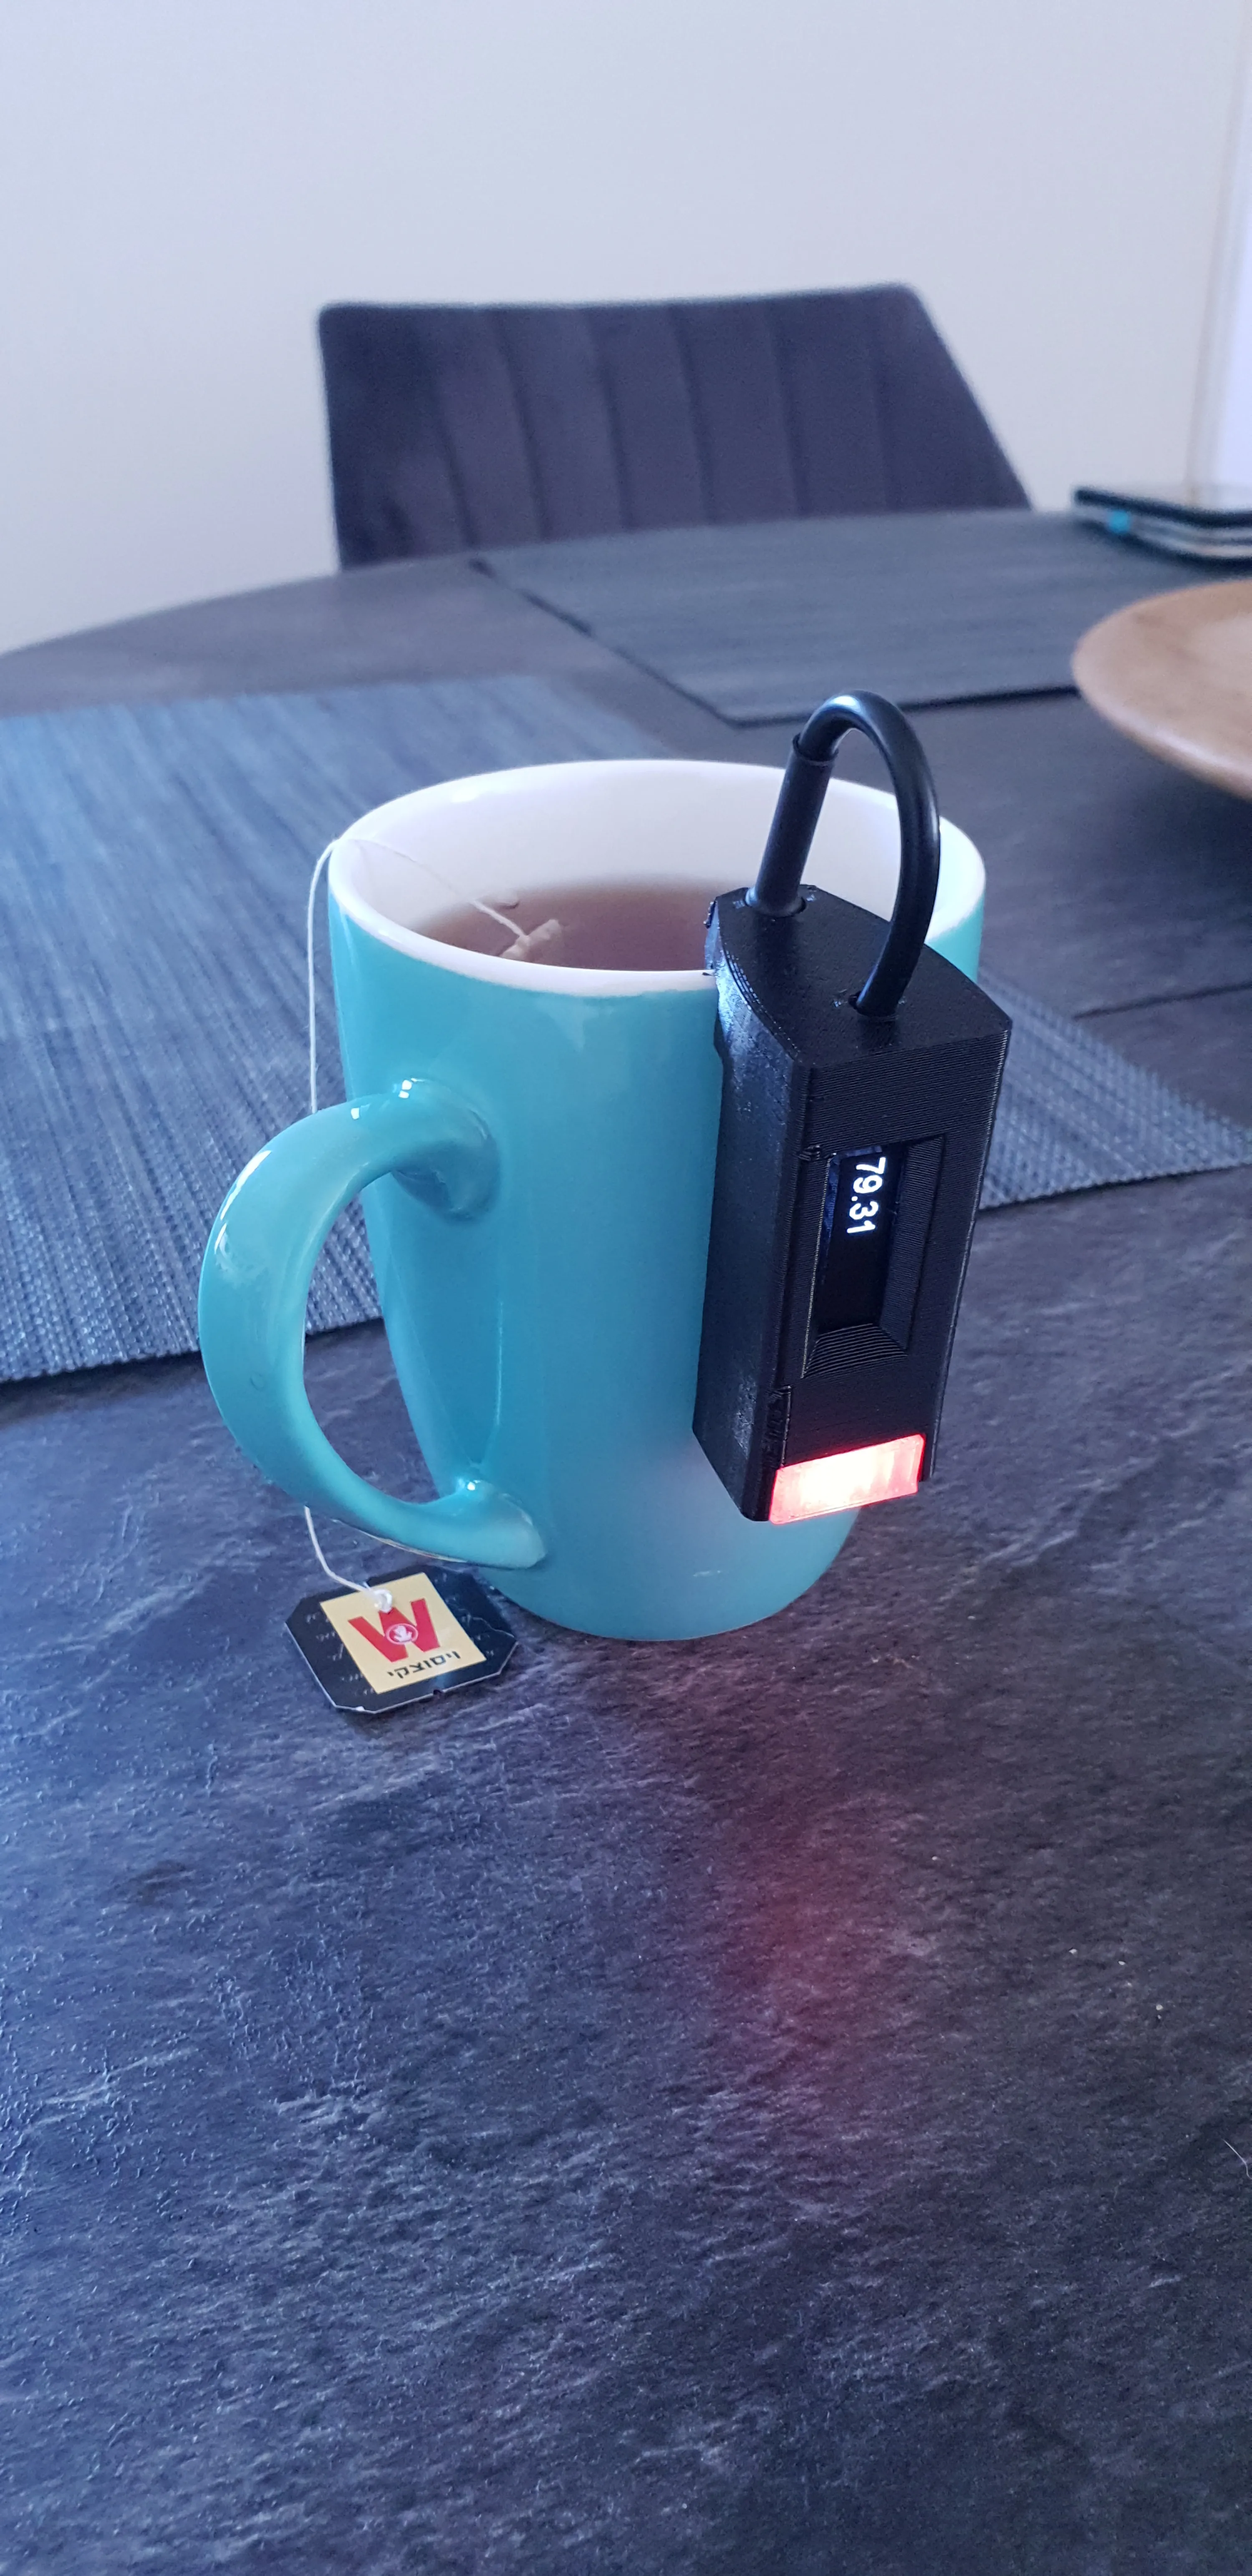
Prototype
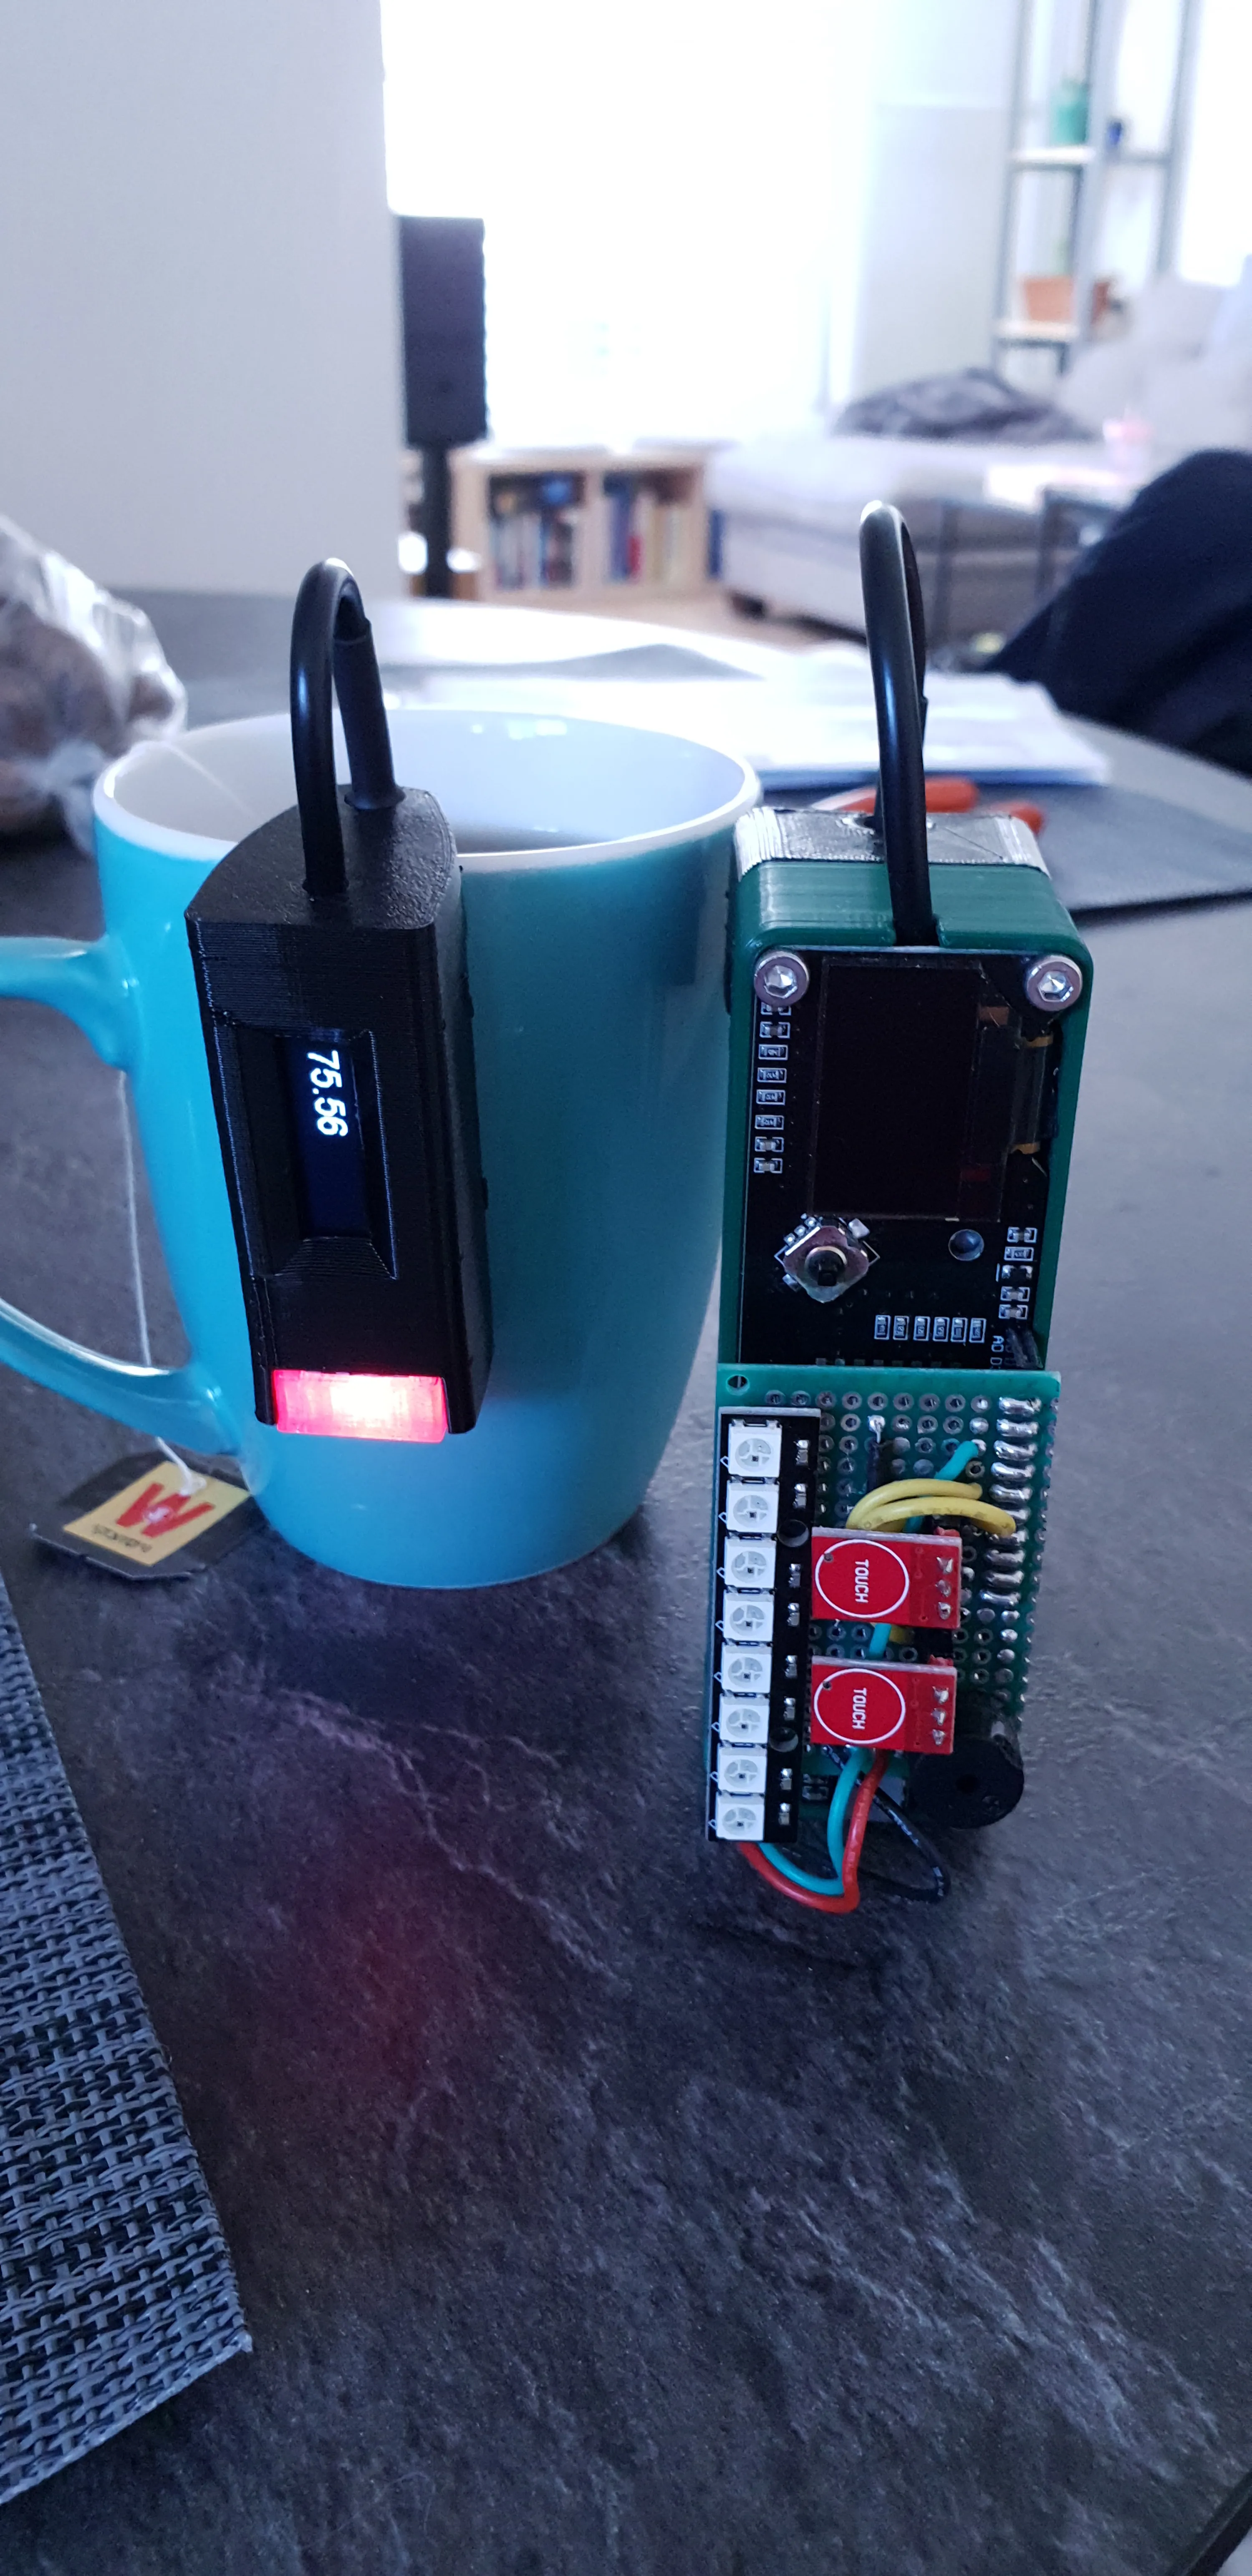
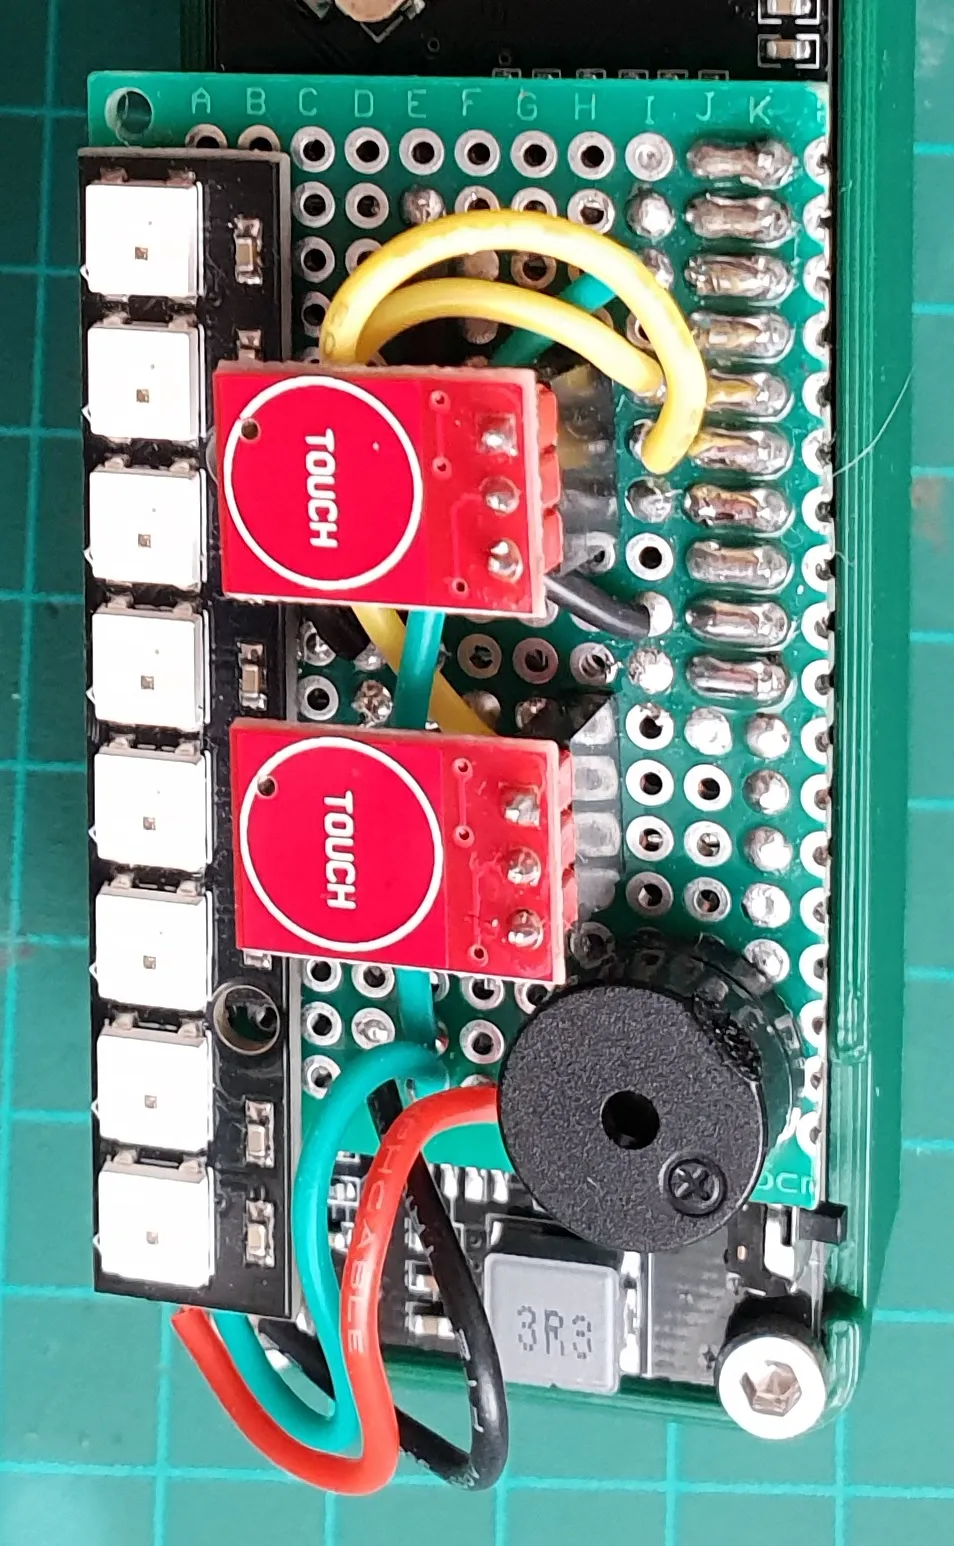
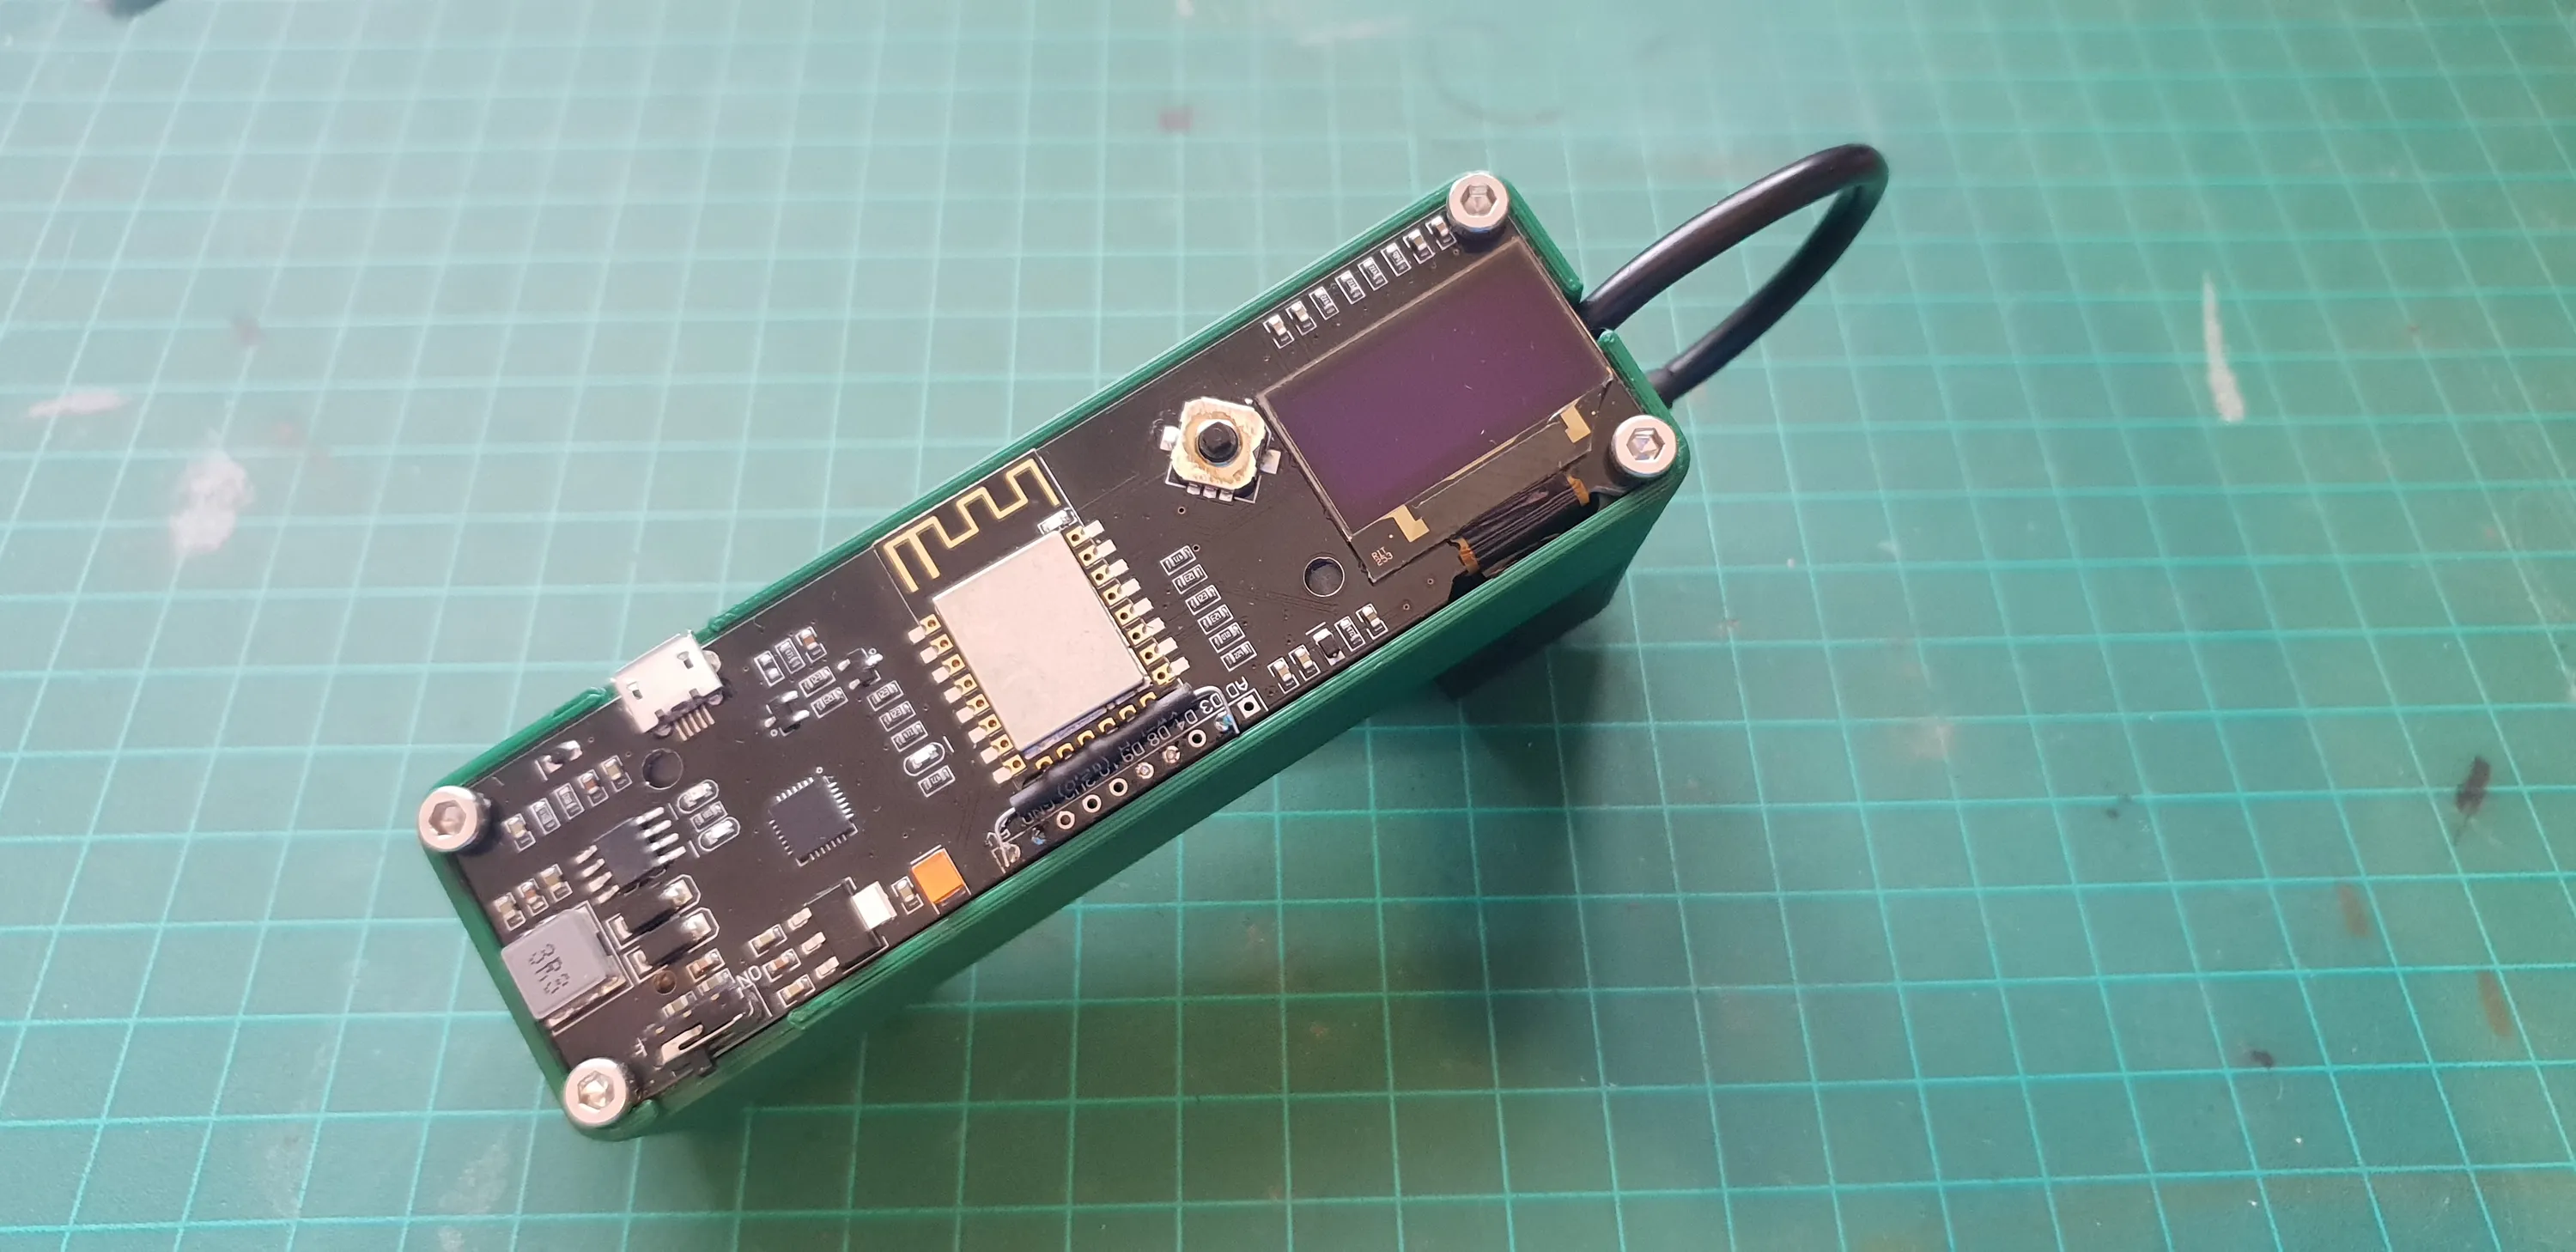
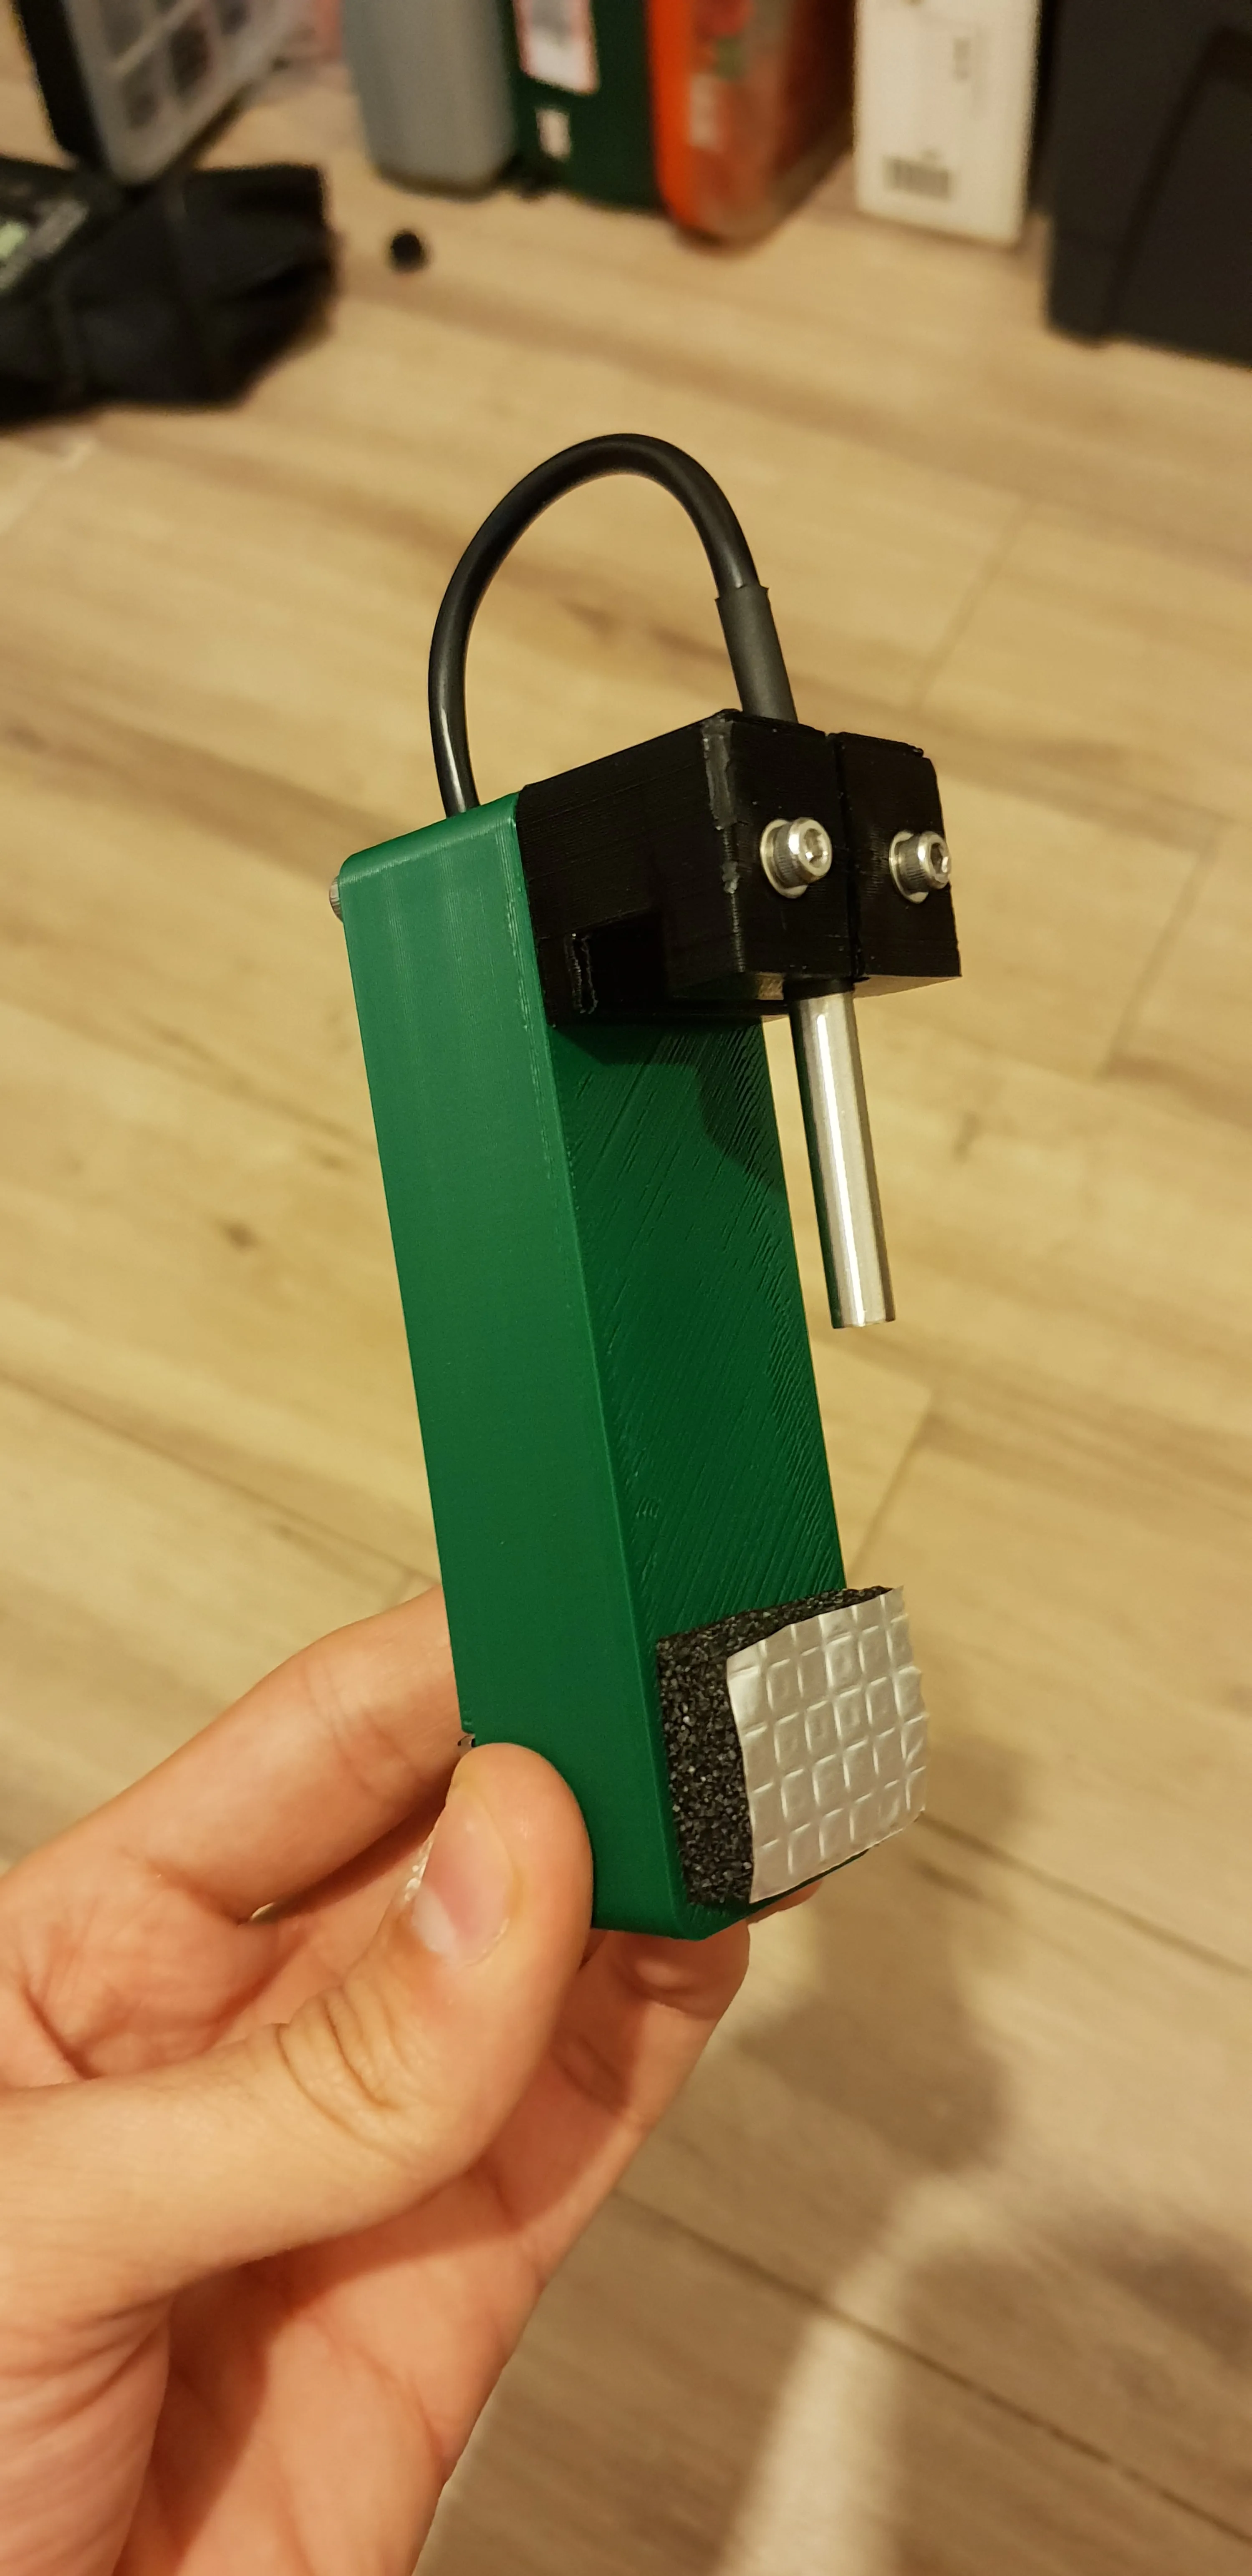
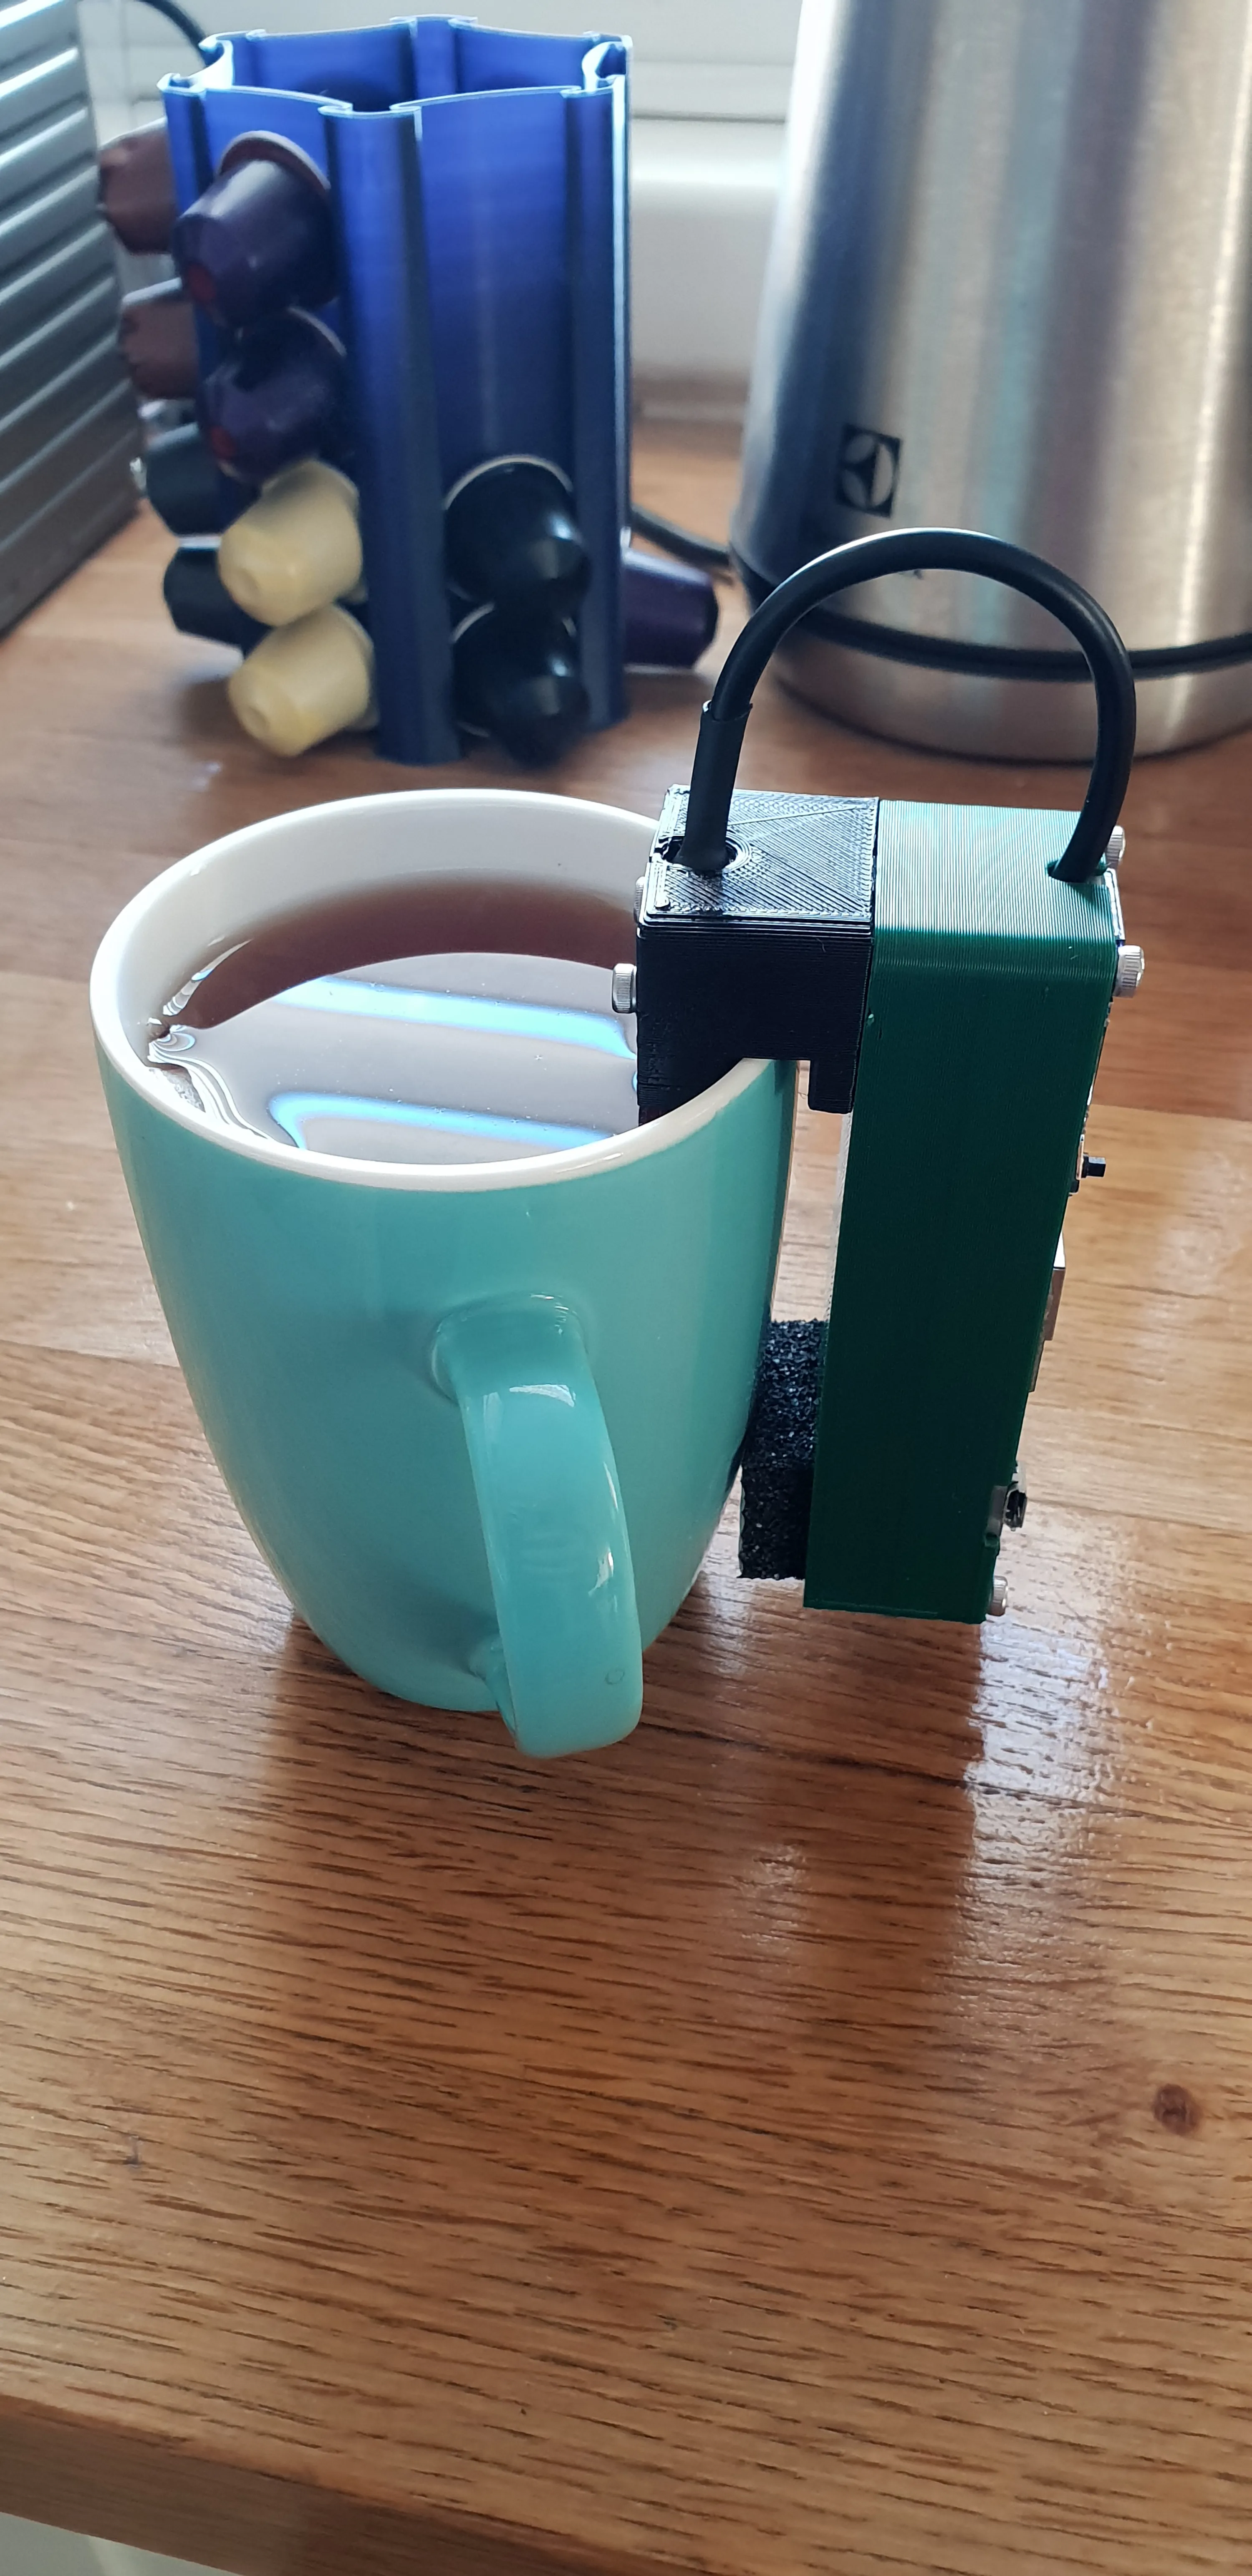
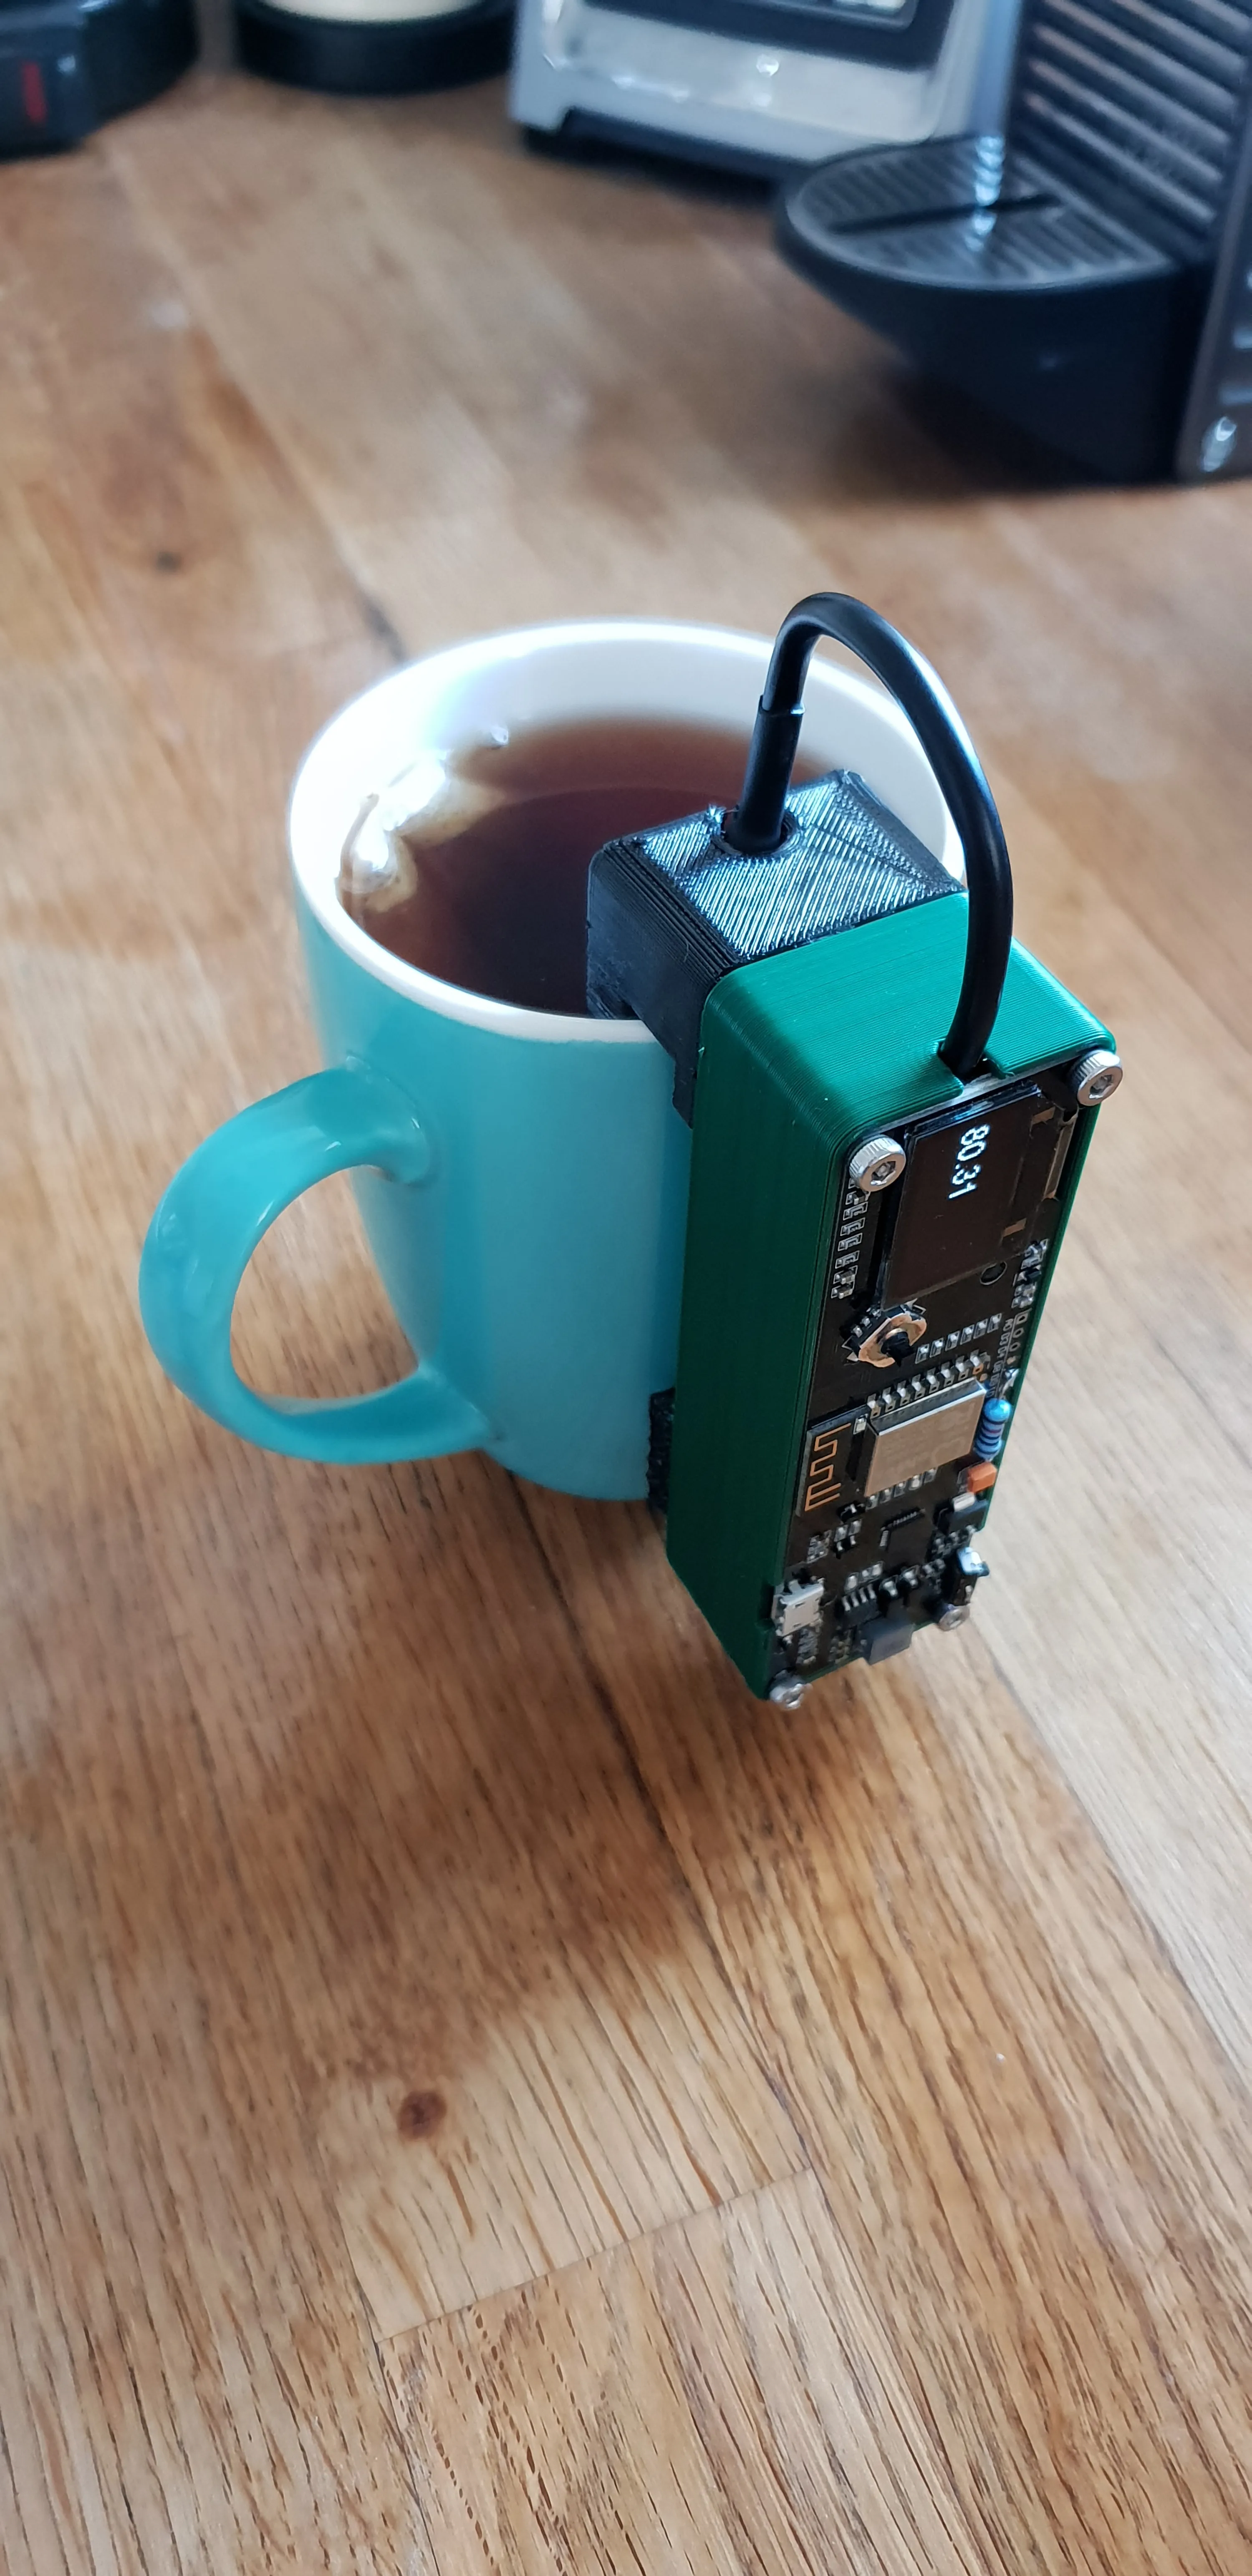
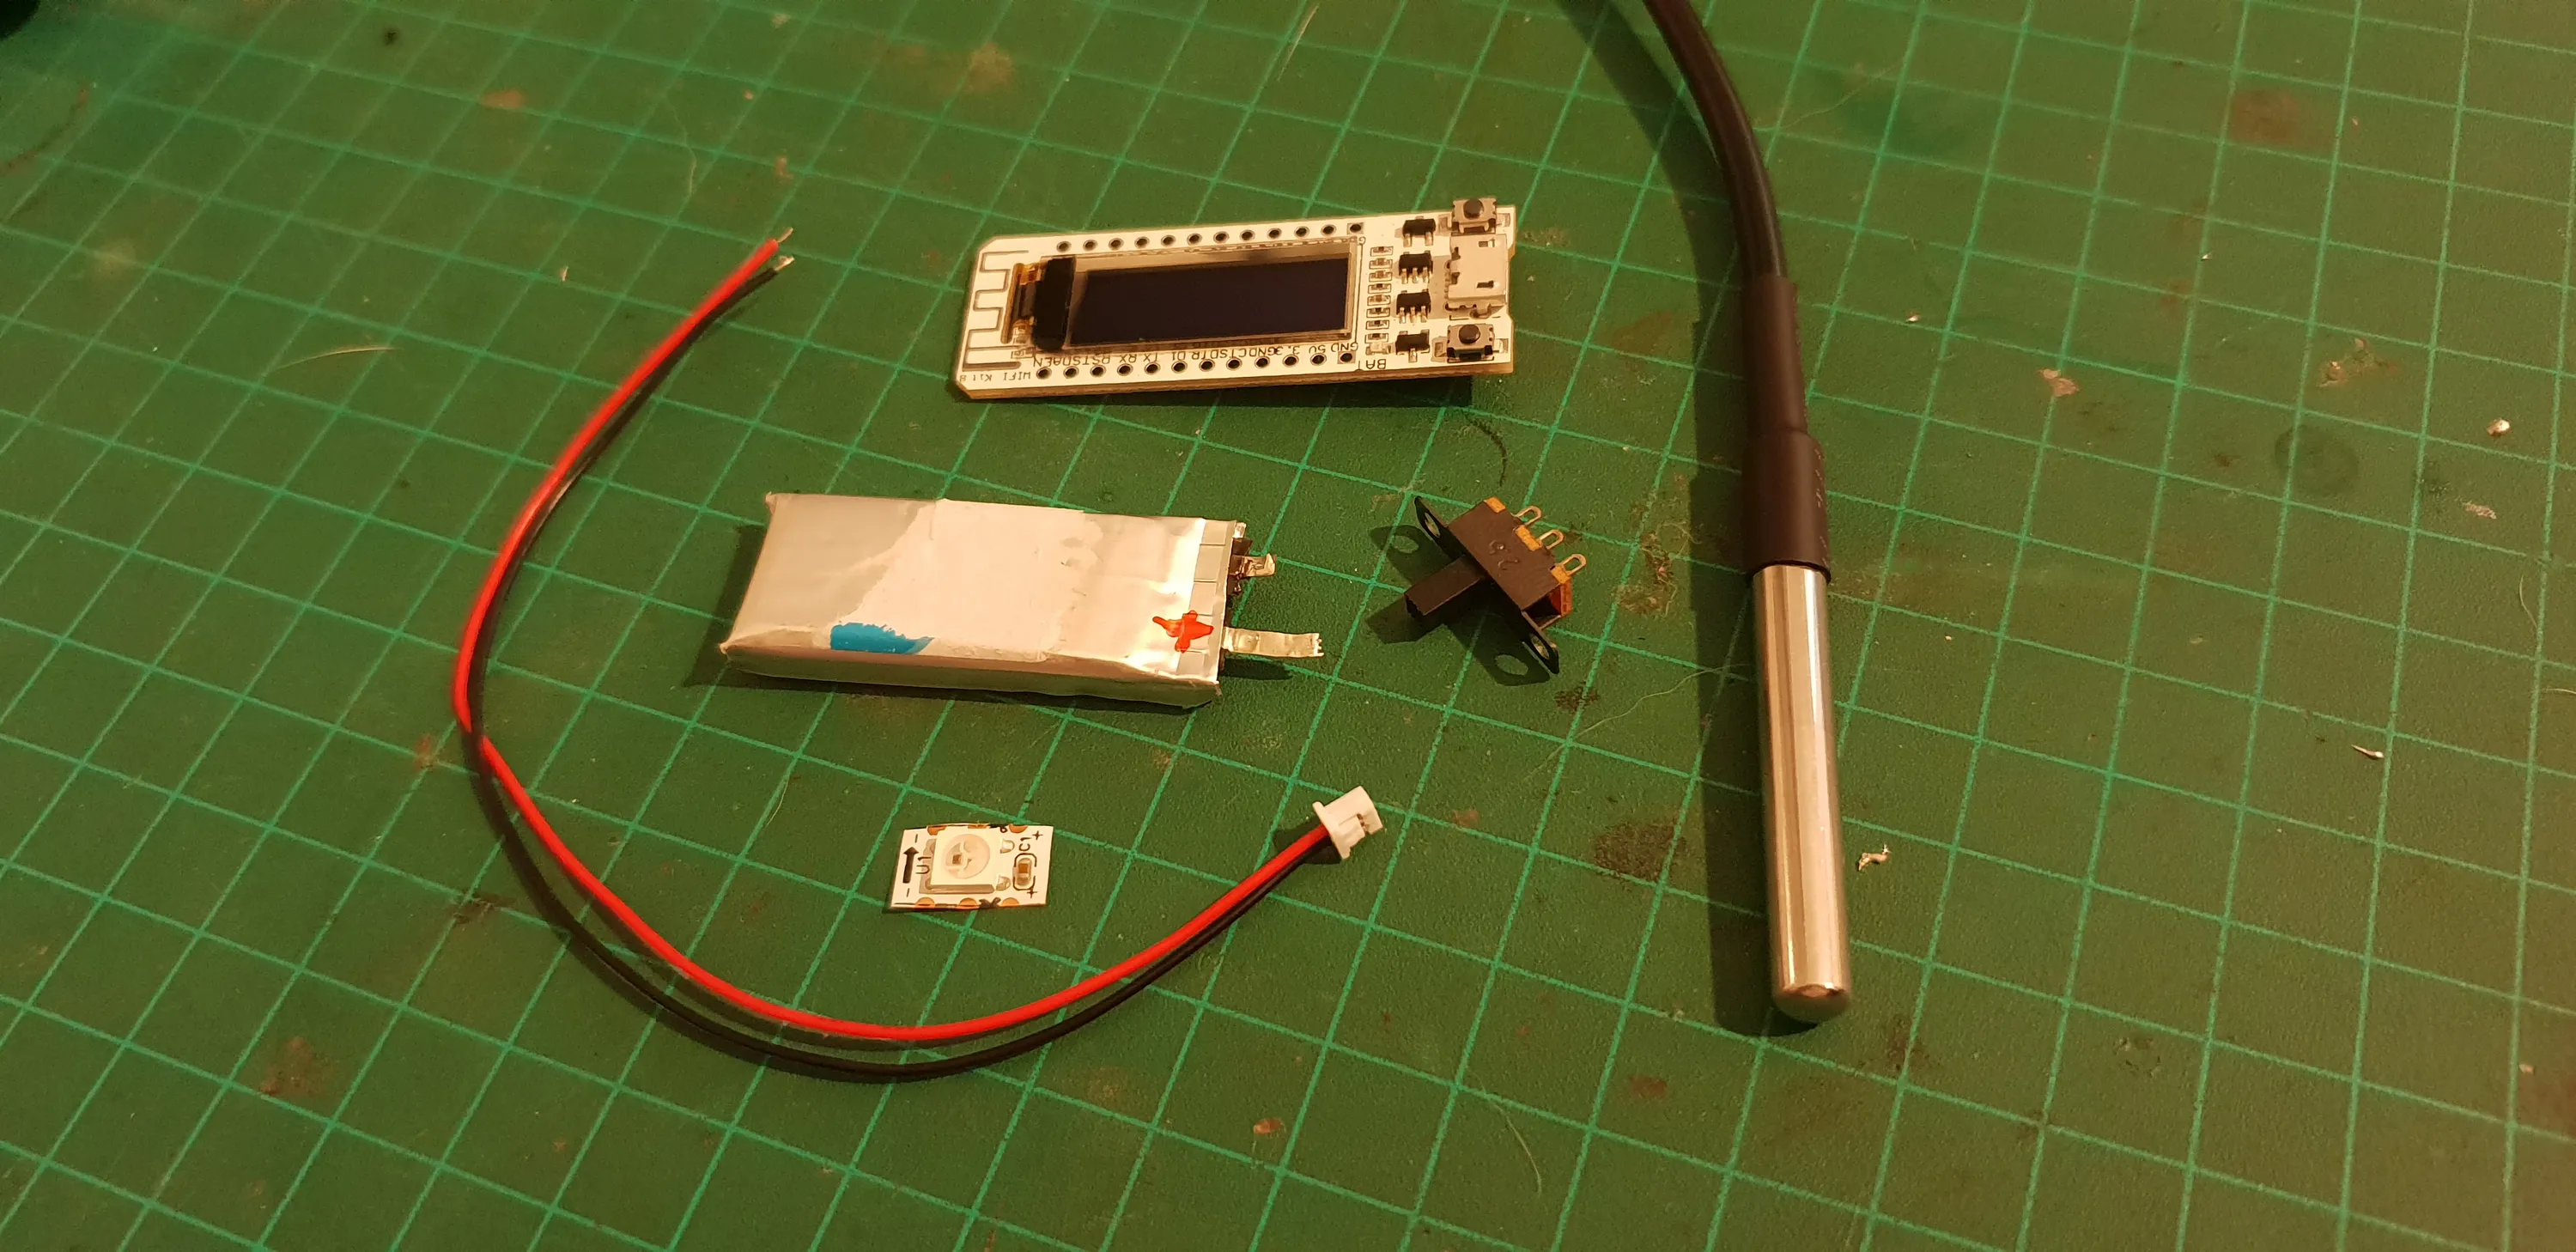
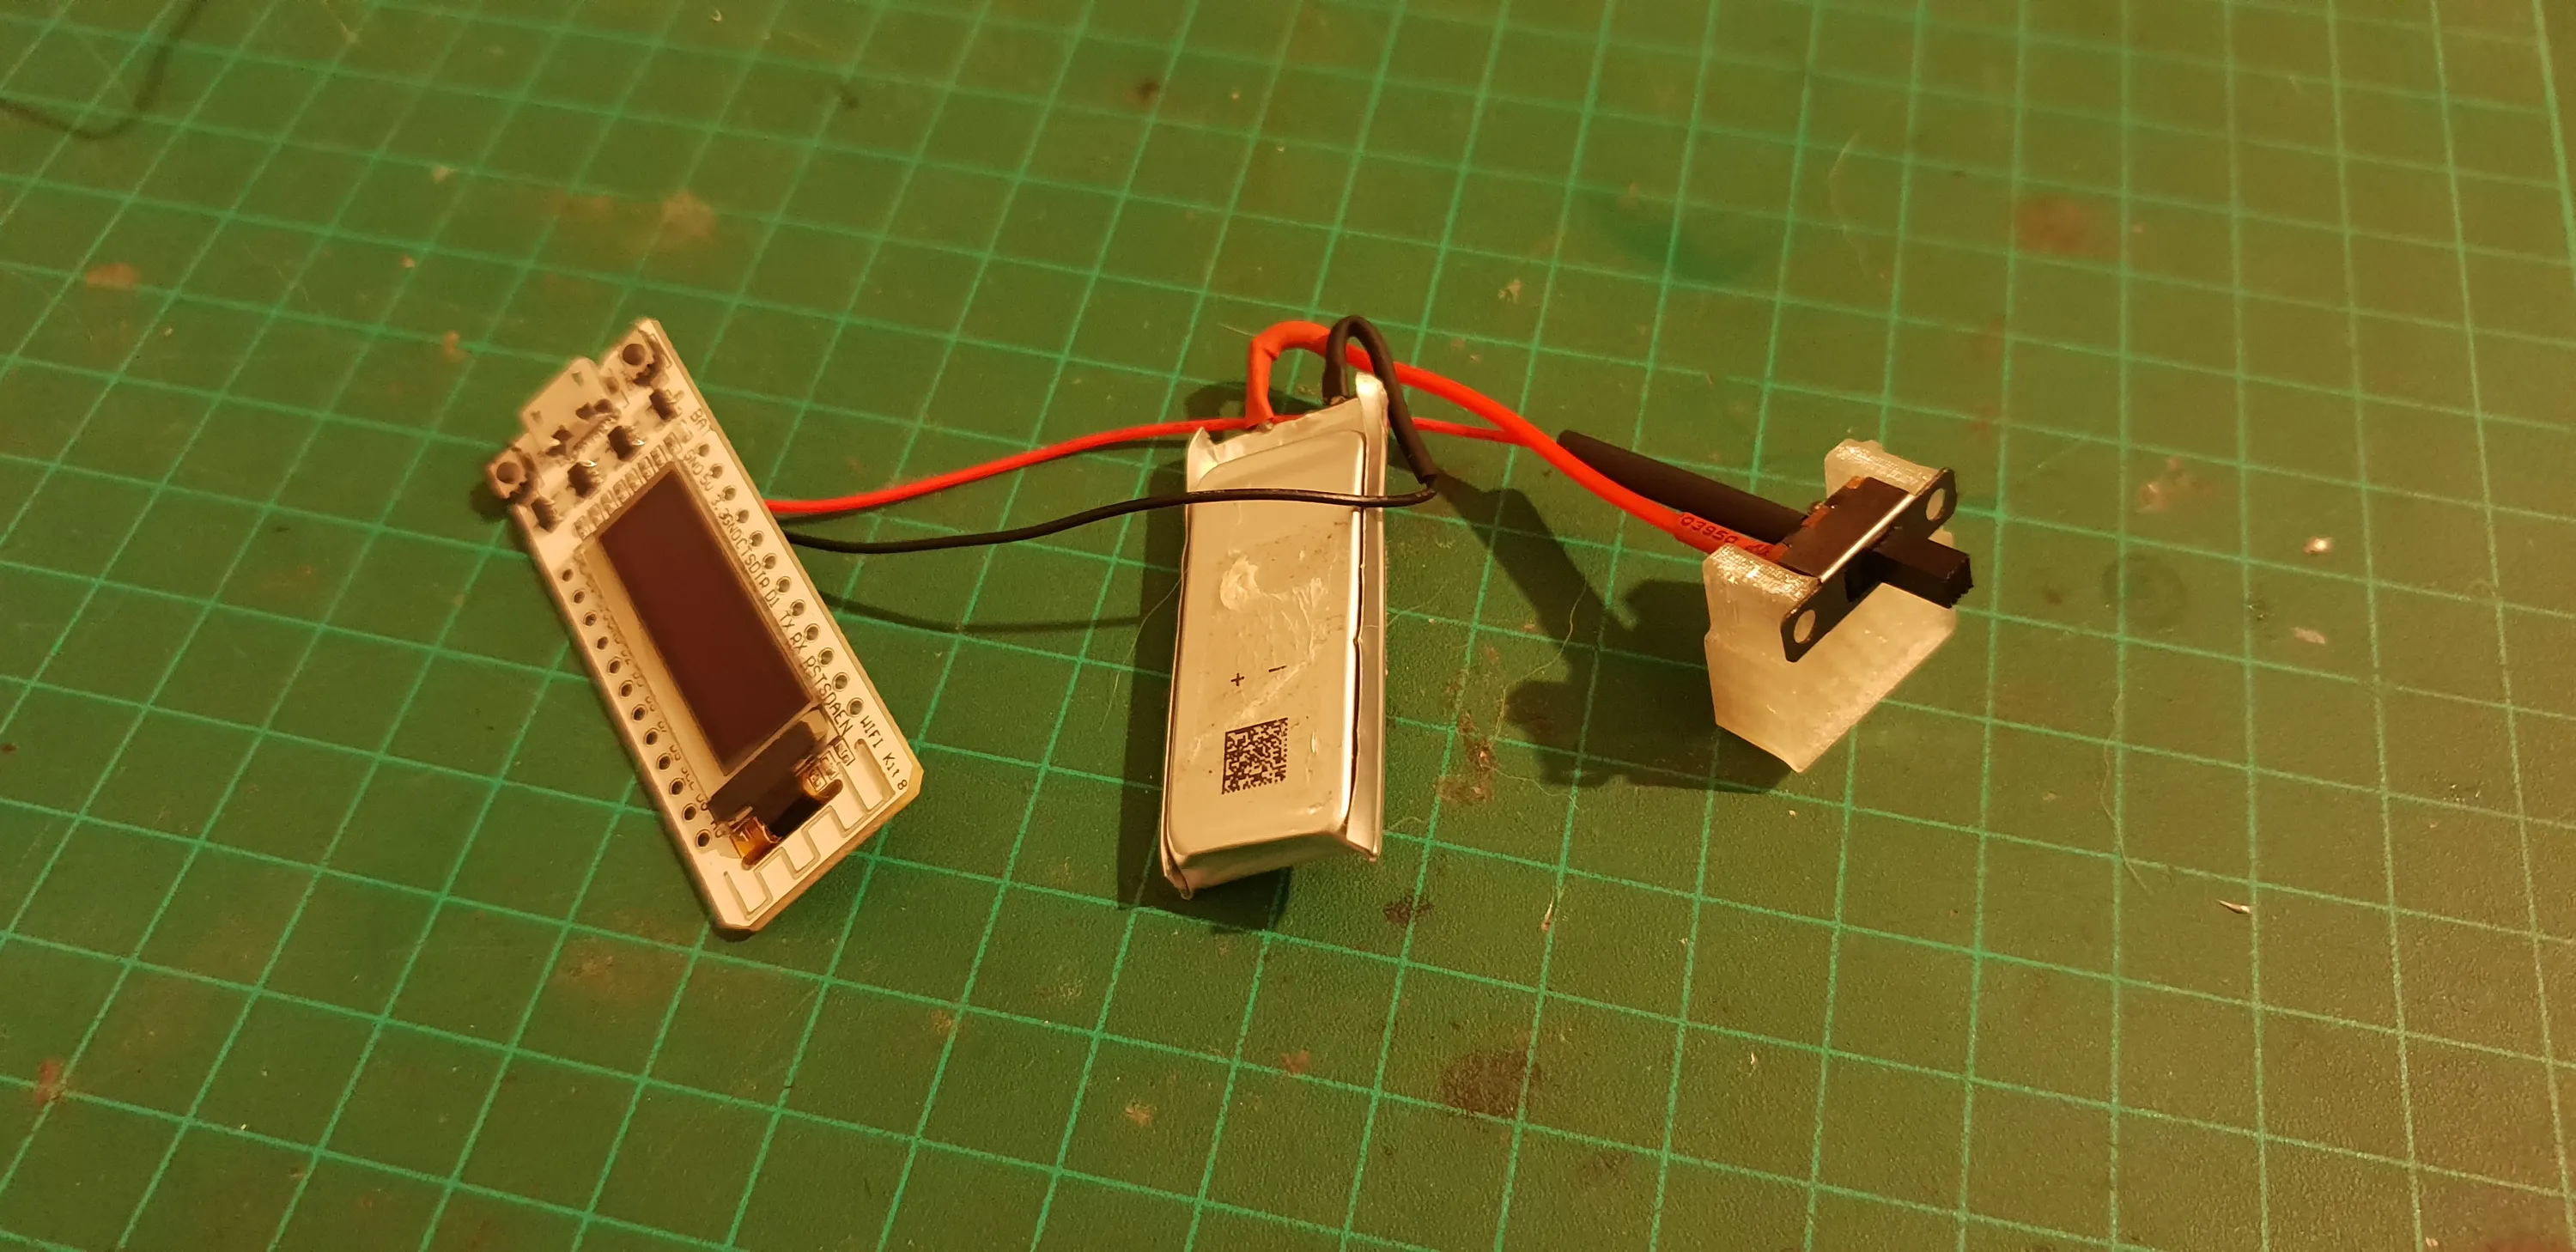
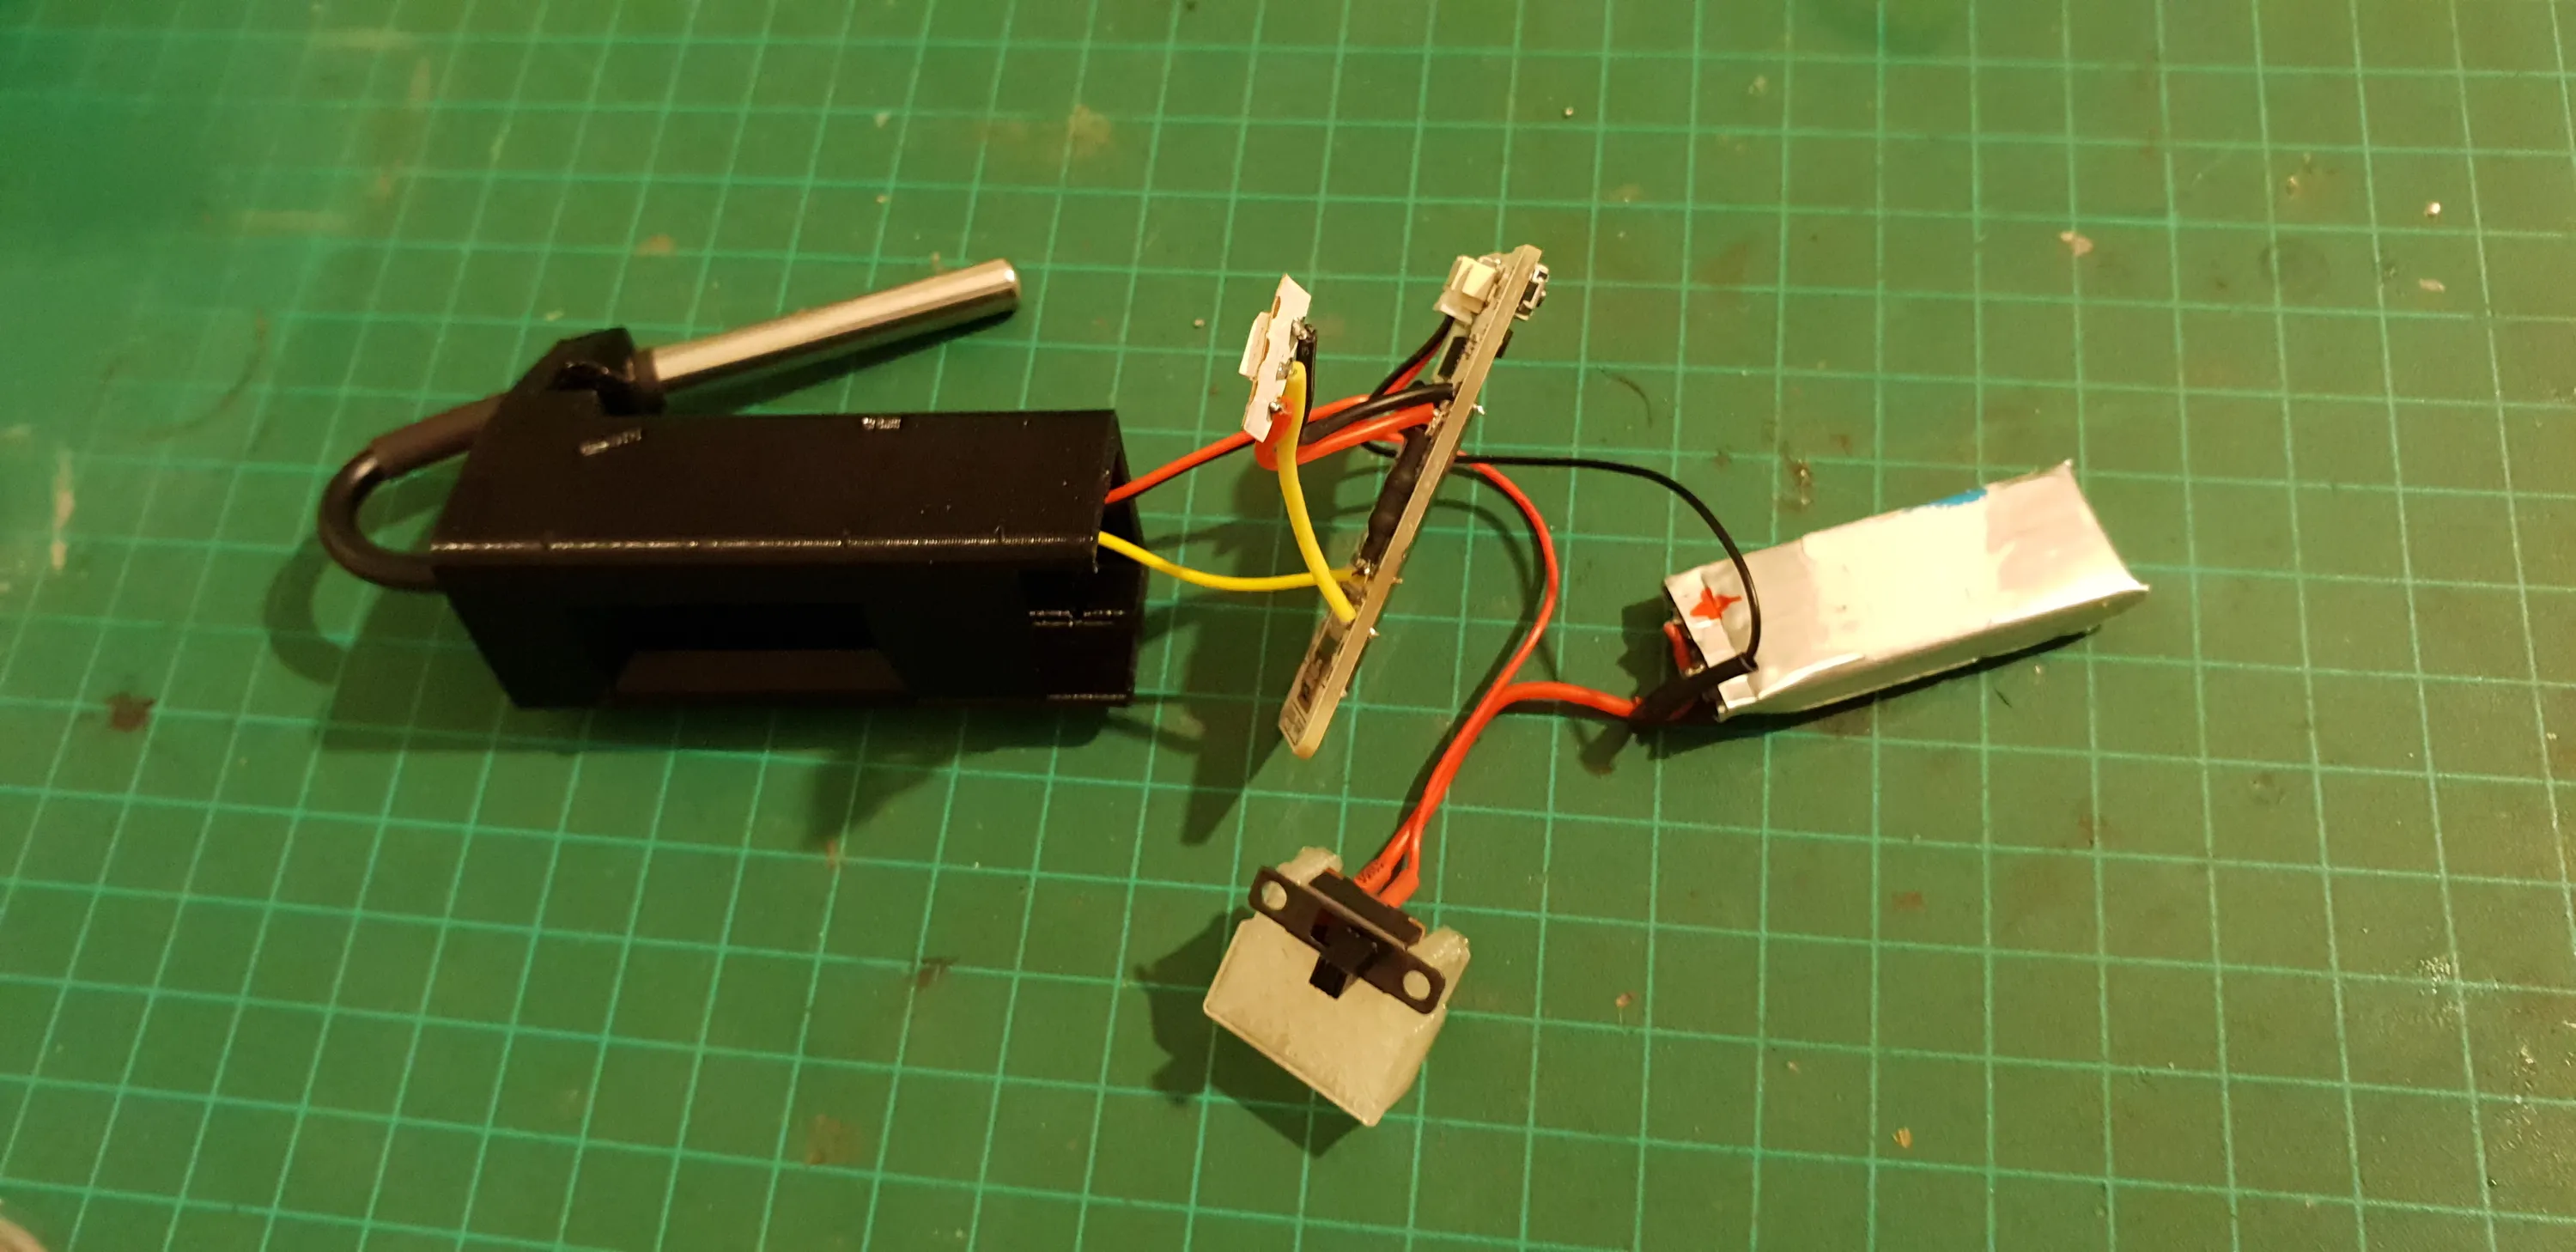
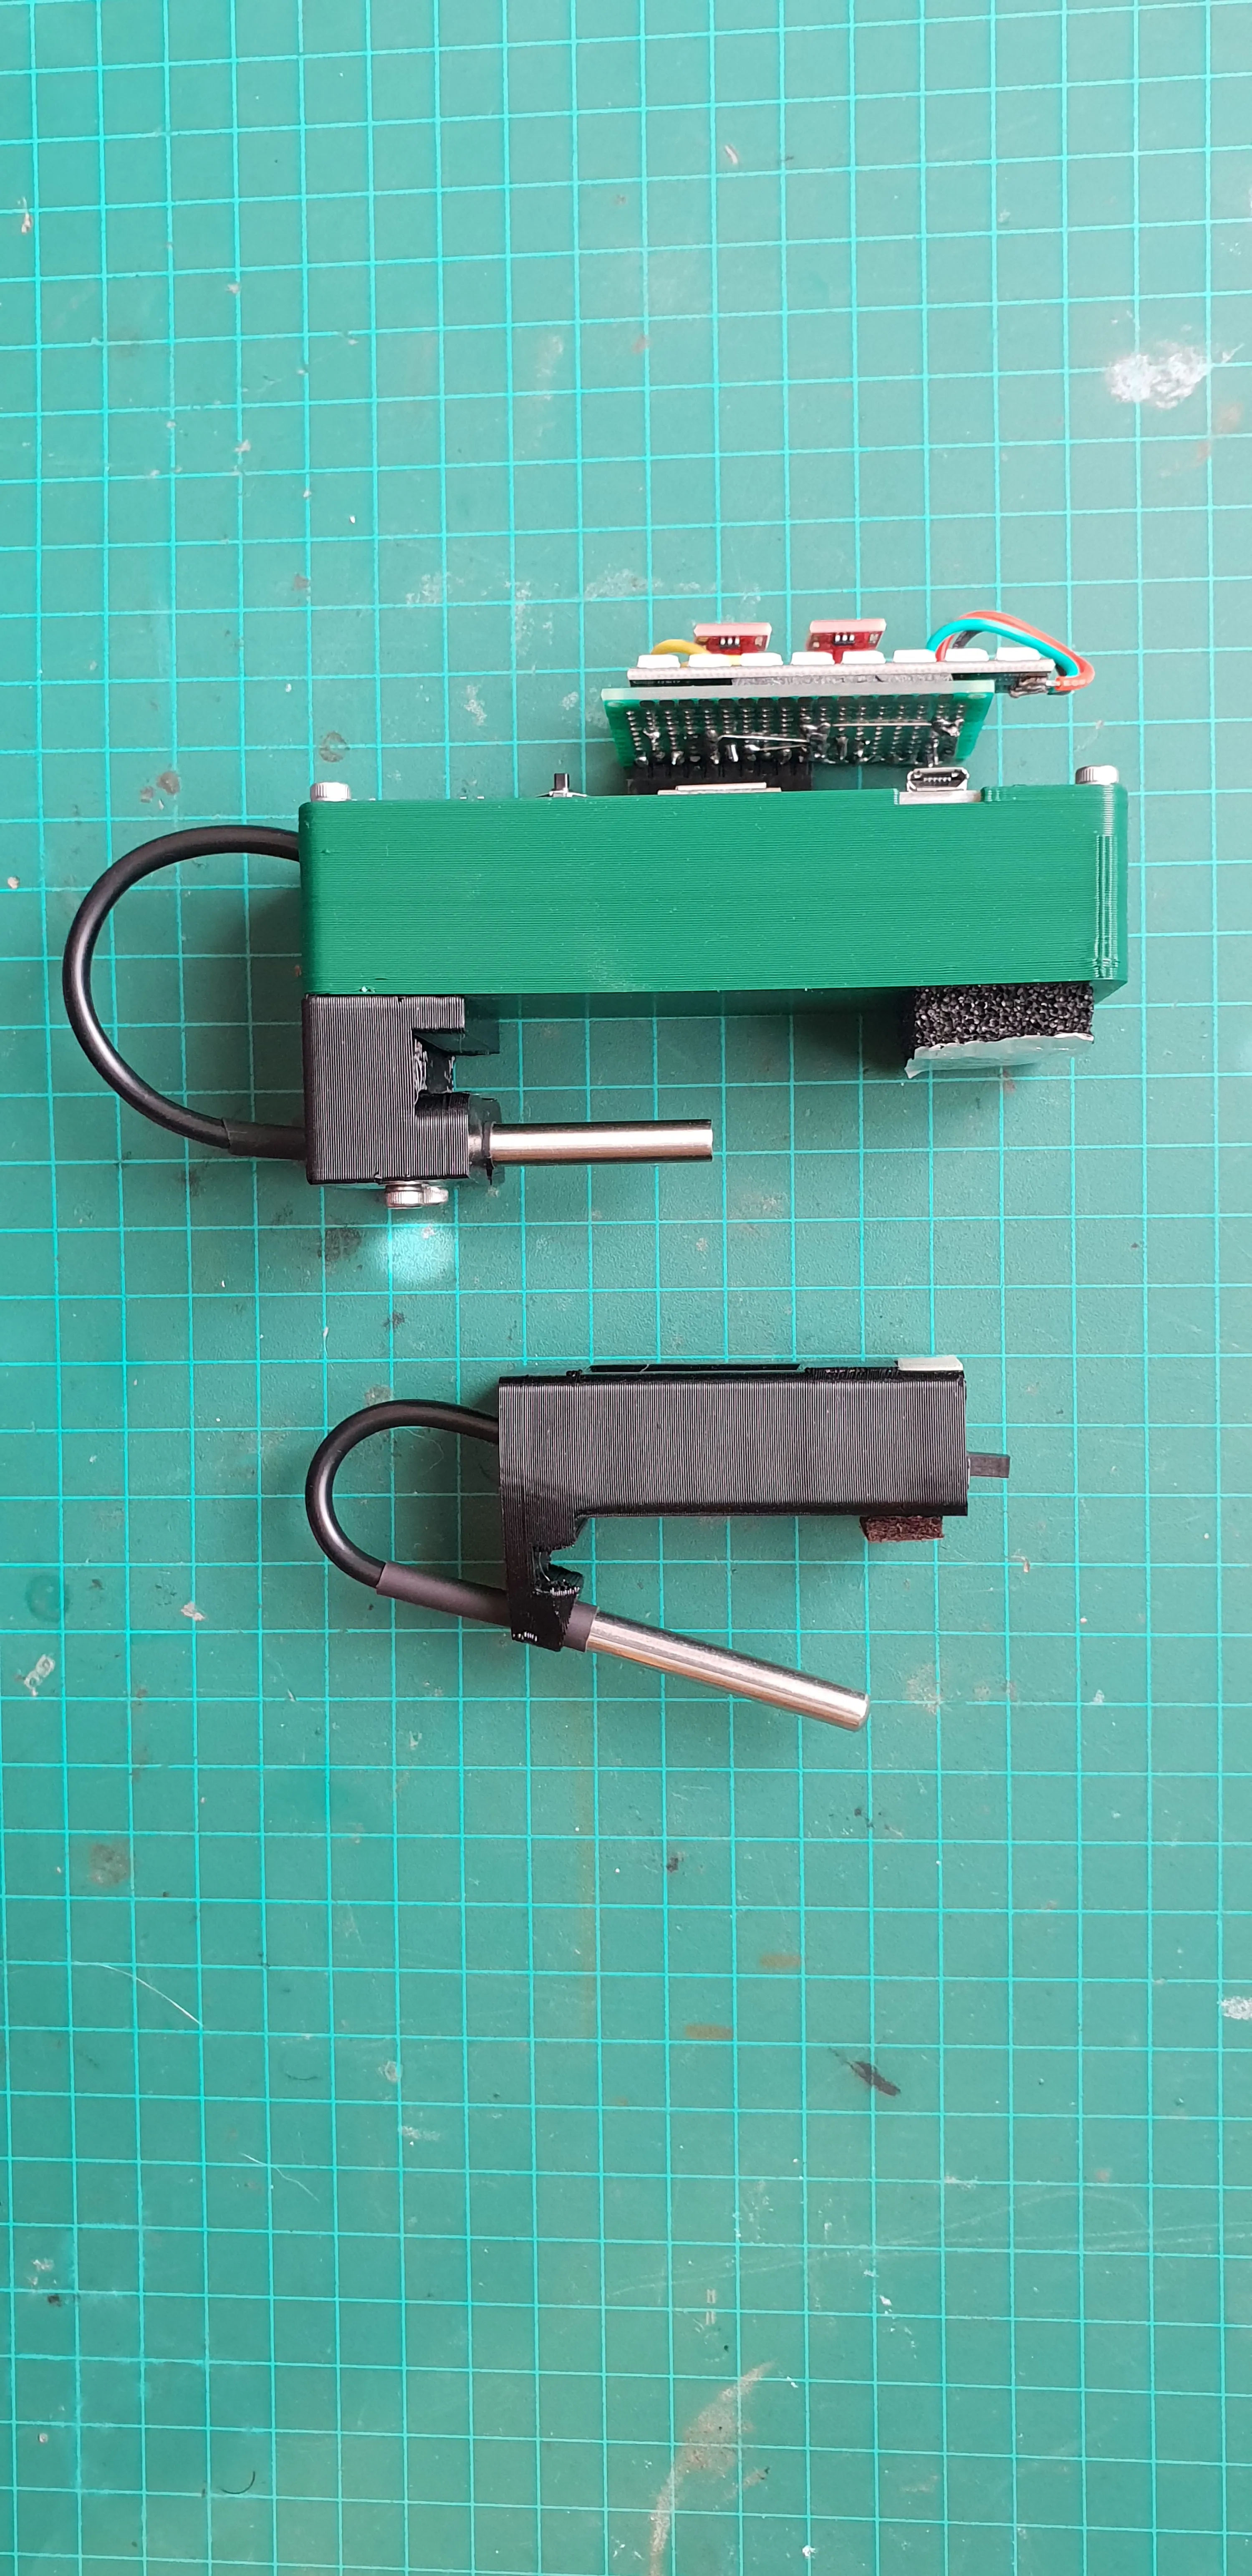
This is the first prototype. I used a development board with an ESP8266 (which has built in WiFi), a 18650 battery holder and charging circuit, an OLED screen and a joystick. I don’t really need all the features It has and it’s way too big, but it’s perfect for testing the software and evaluating features before committing to a design and making hardware decisions.
The board also breaks out gpio pins, so I can experiment with different external hardware and decide what works best for my use case. I made a removable daughter board with extra I/O.
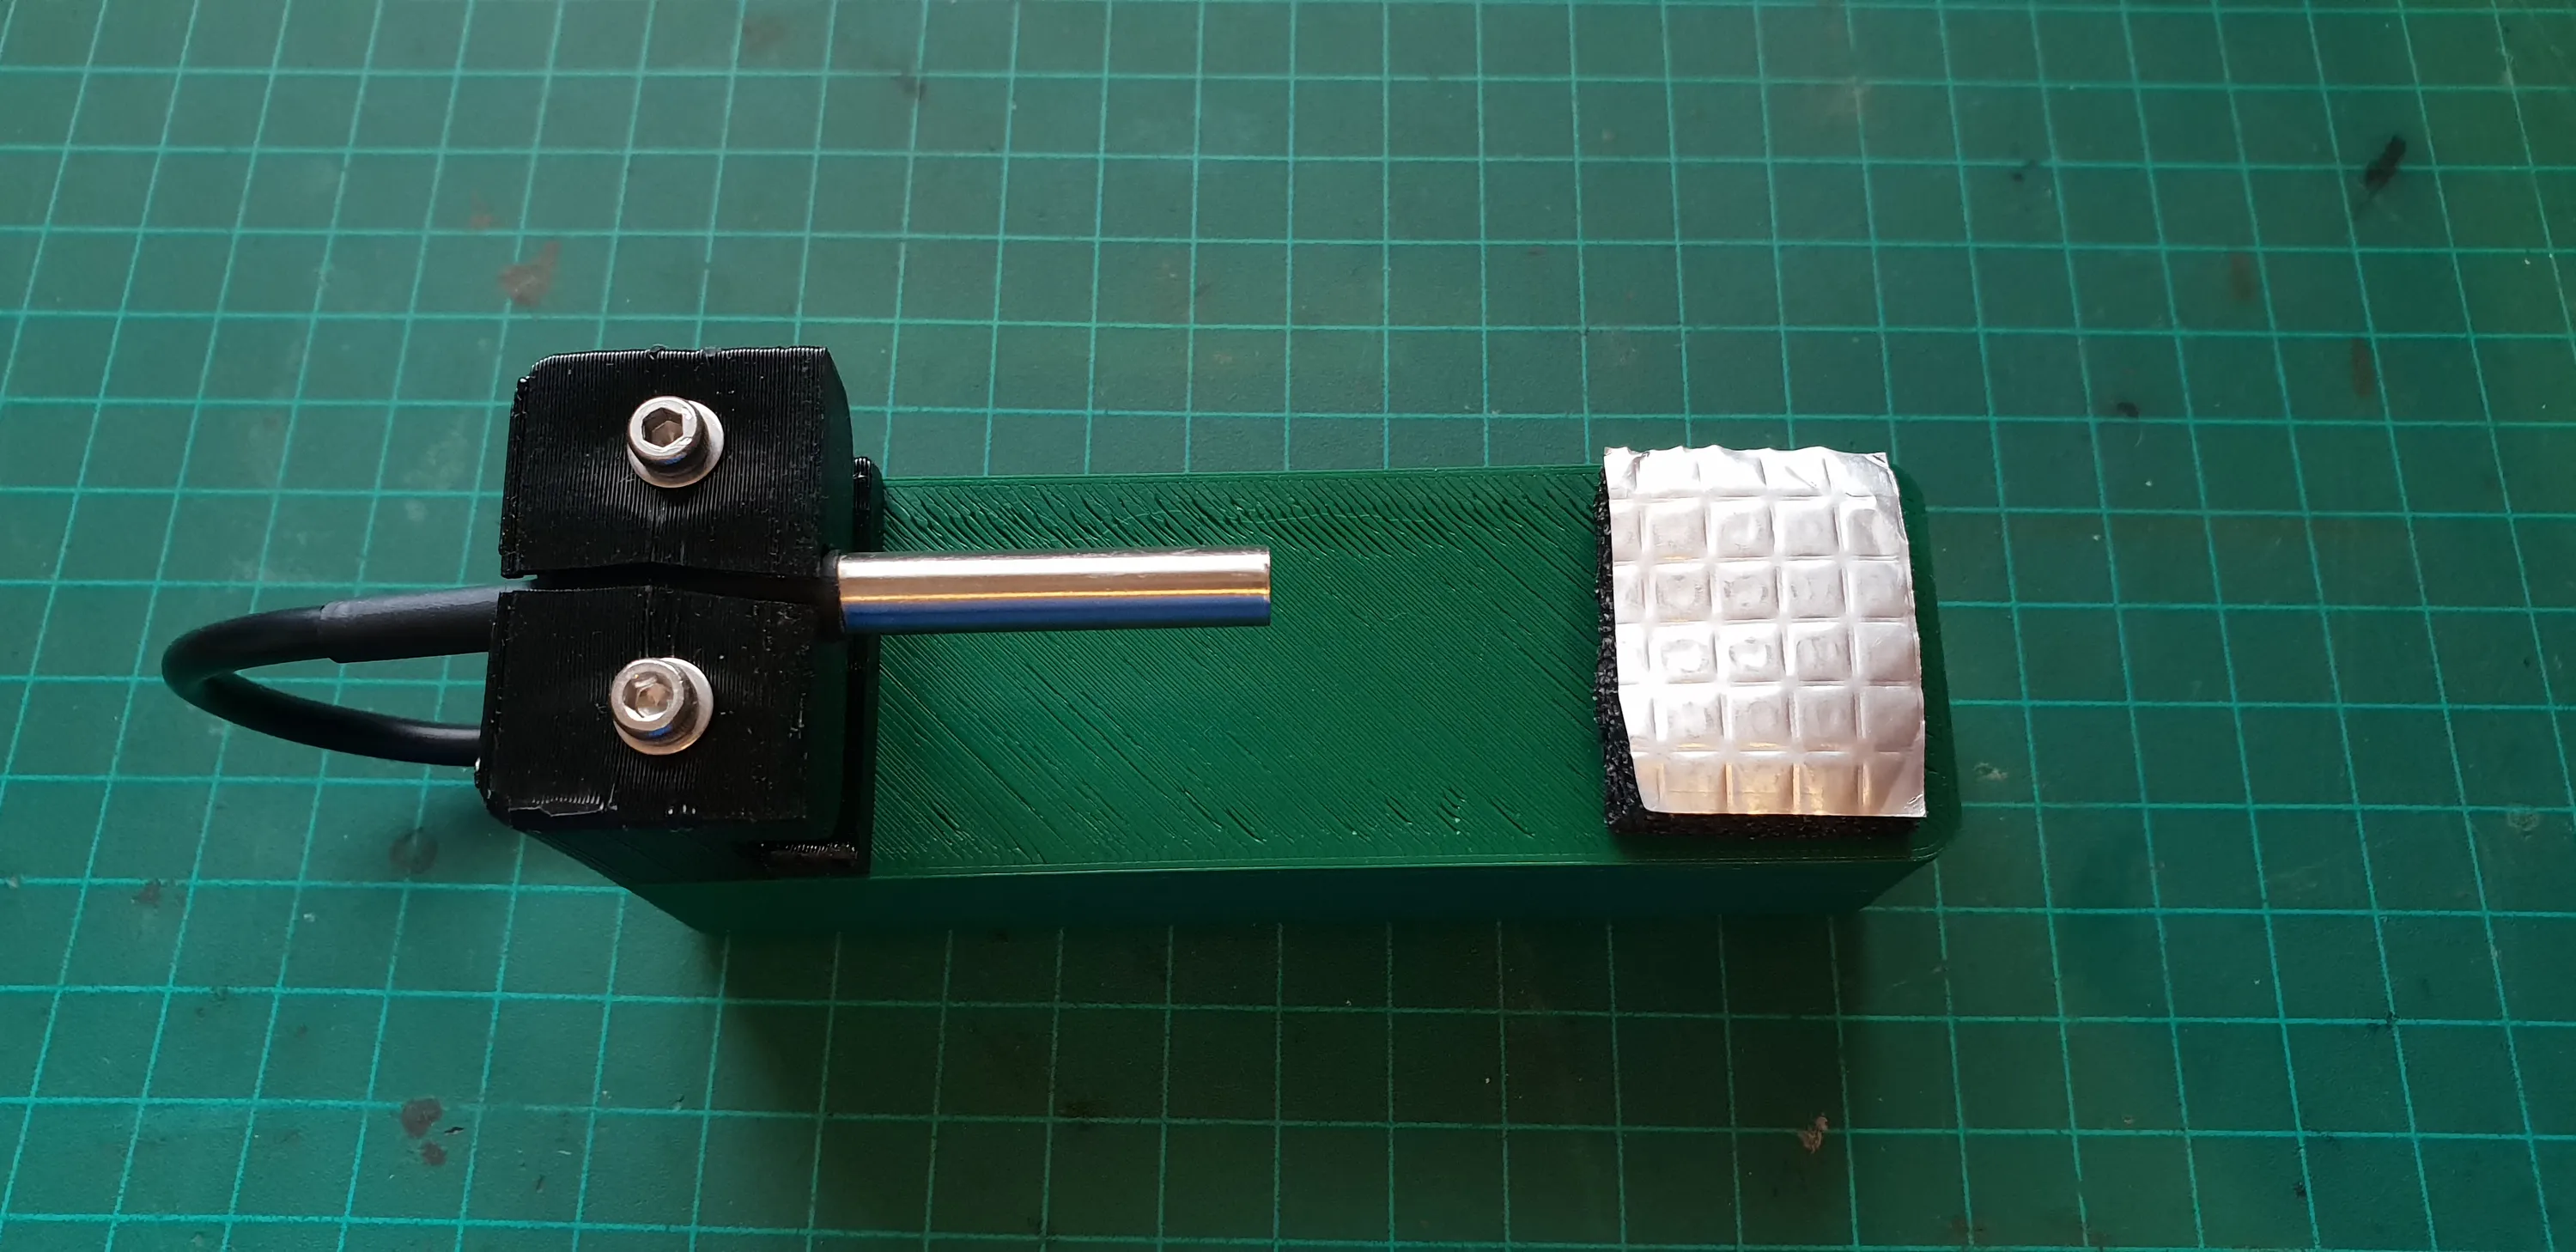
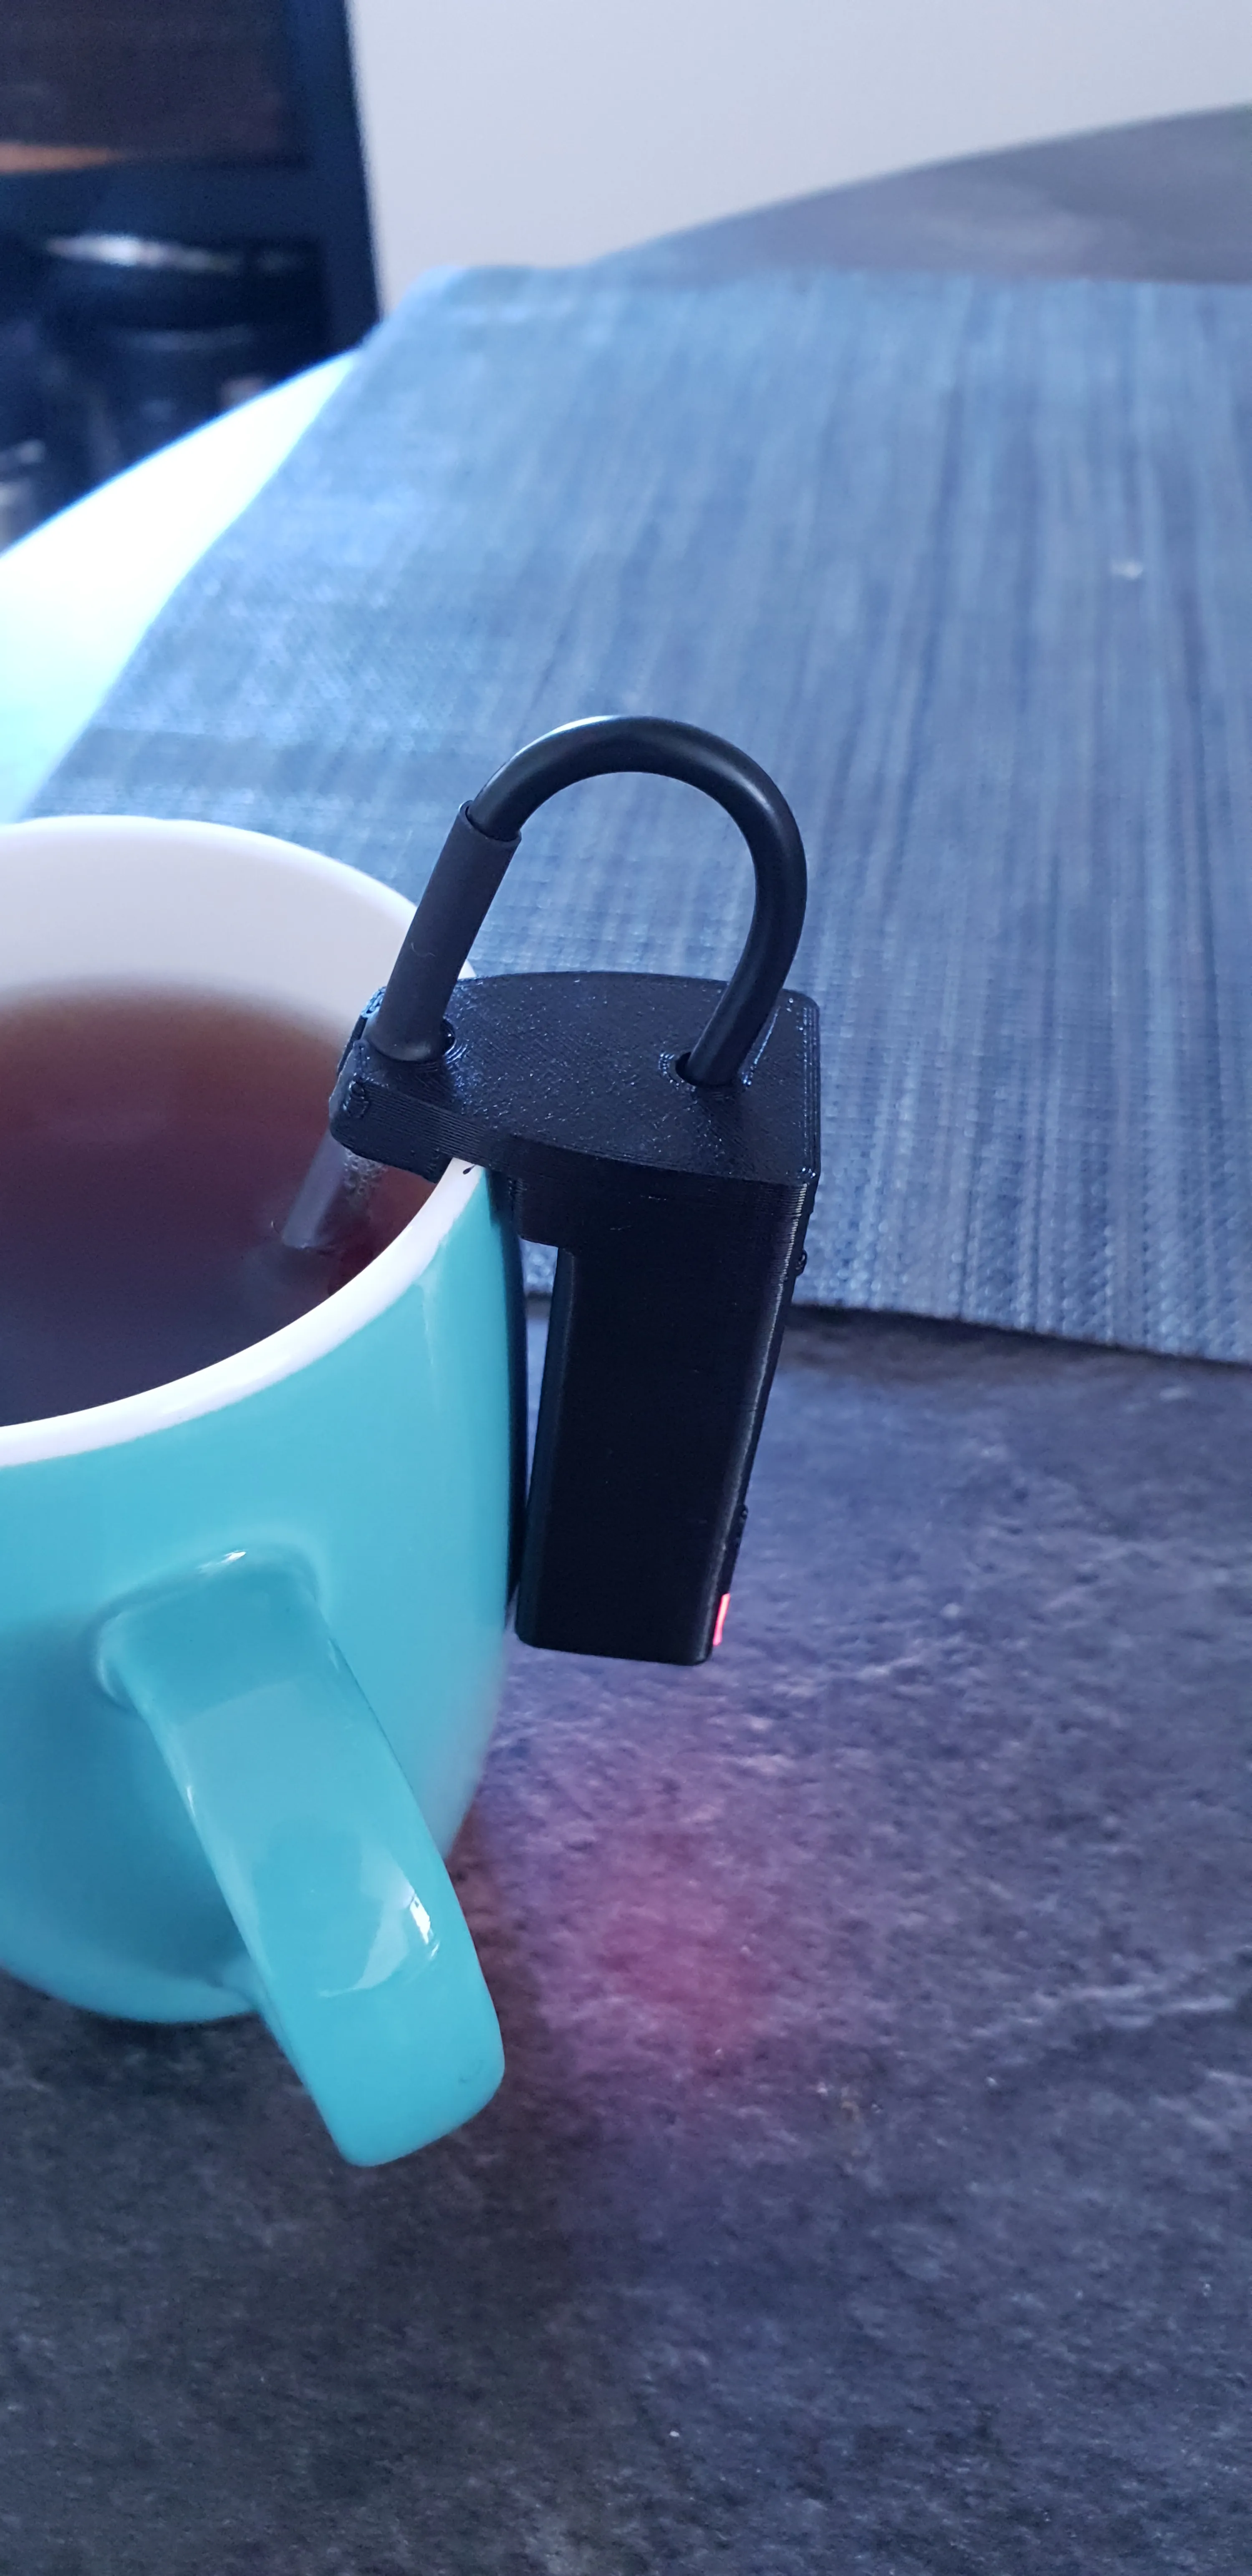
Probe
The temperature probe is a ----. It’s waterproof and made out of stainless steel.
It’s cable it a bit stiff and it has a rigid heat shrink, so mounting it will be a compromise, but it’s good enough for a prototype. Especially since it’s a popular option that has a lot of projects already using it and a lot of known working open source code to learn from.
Controls
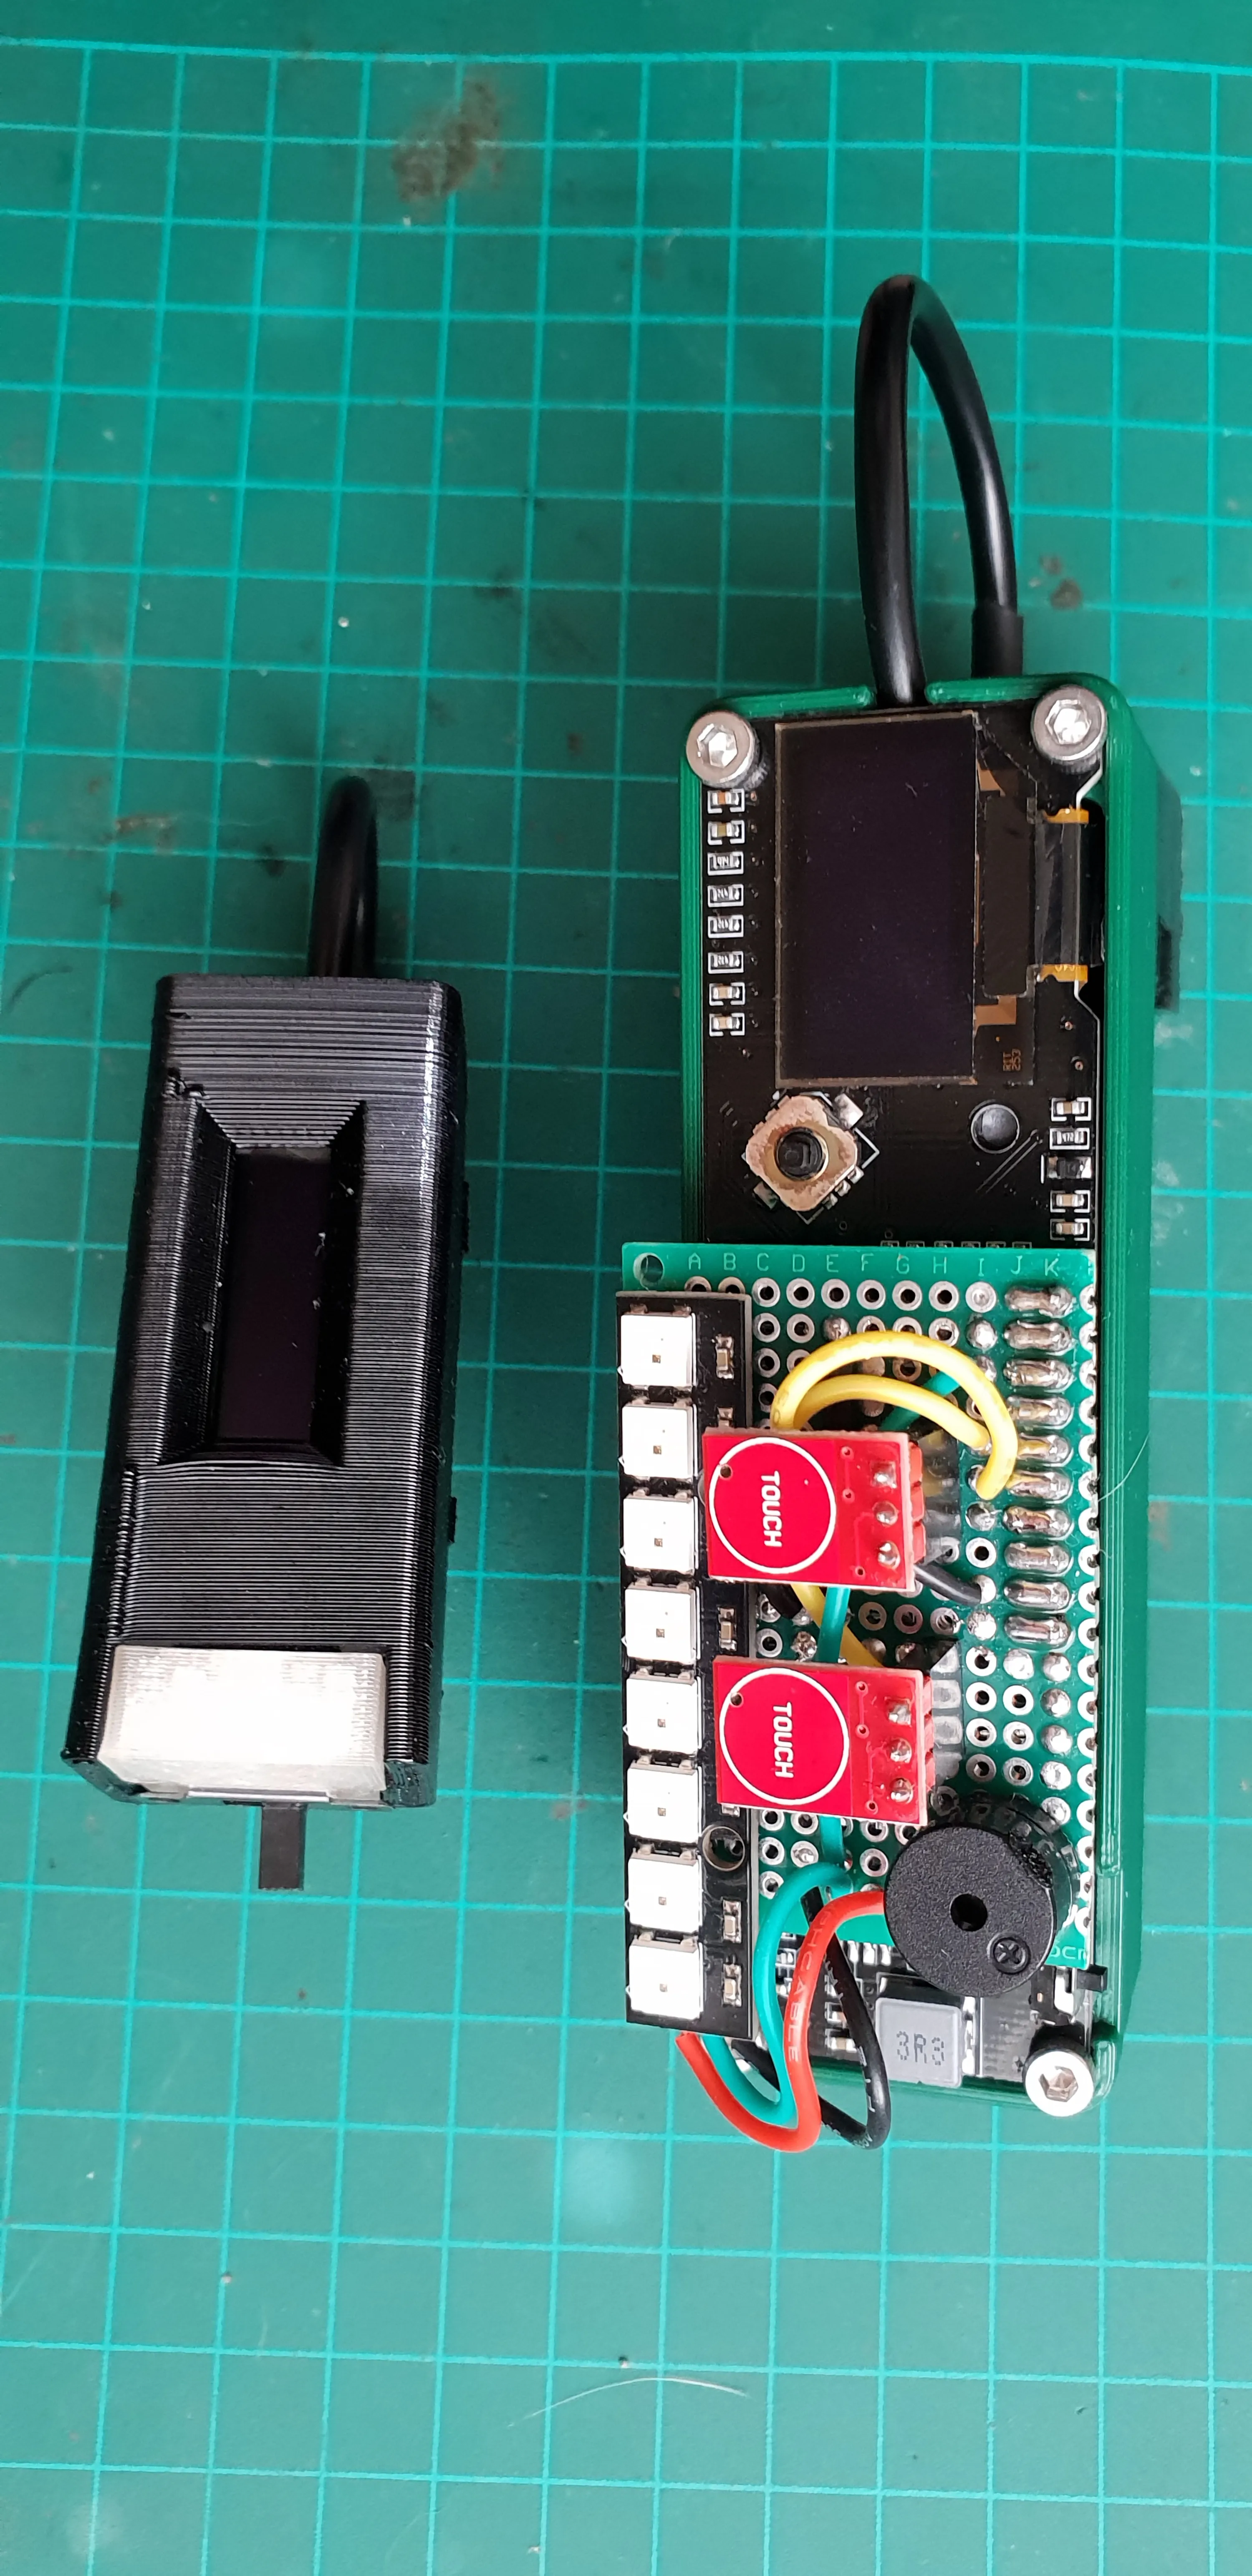
The board already has a joystick, which is basically just 5 buttons. I could just use that, but I already know the final design will not have a joystick, so I added a couple of touch buttons.
The buttons are used to configure the target temp and toggle what’s displayed on the screen.
Indicators
Like I mentioned before, I want an on board and indicator for when I’m not connected to a network and for independant, self contained, operation.
The most basic form of indication would be a simple LED light.
For the same footprint and a bit more code, I can have different colors with an RGB LED.
While we’re at it, why not experiment with encoding more data with light by having a row of 8 LEDs and using them to display a binary representation of the value in degrees Celsius. A byte fits the 0 to 100 range nicely, even if I make it signed to add sub zero measurements (which woldn’t fit if I went with Fahrenheit).
The test here is to see if a row of LEDs, or maybe even a single LED, is enough for me to ditch the screen.
The oled screen is a bit overkill for the amount of data I need, but it can be useful to display other system information like battery level, network status, state machine tracking and debug info.
I added a buzzer as an alarm mode for experimentation, but I was pretty sure from the start that it won’t be used in the next version.
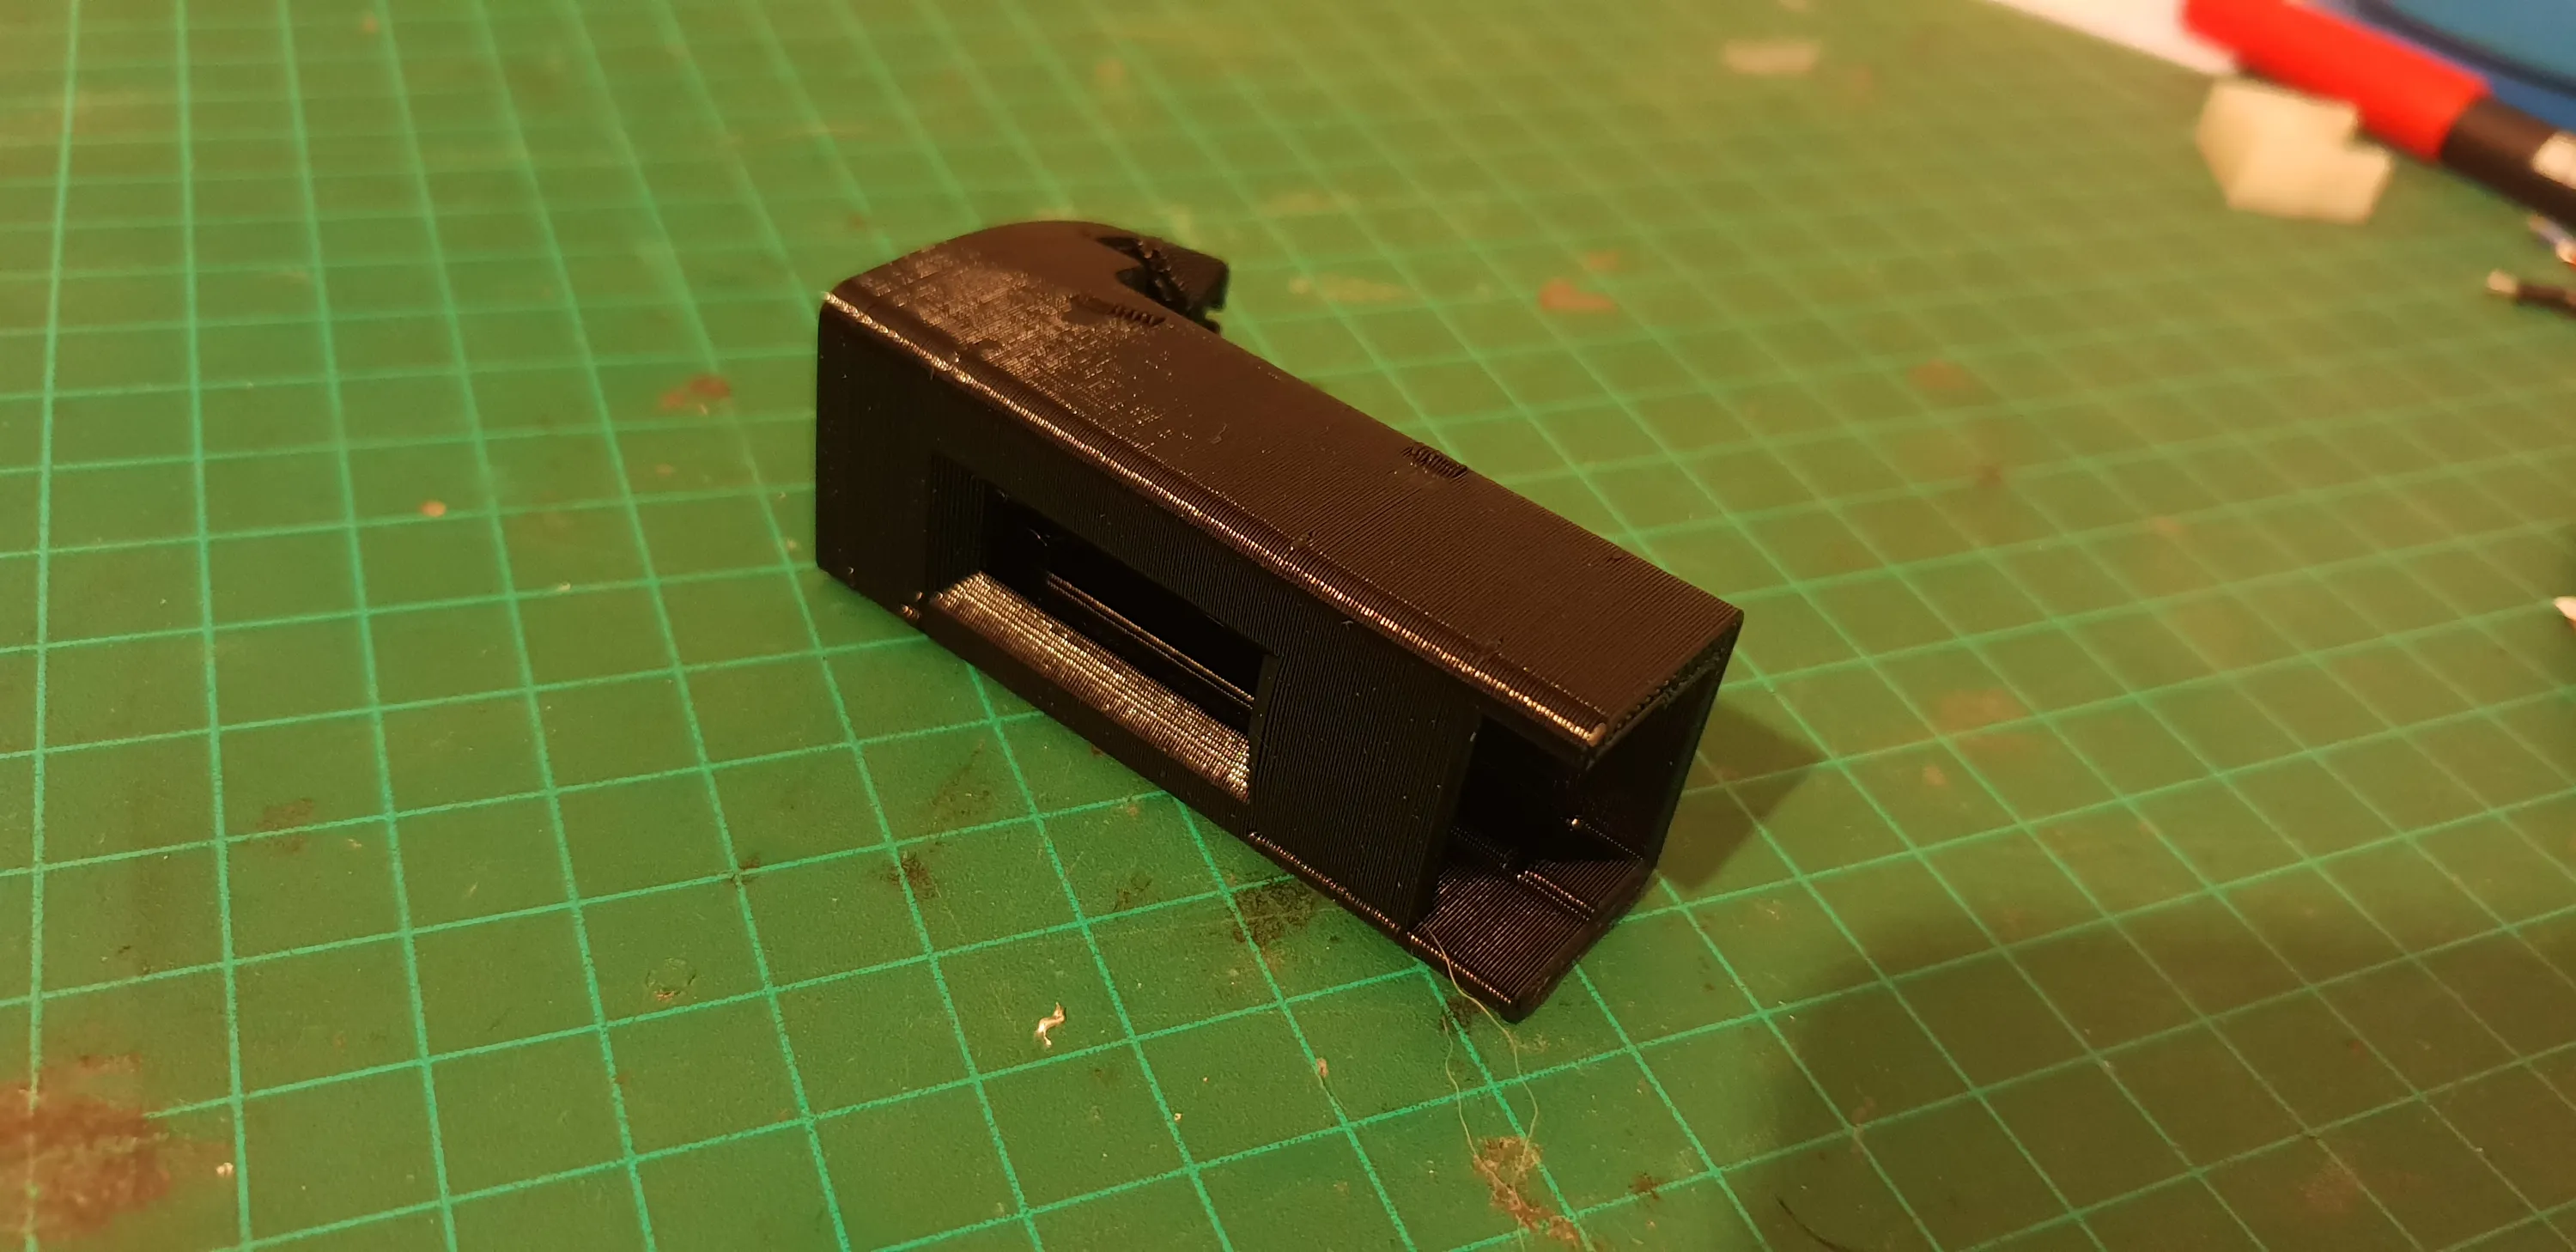
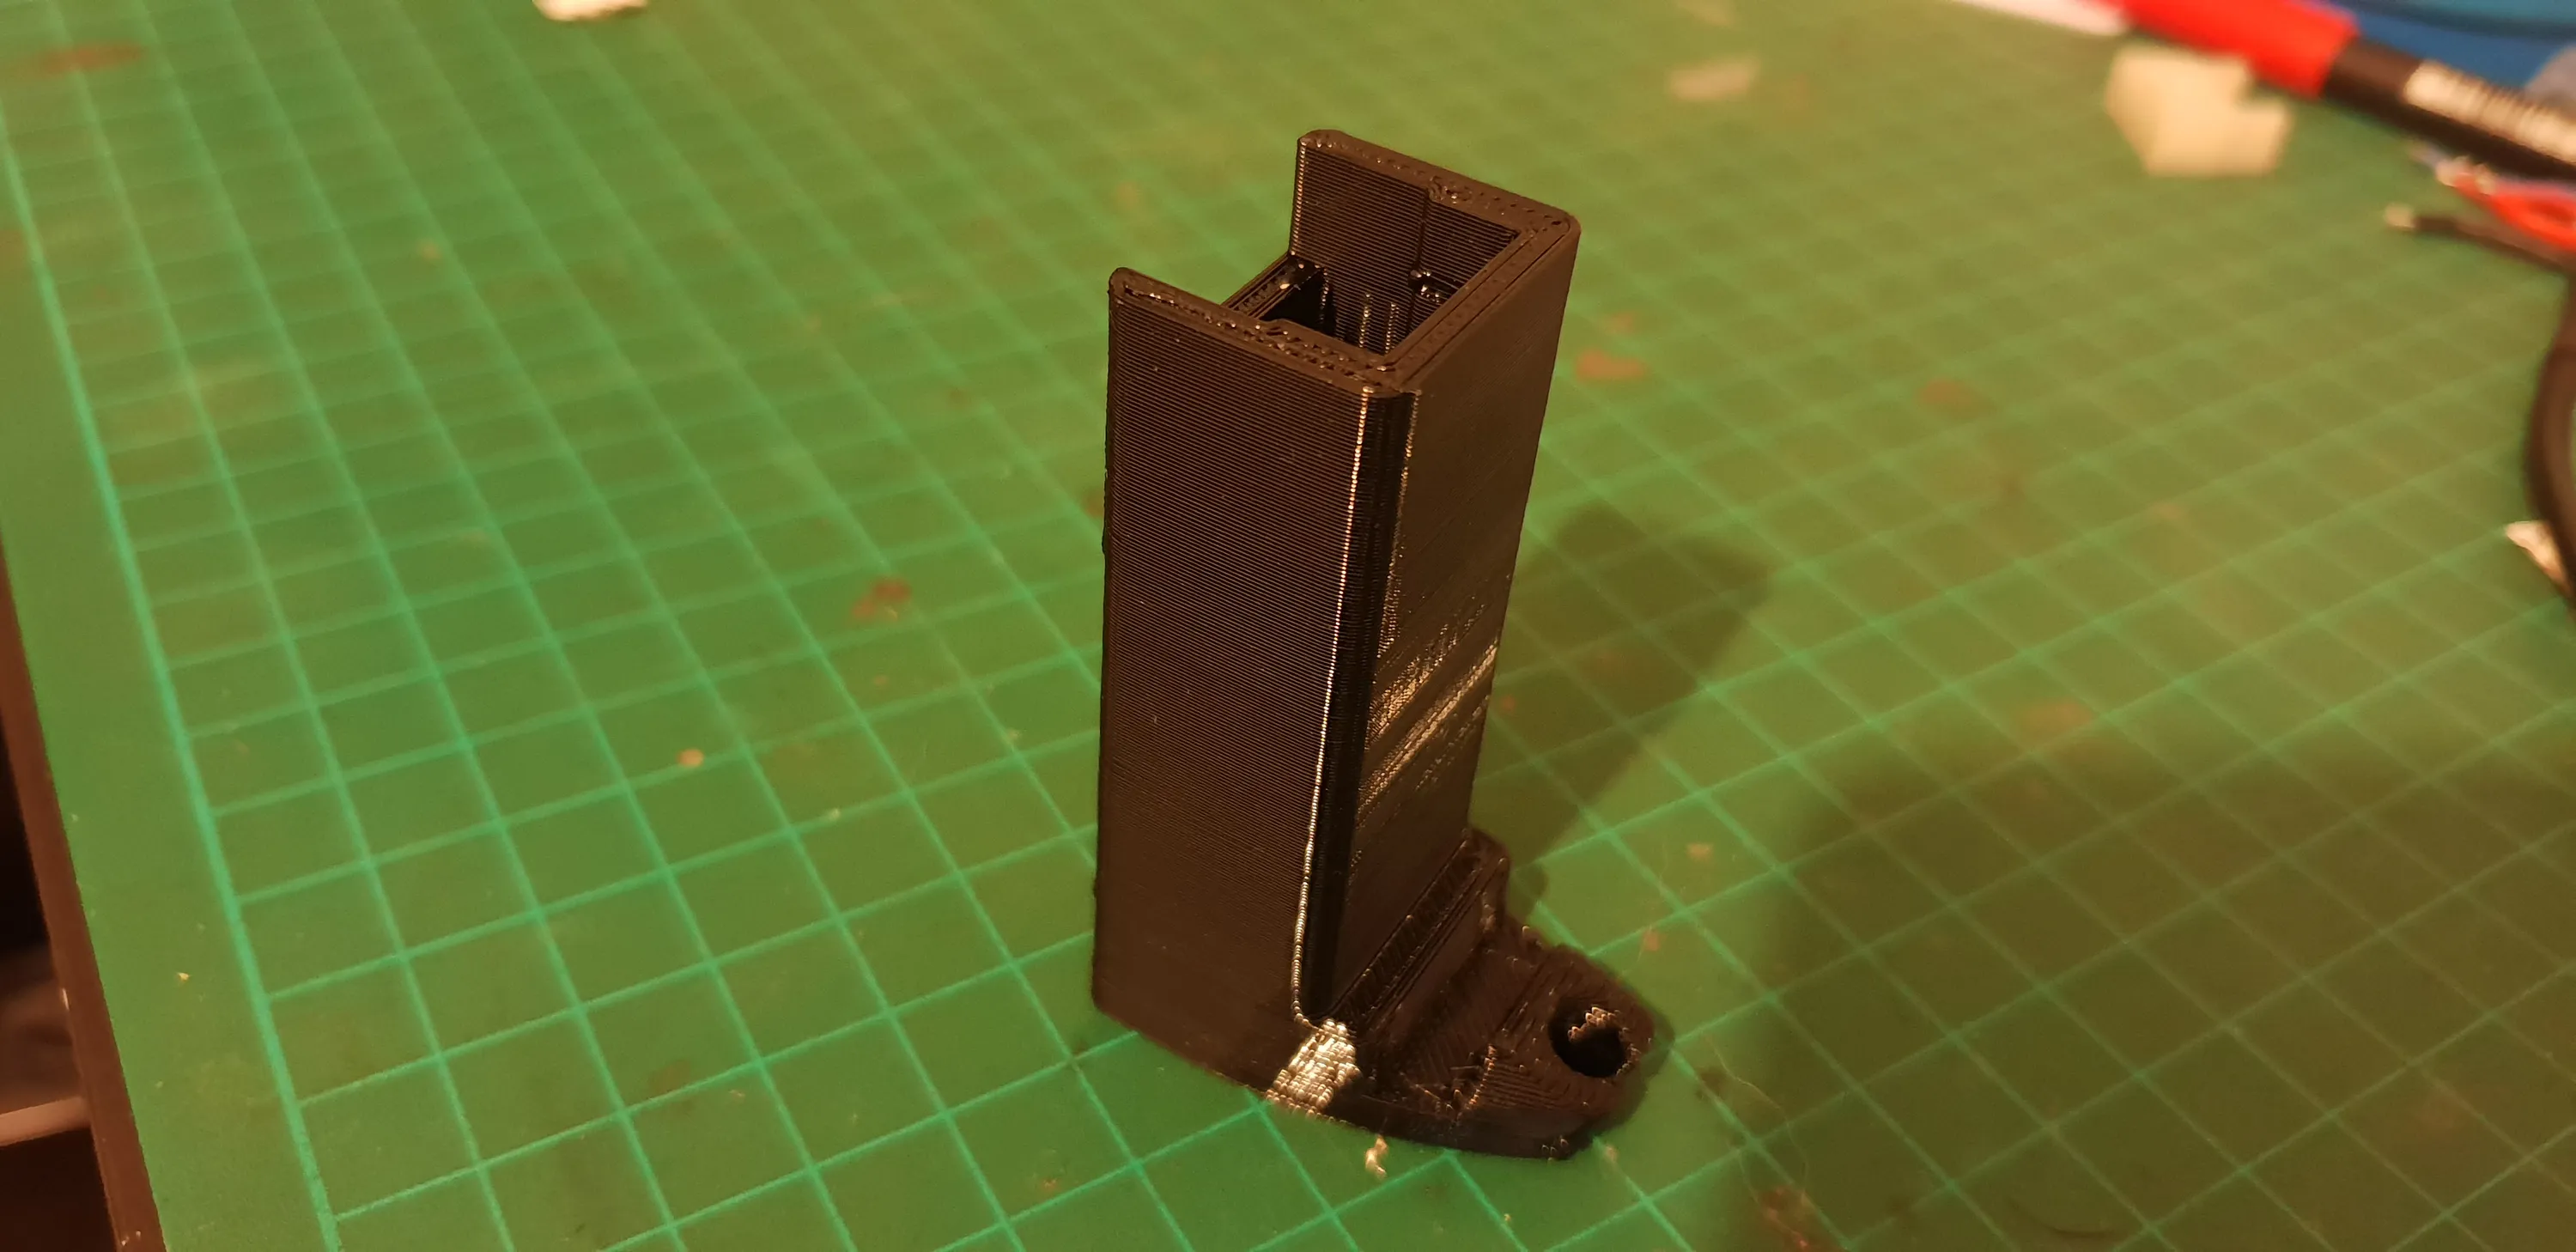
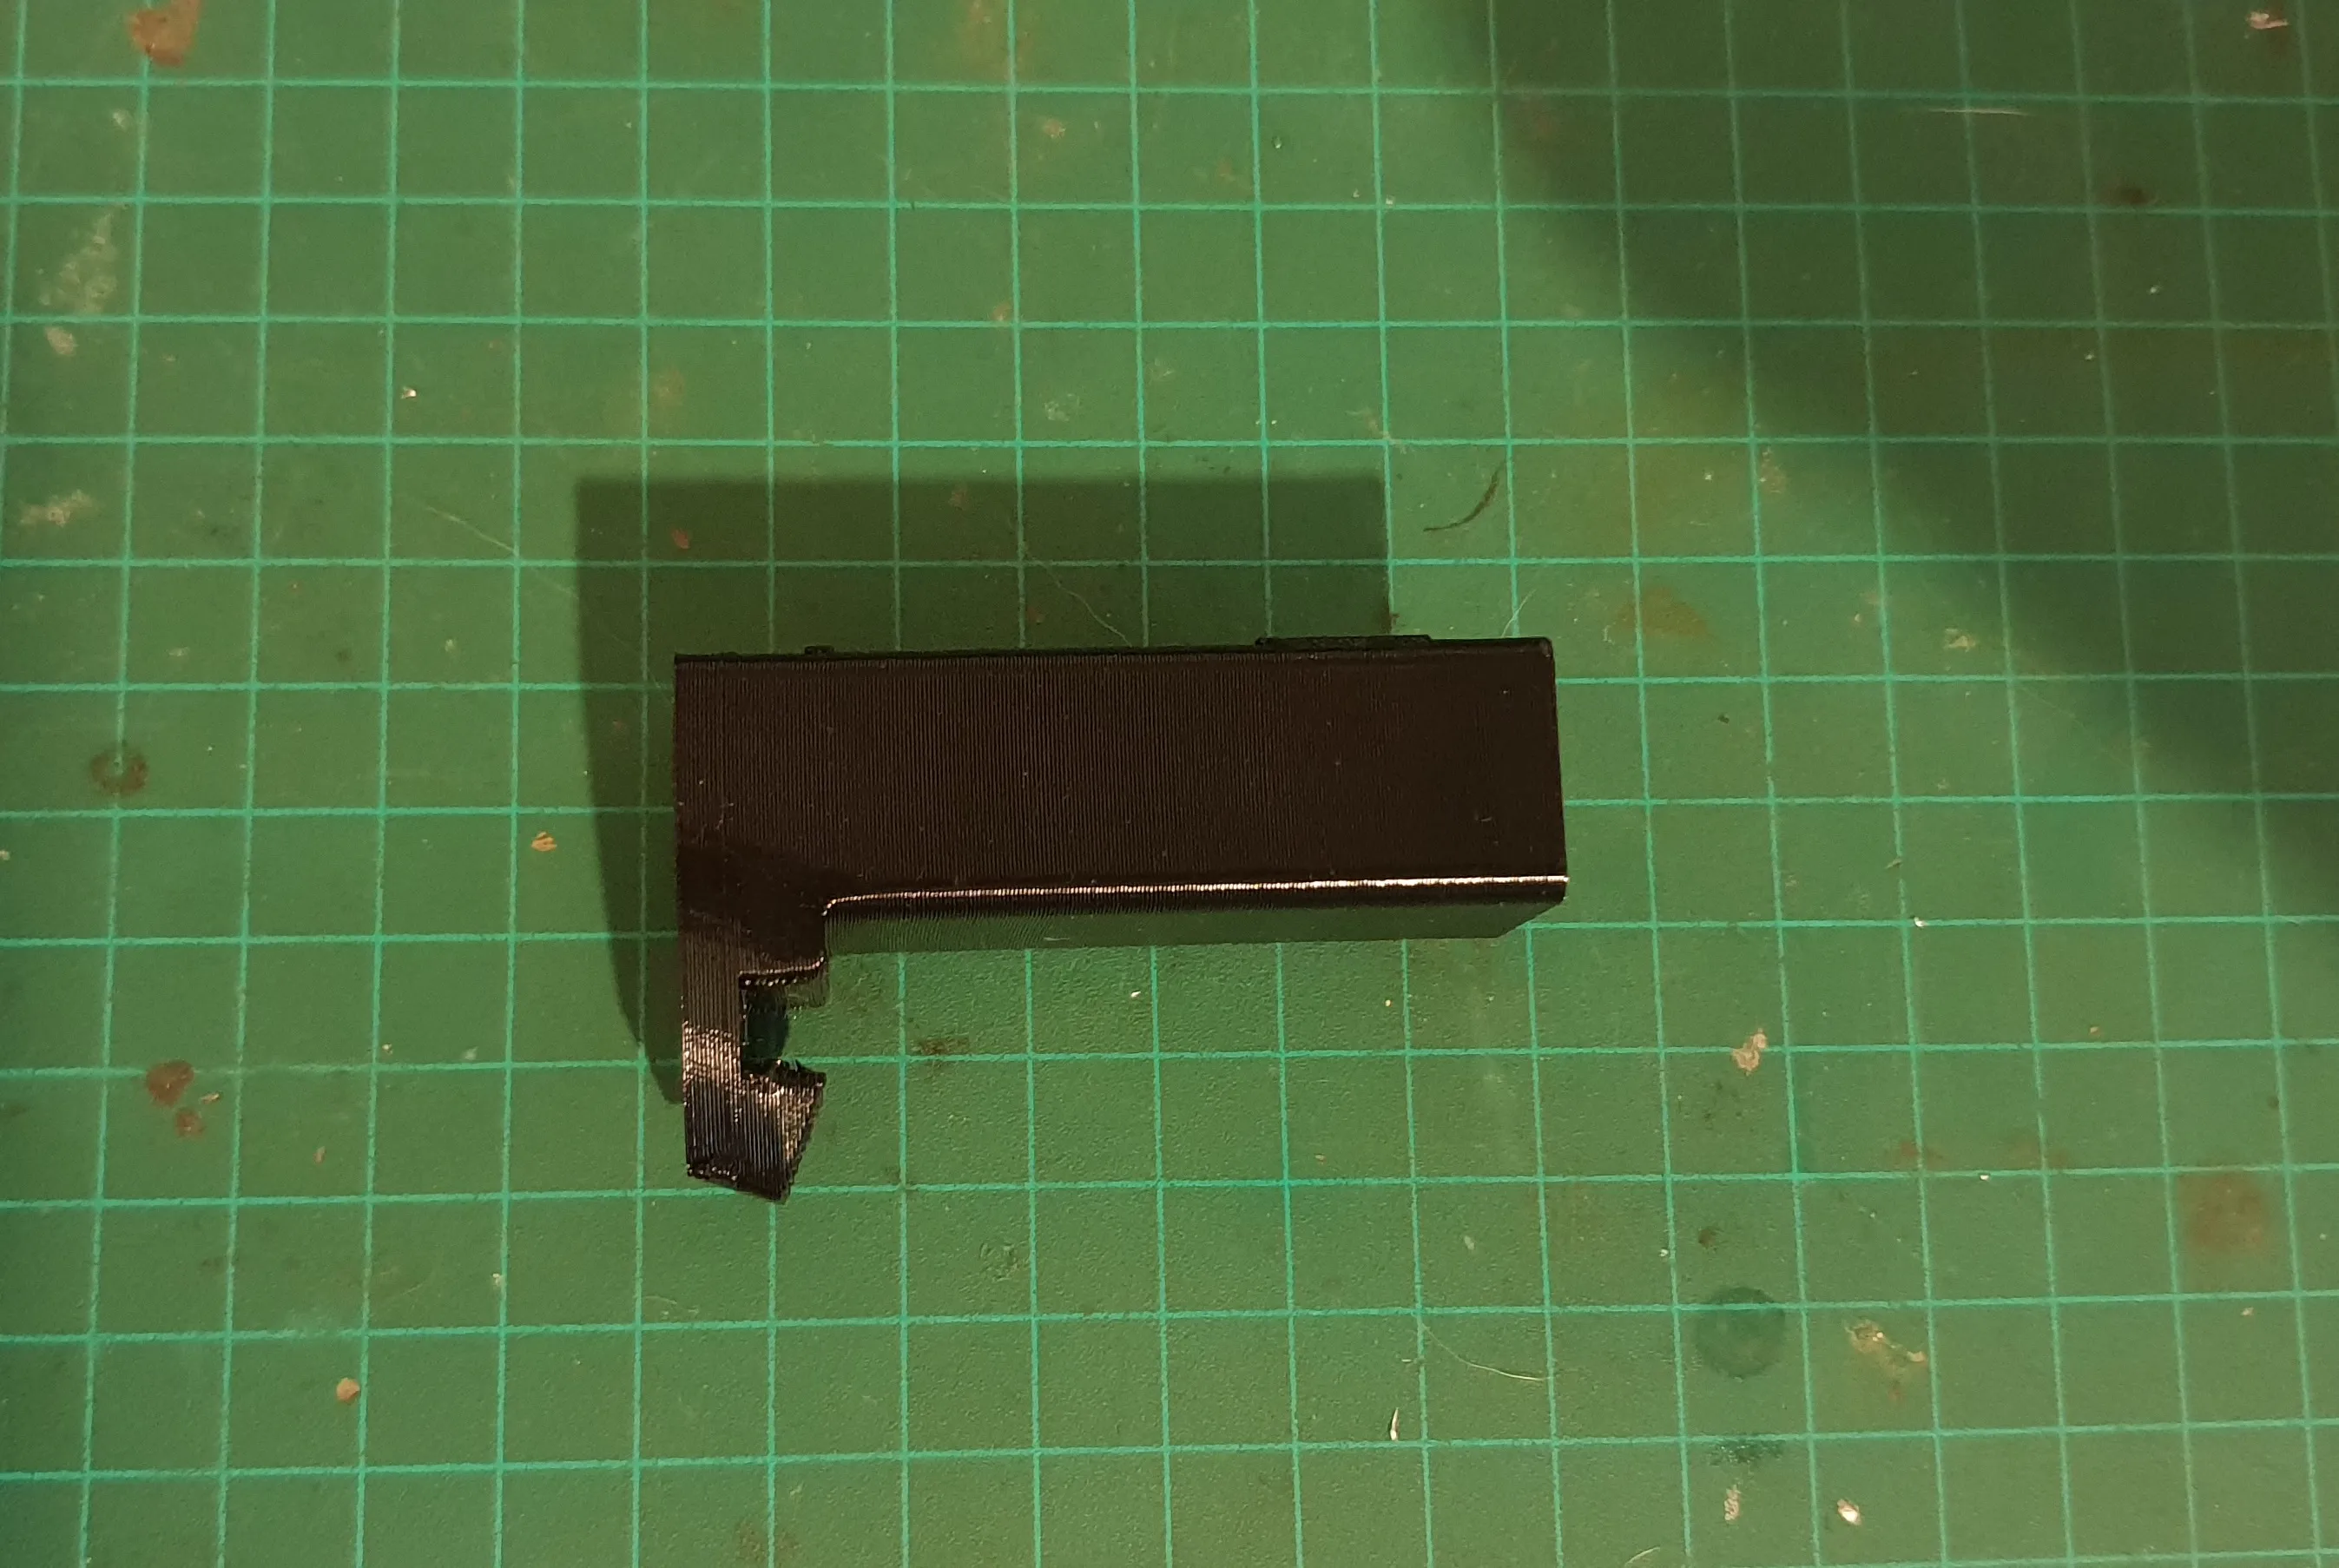
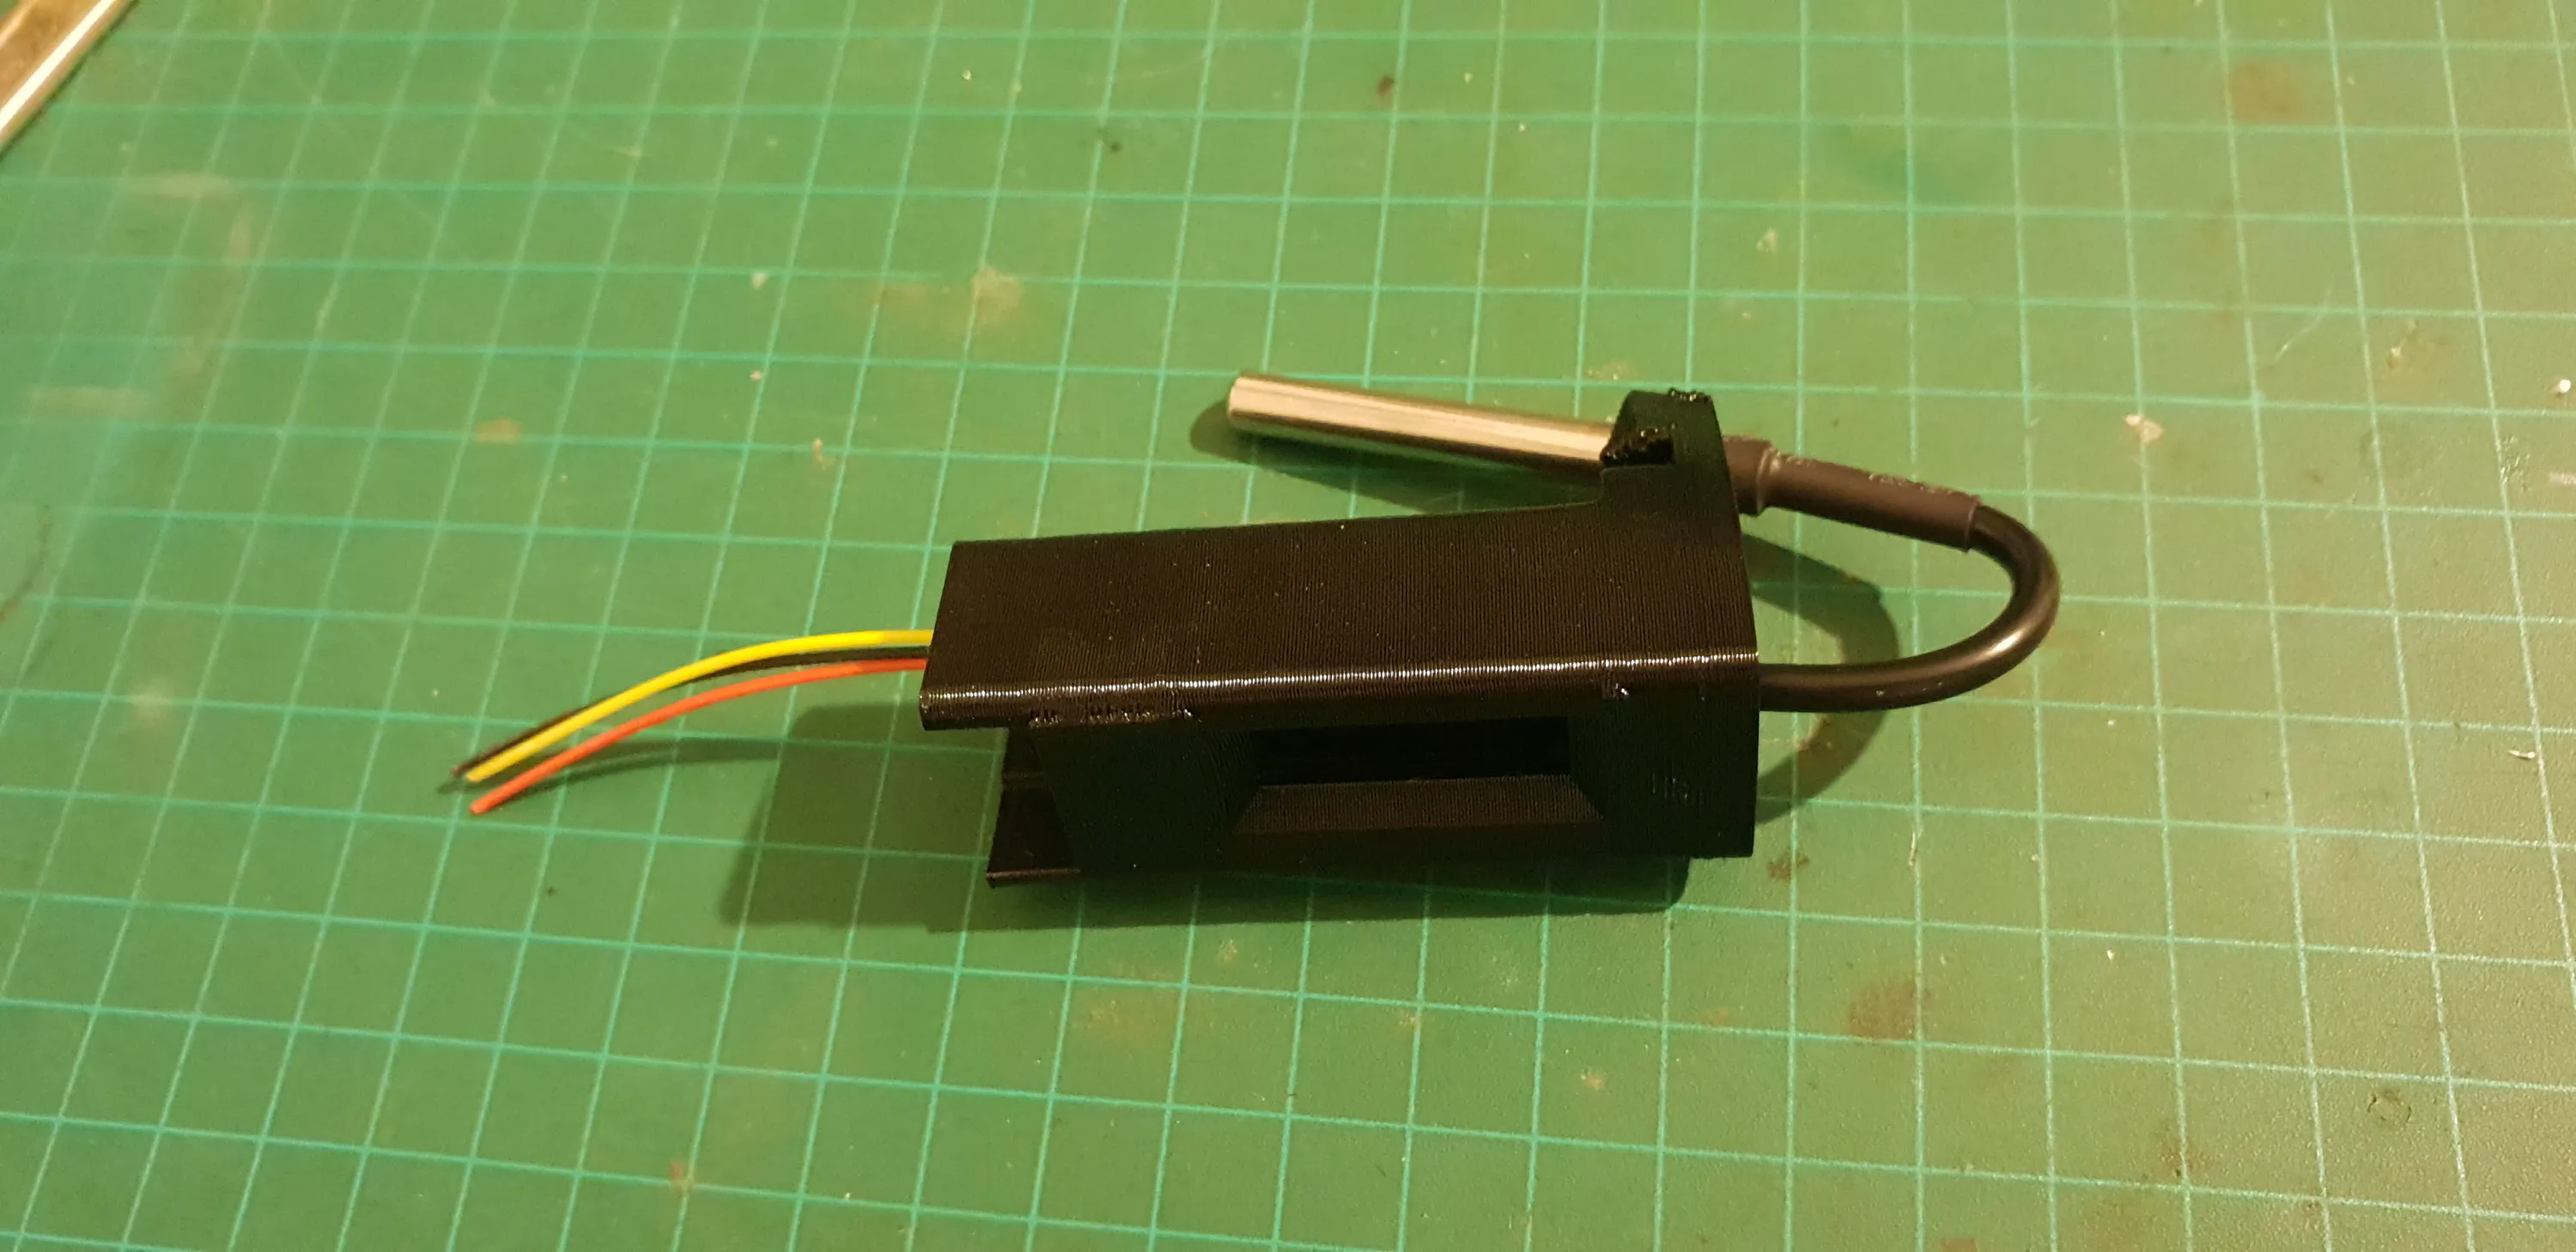
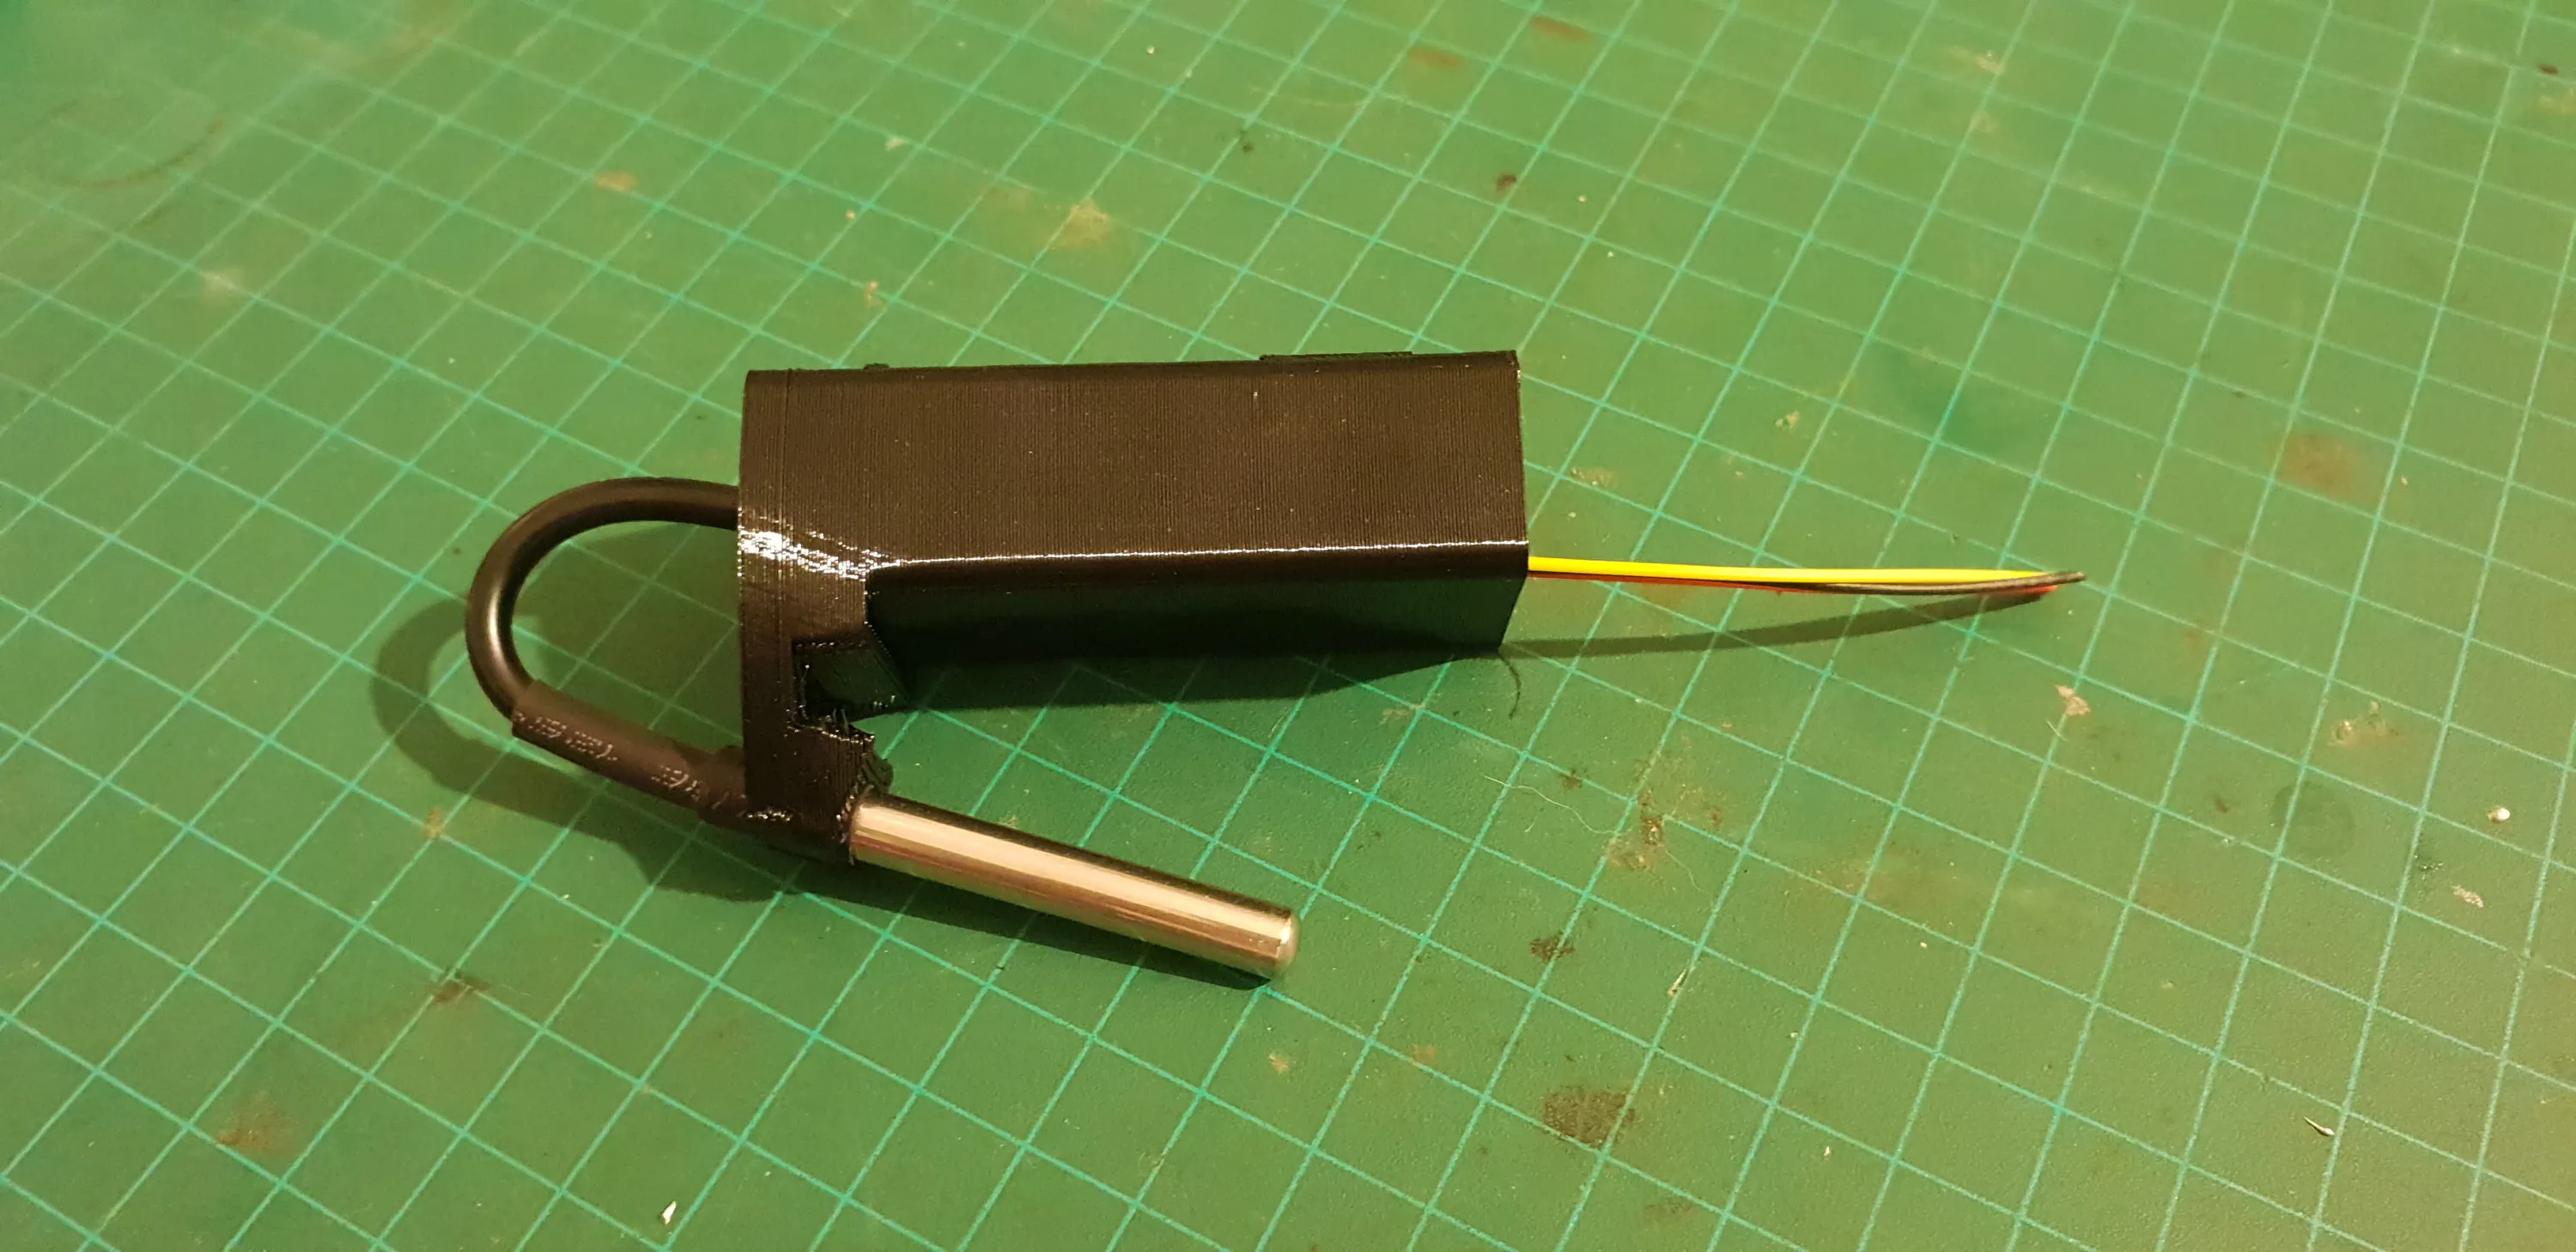
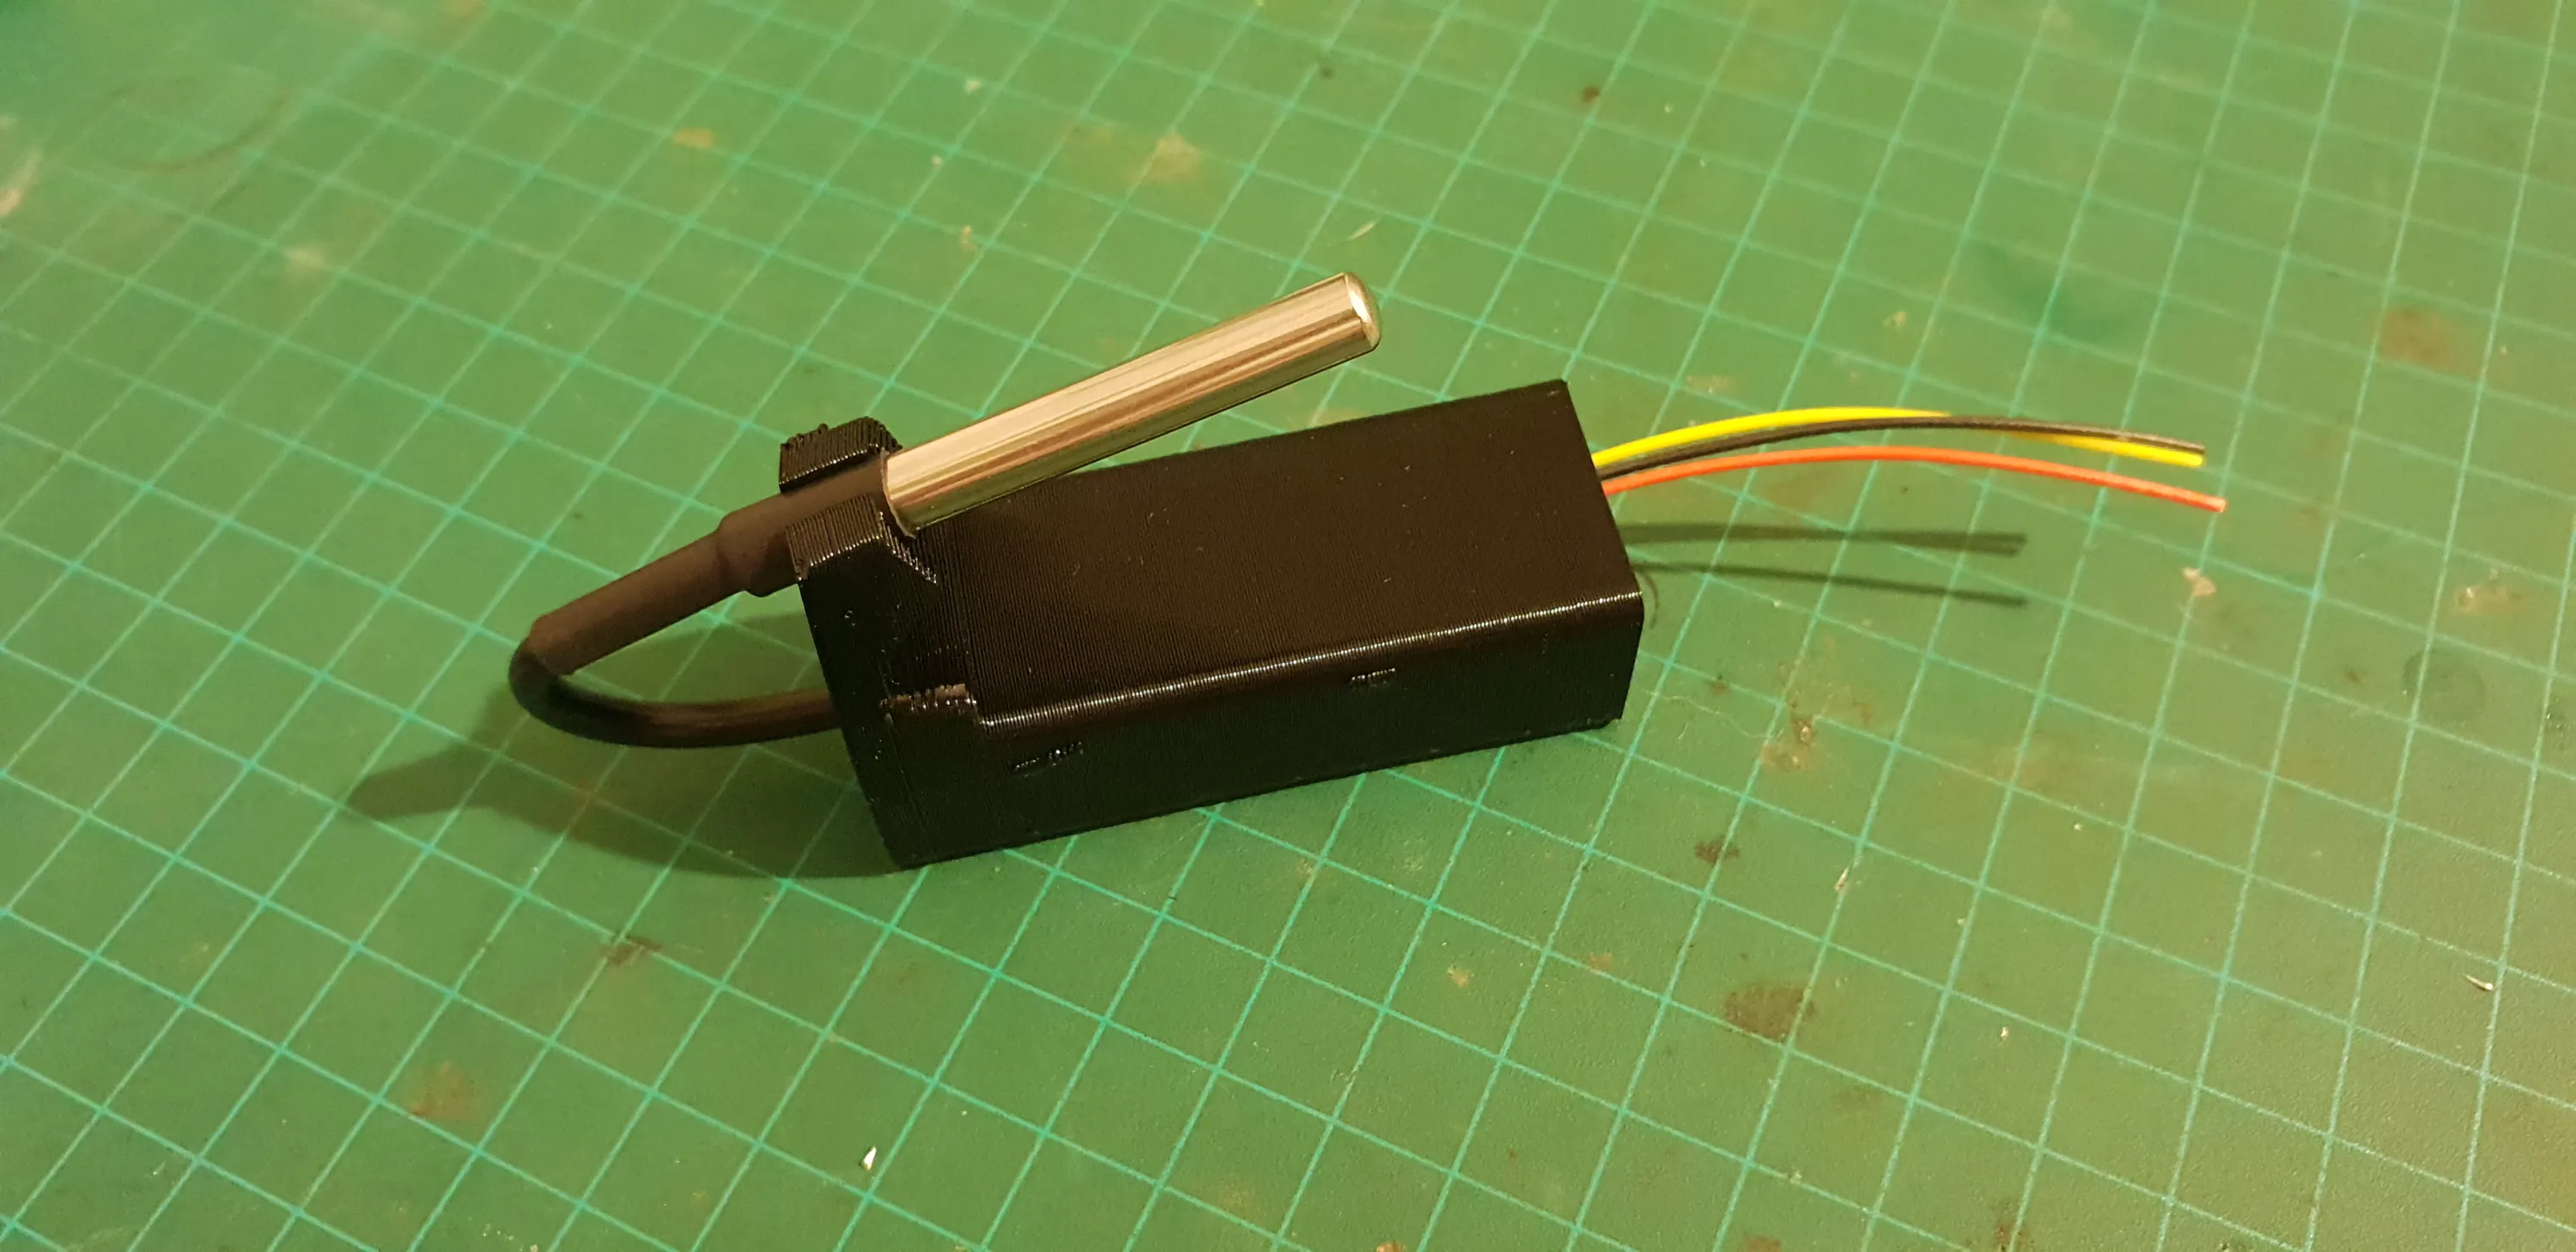
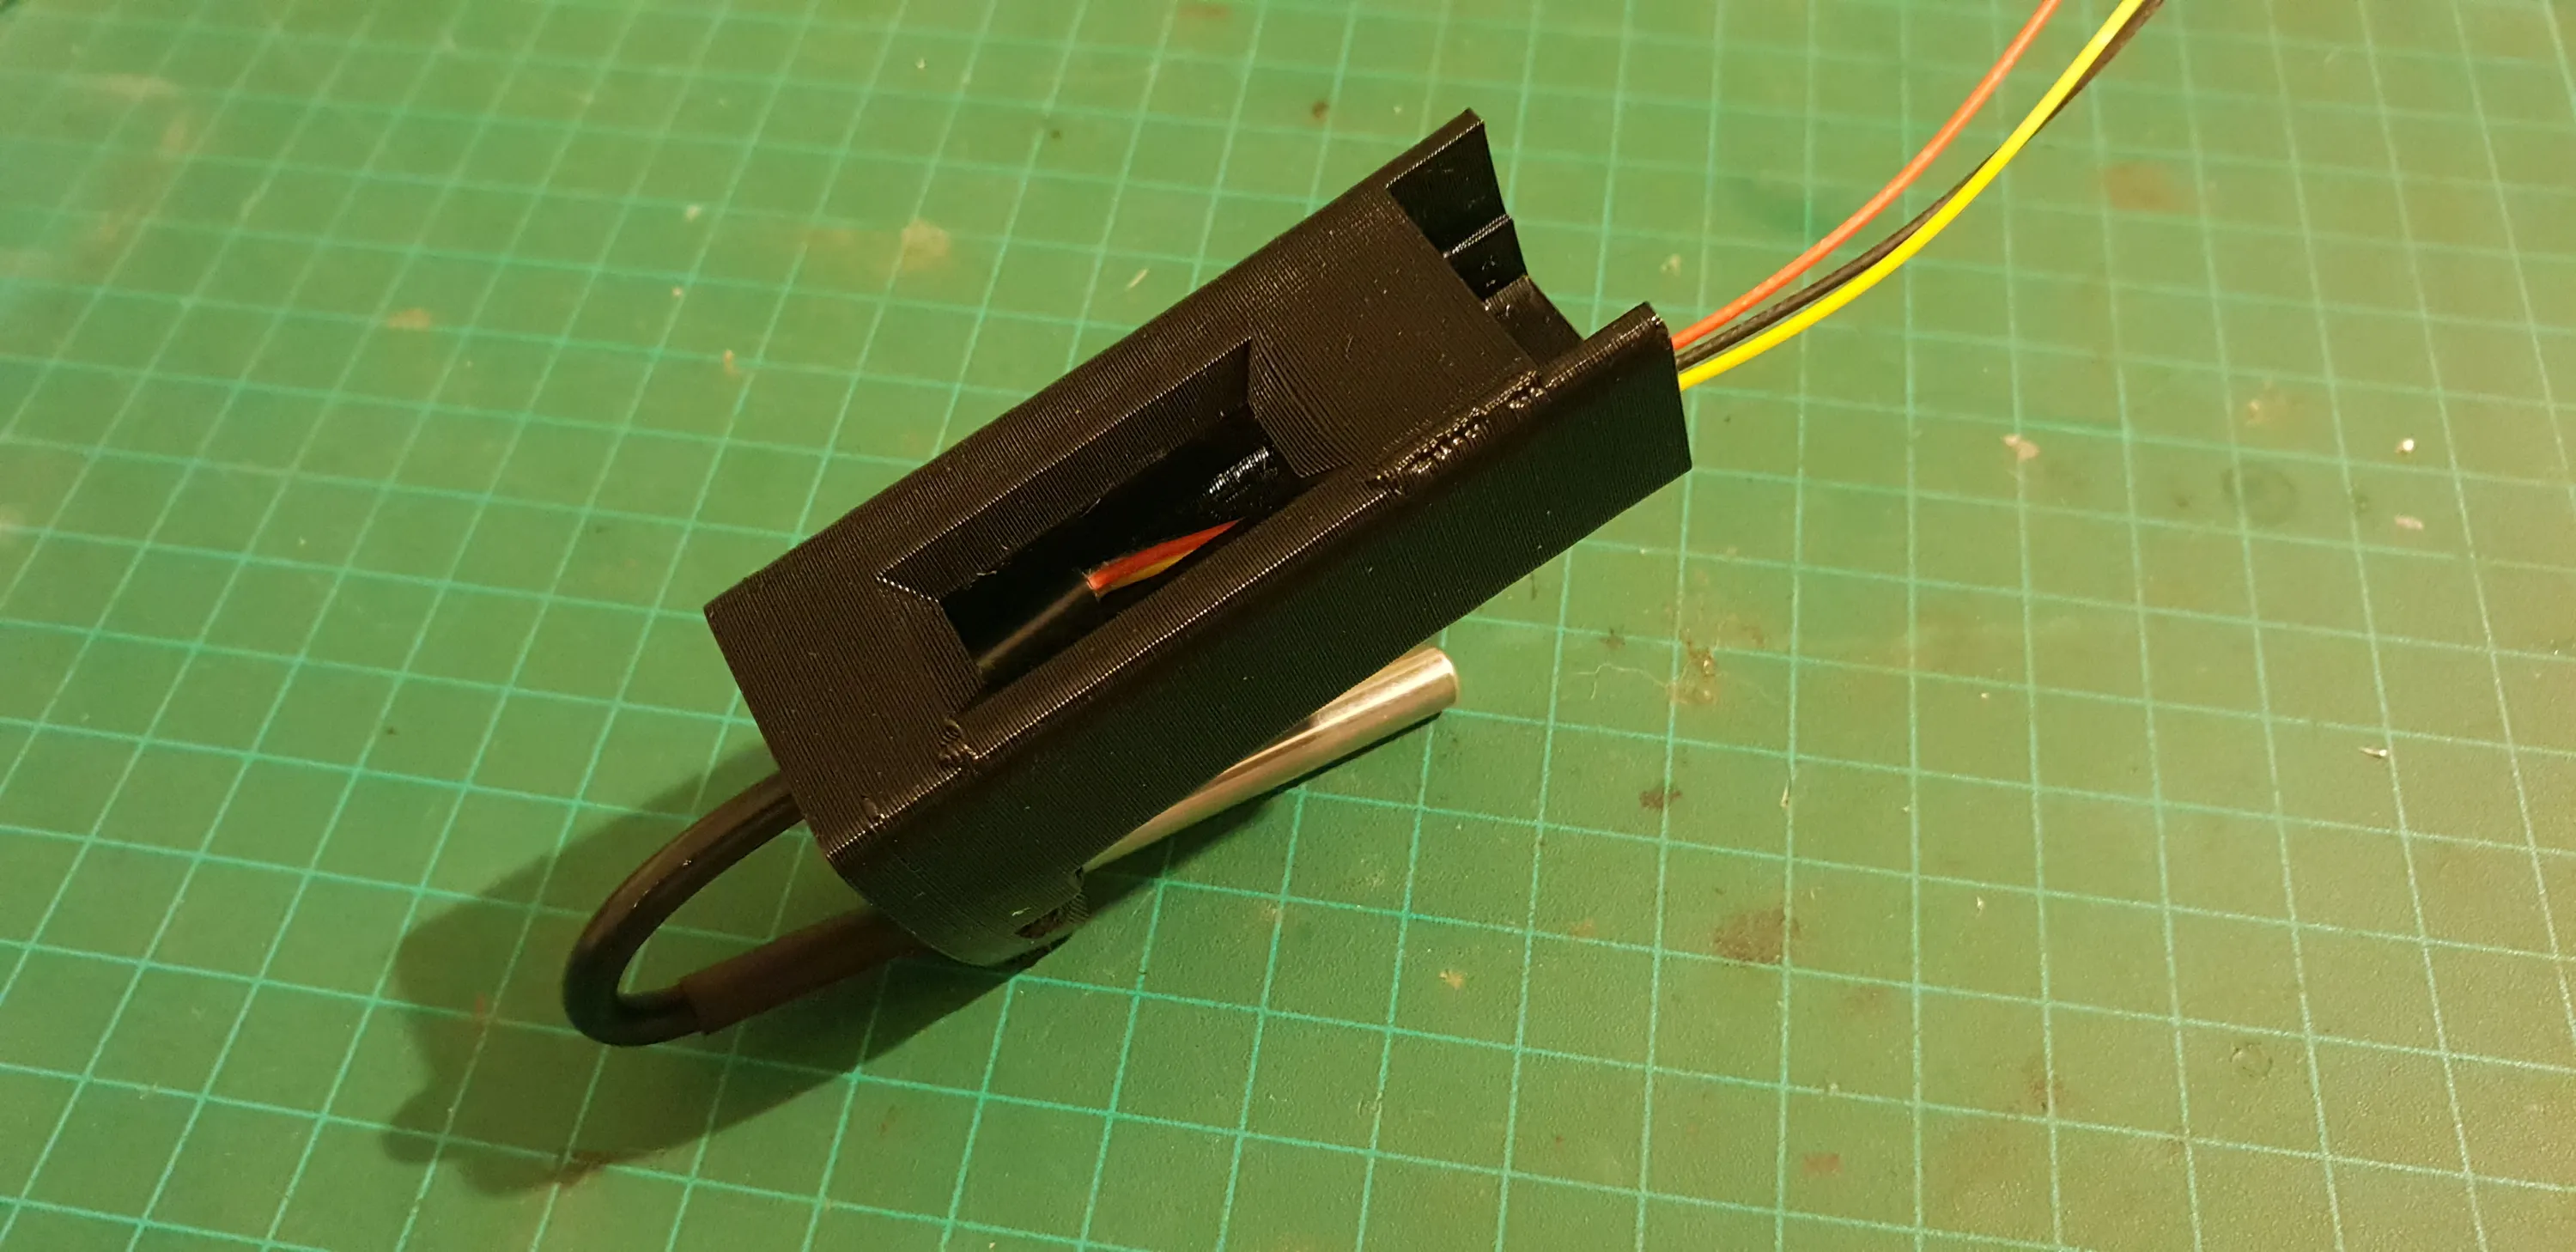
Case
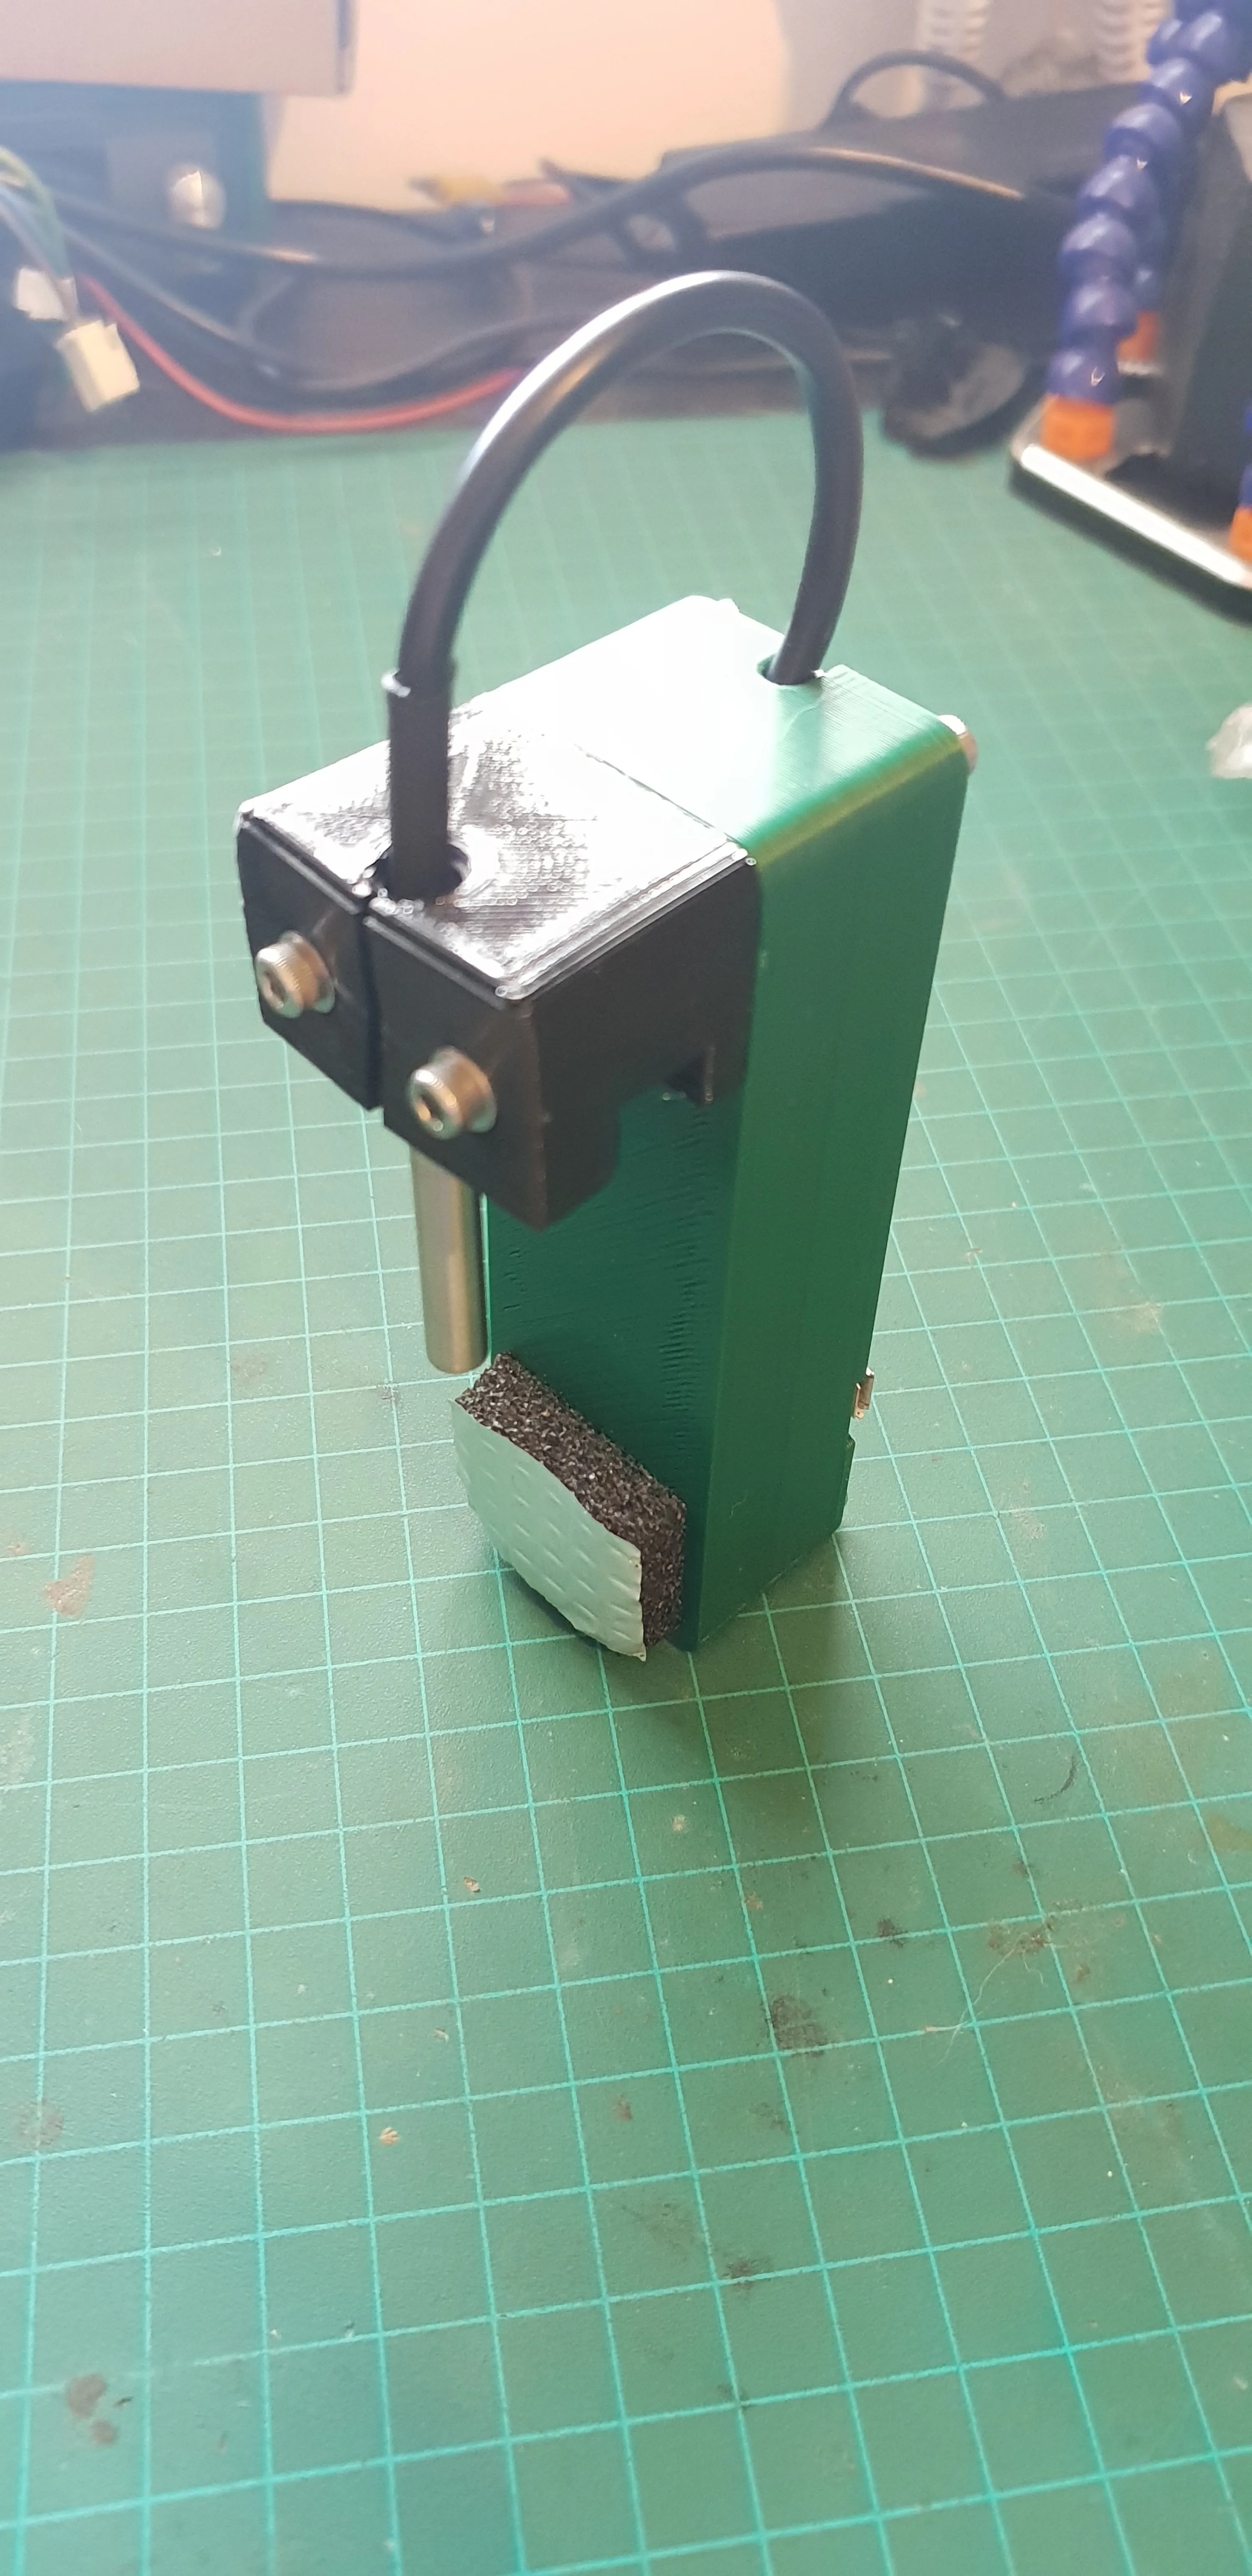
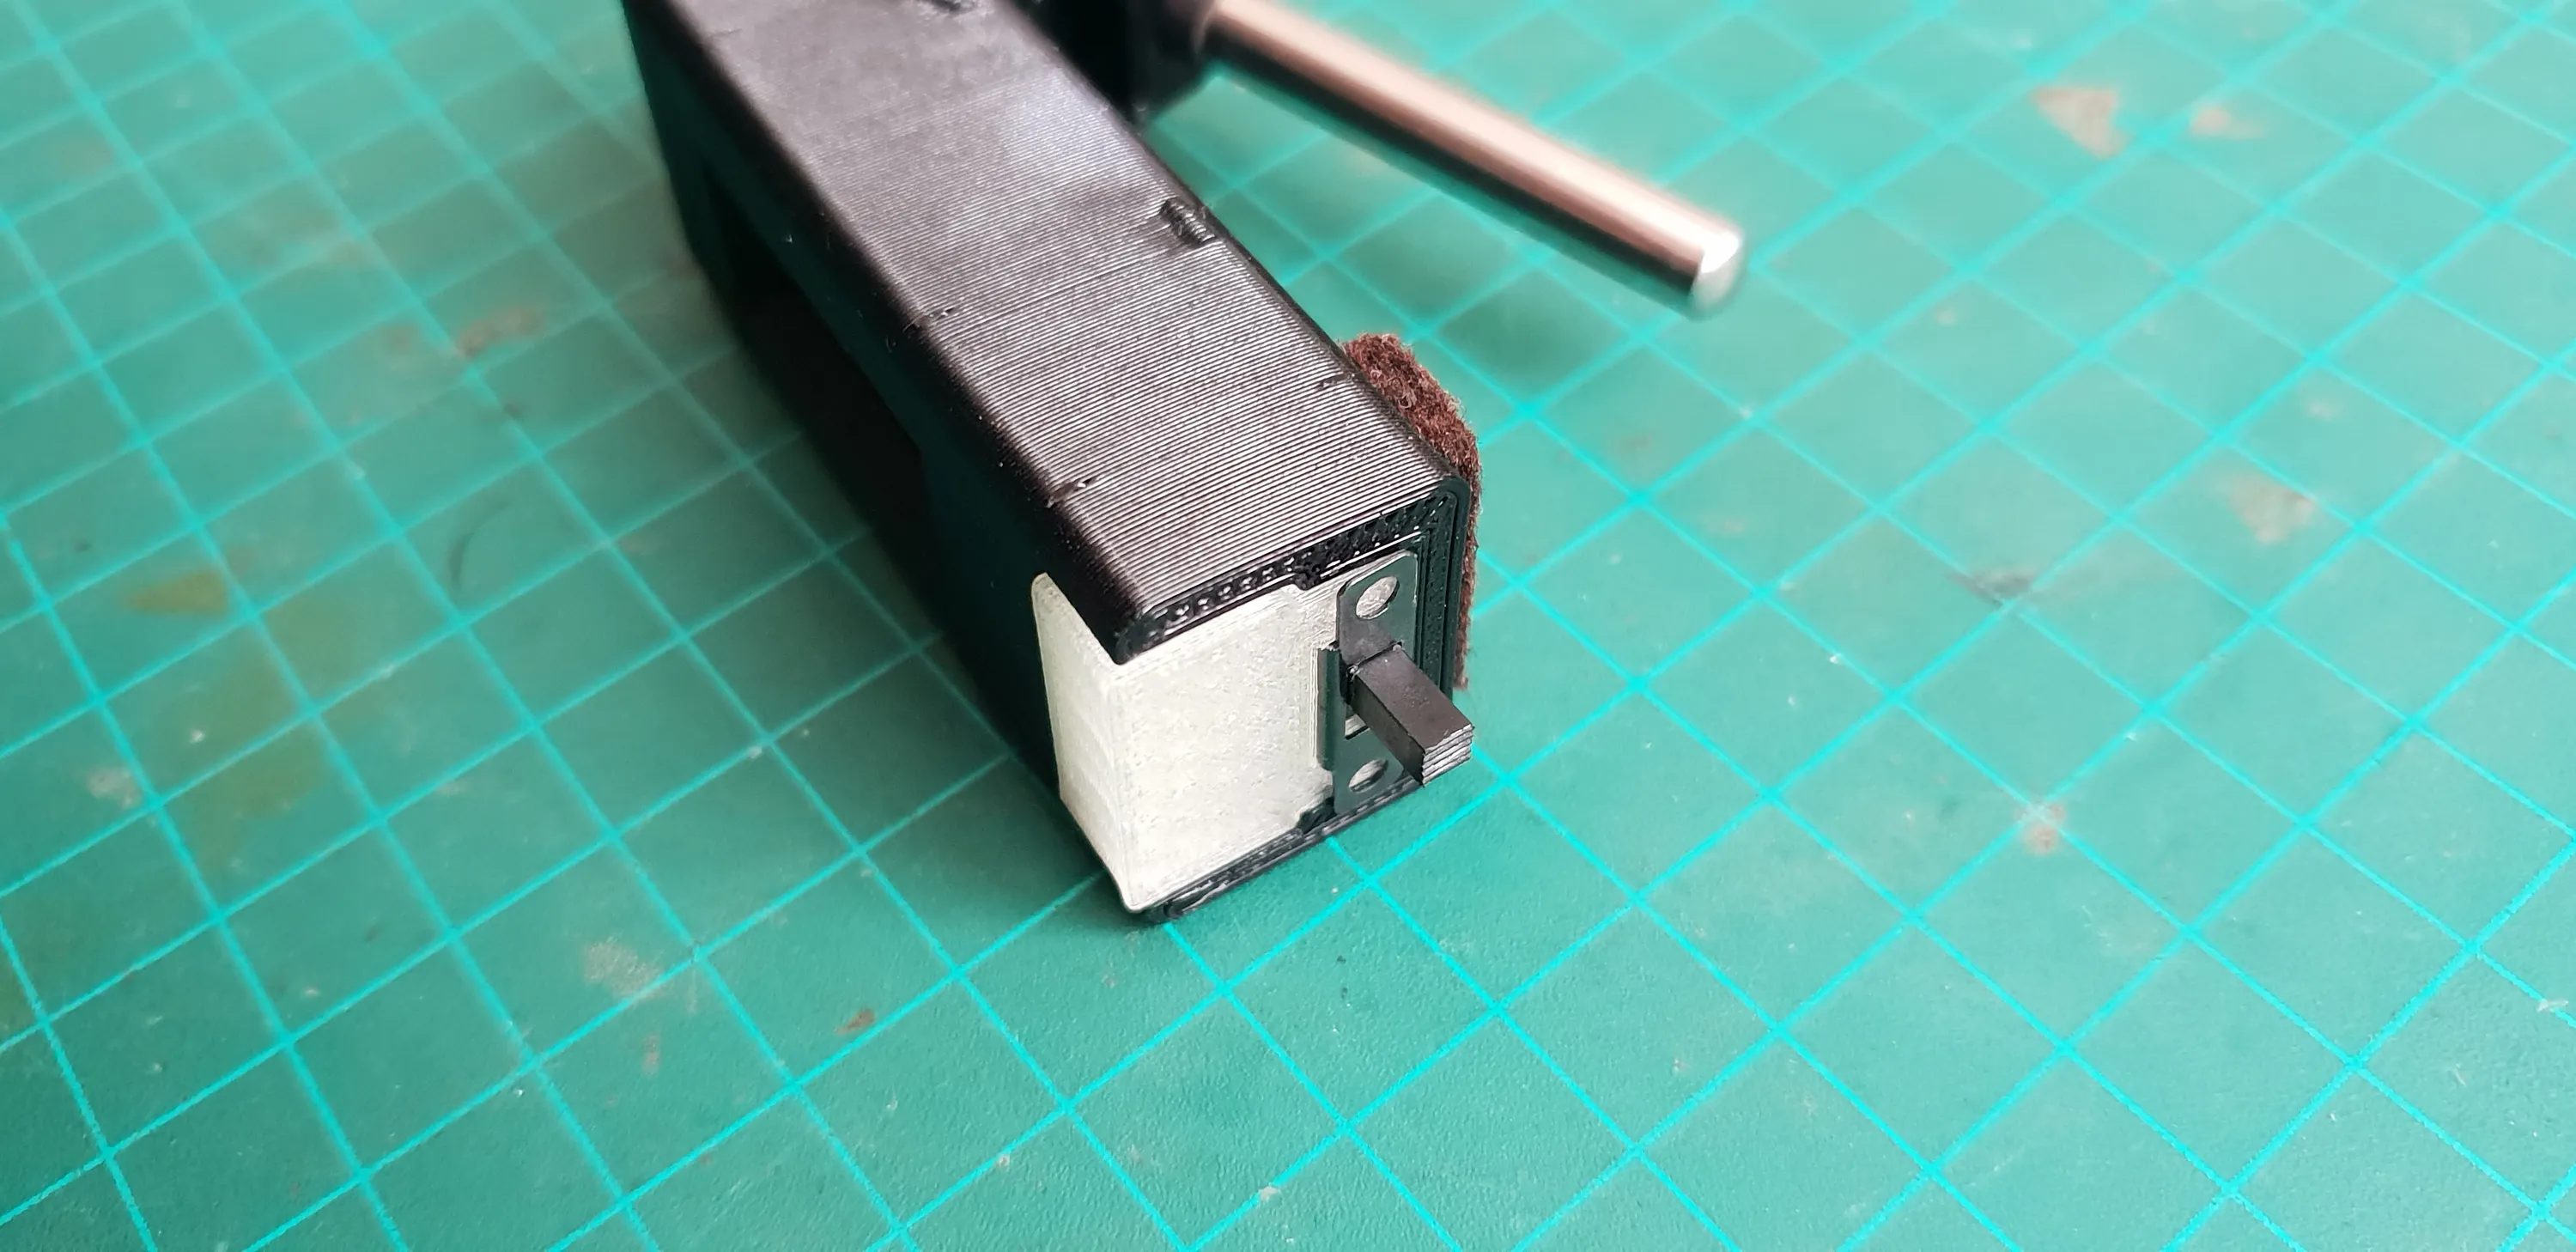
The board conveniently has holes in the corners, so making a shell to cover the back with the battery and provide a place to mount the probe is trivial.
Since the board has a charging circuit with a USB port, the battery doesn’t need to be accessible.
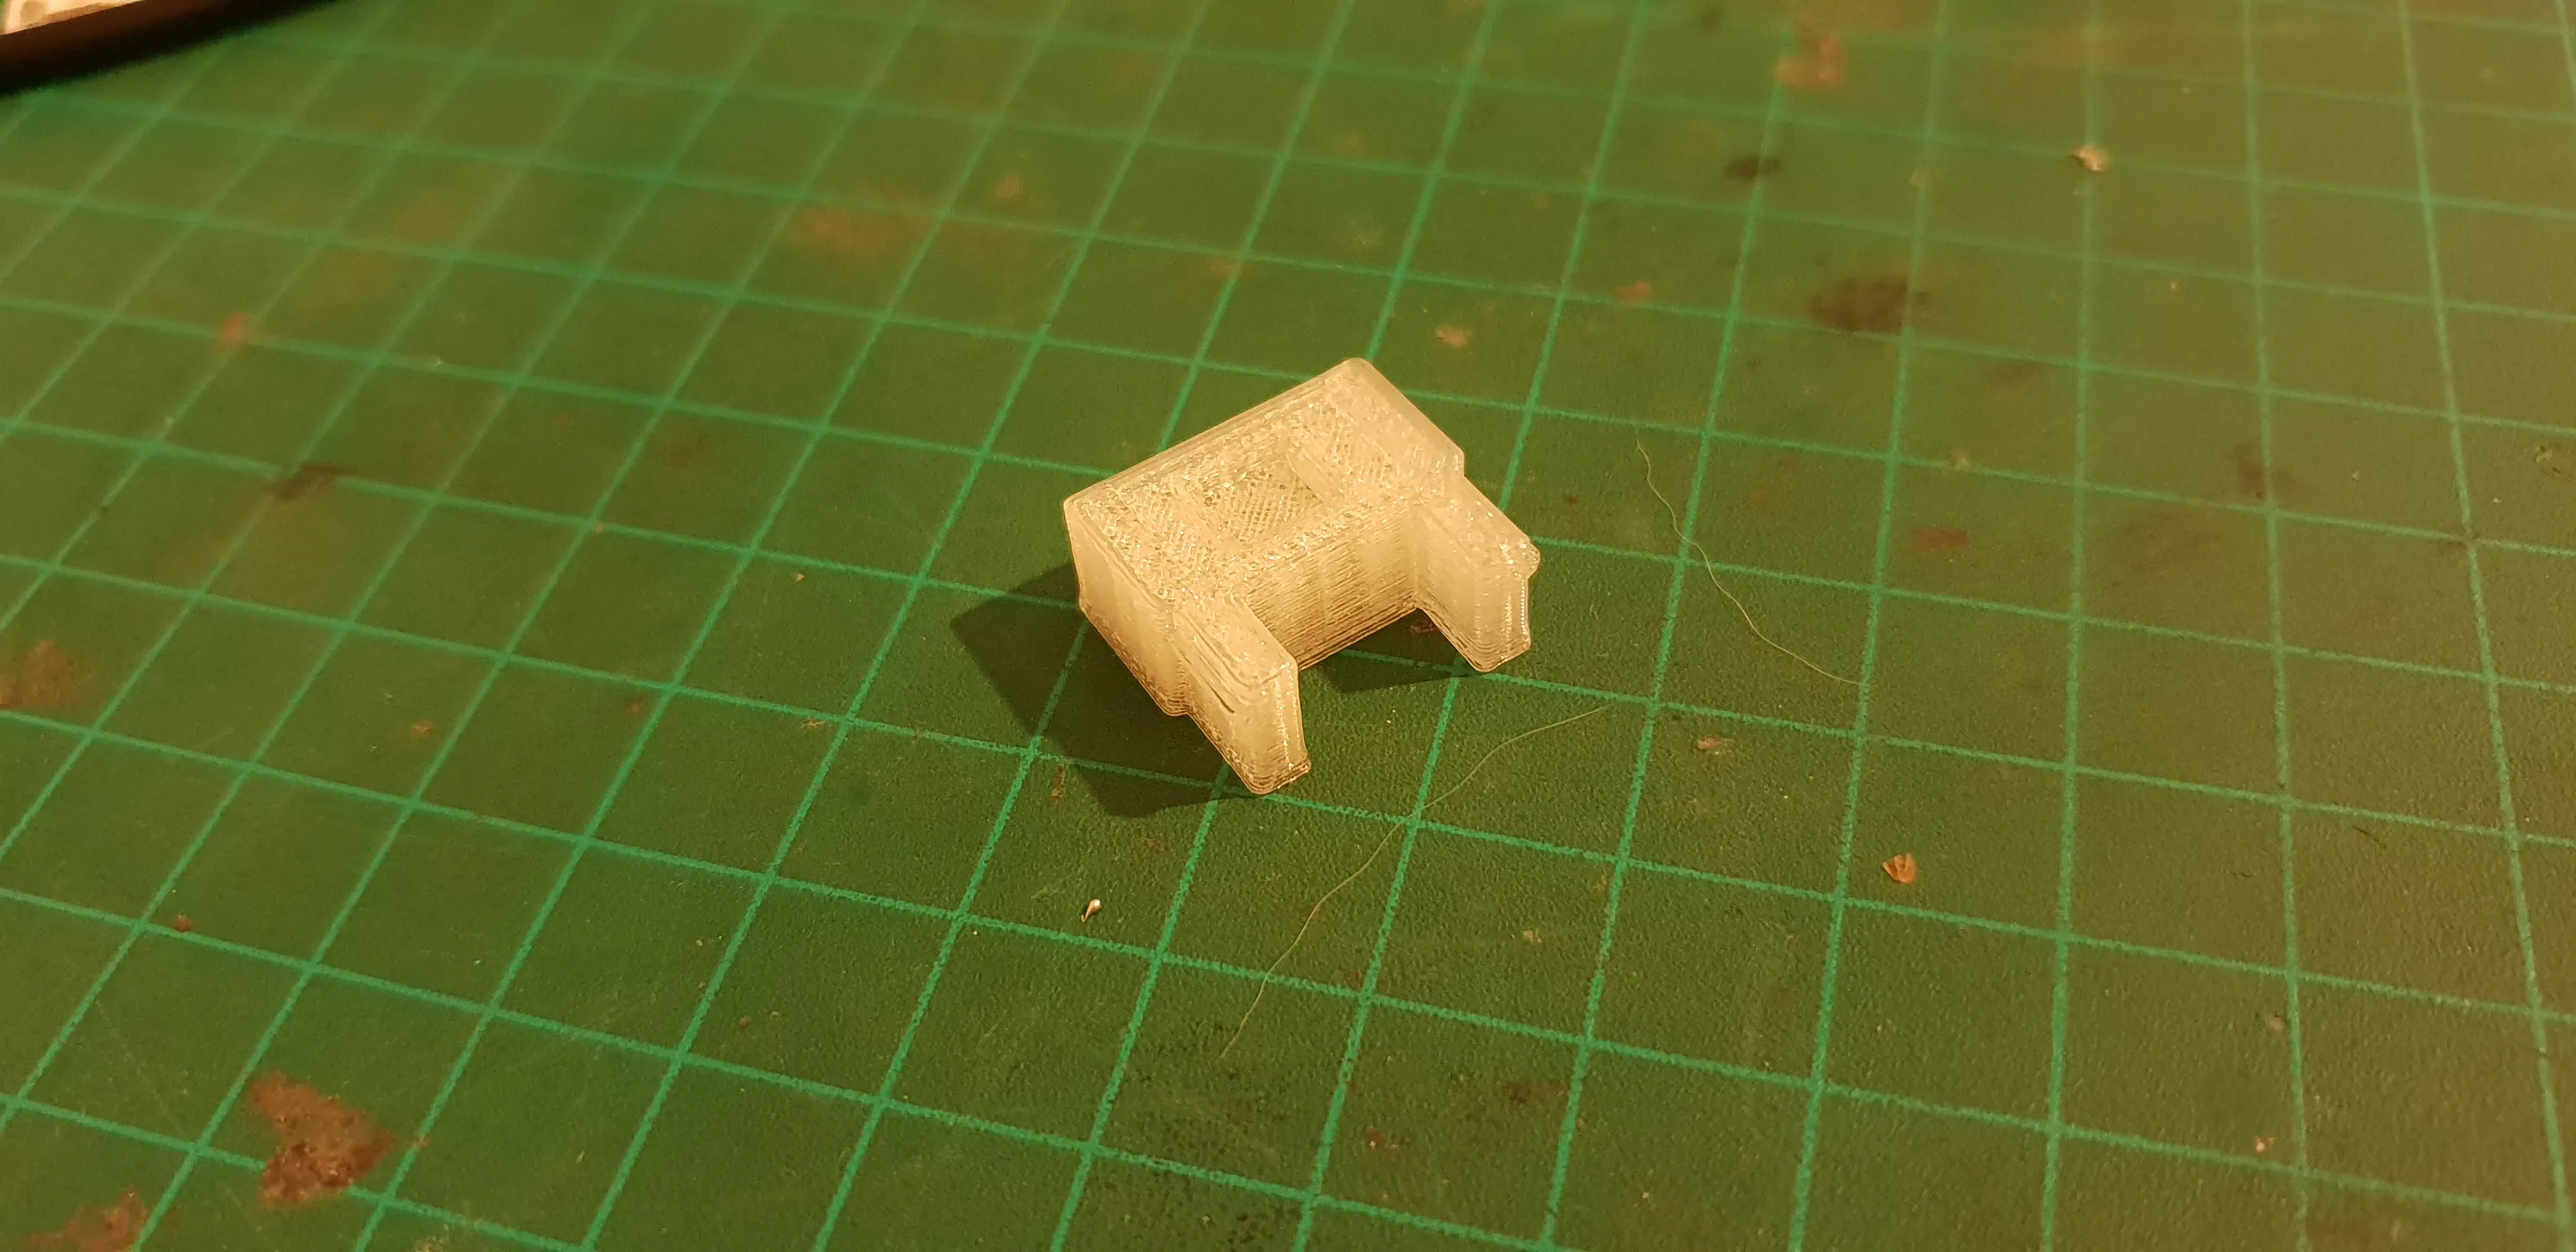
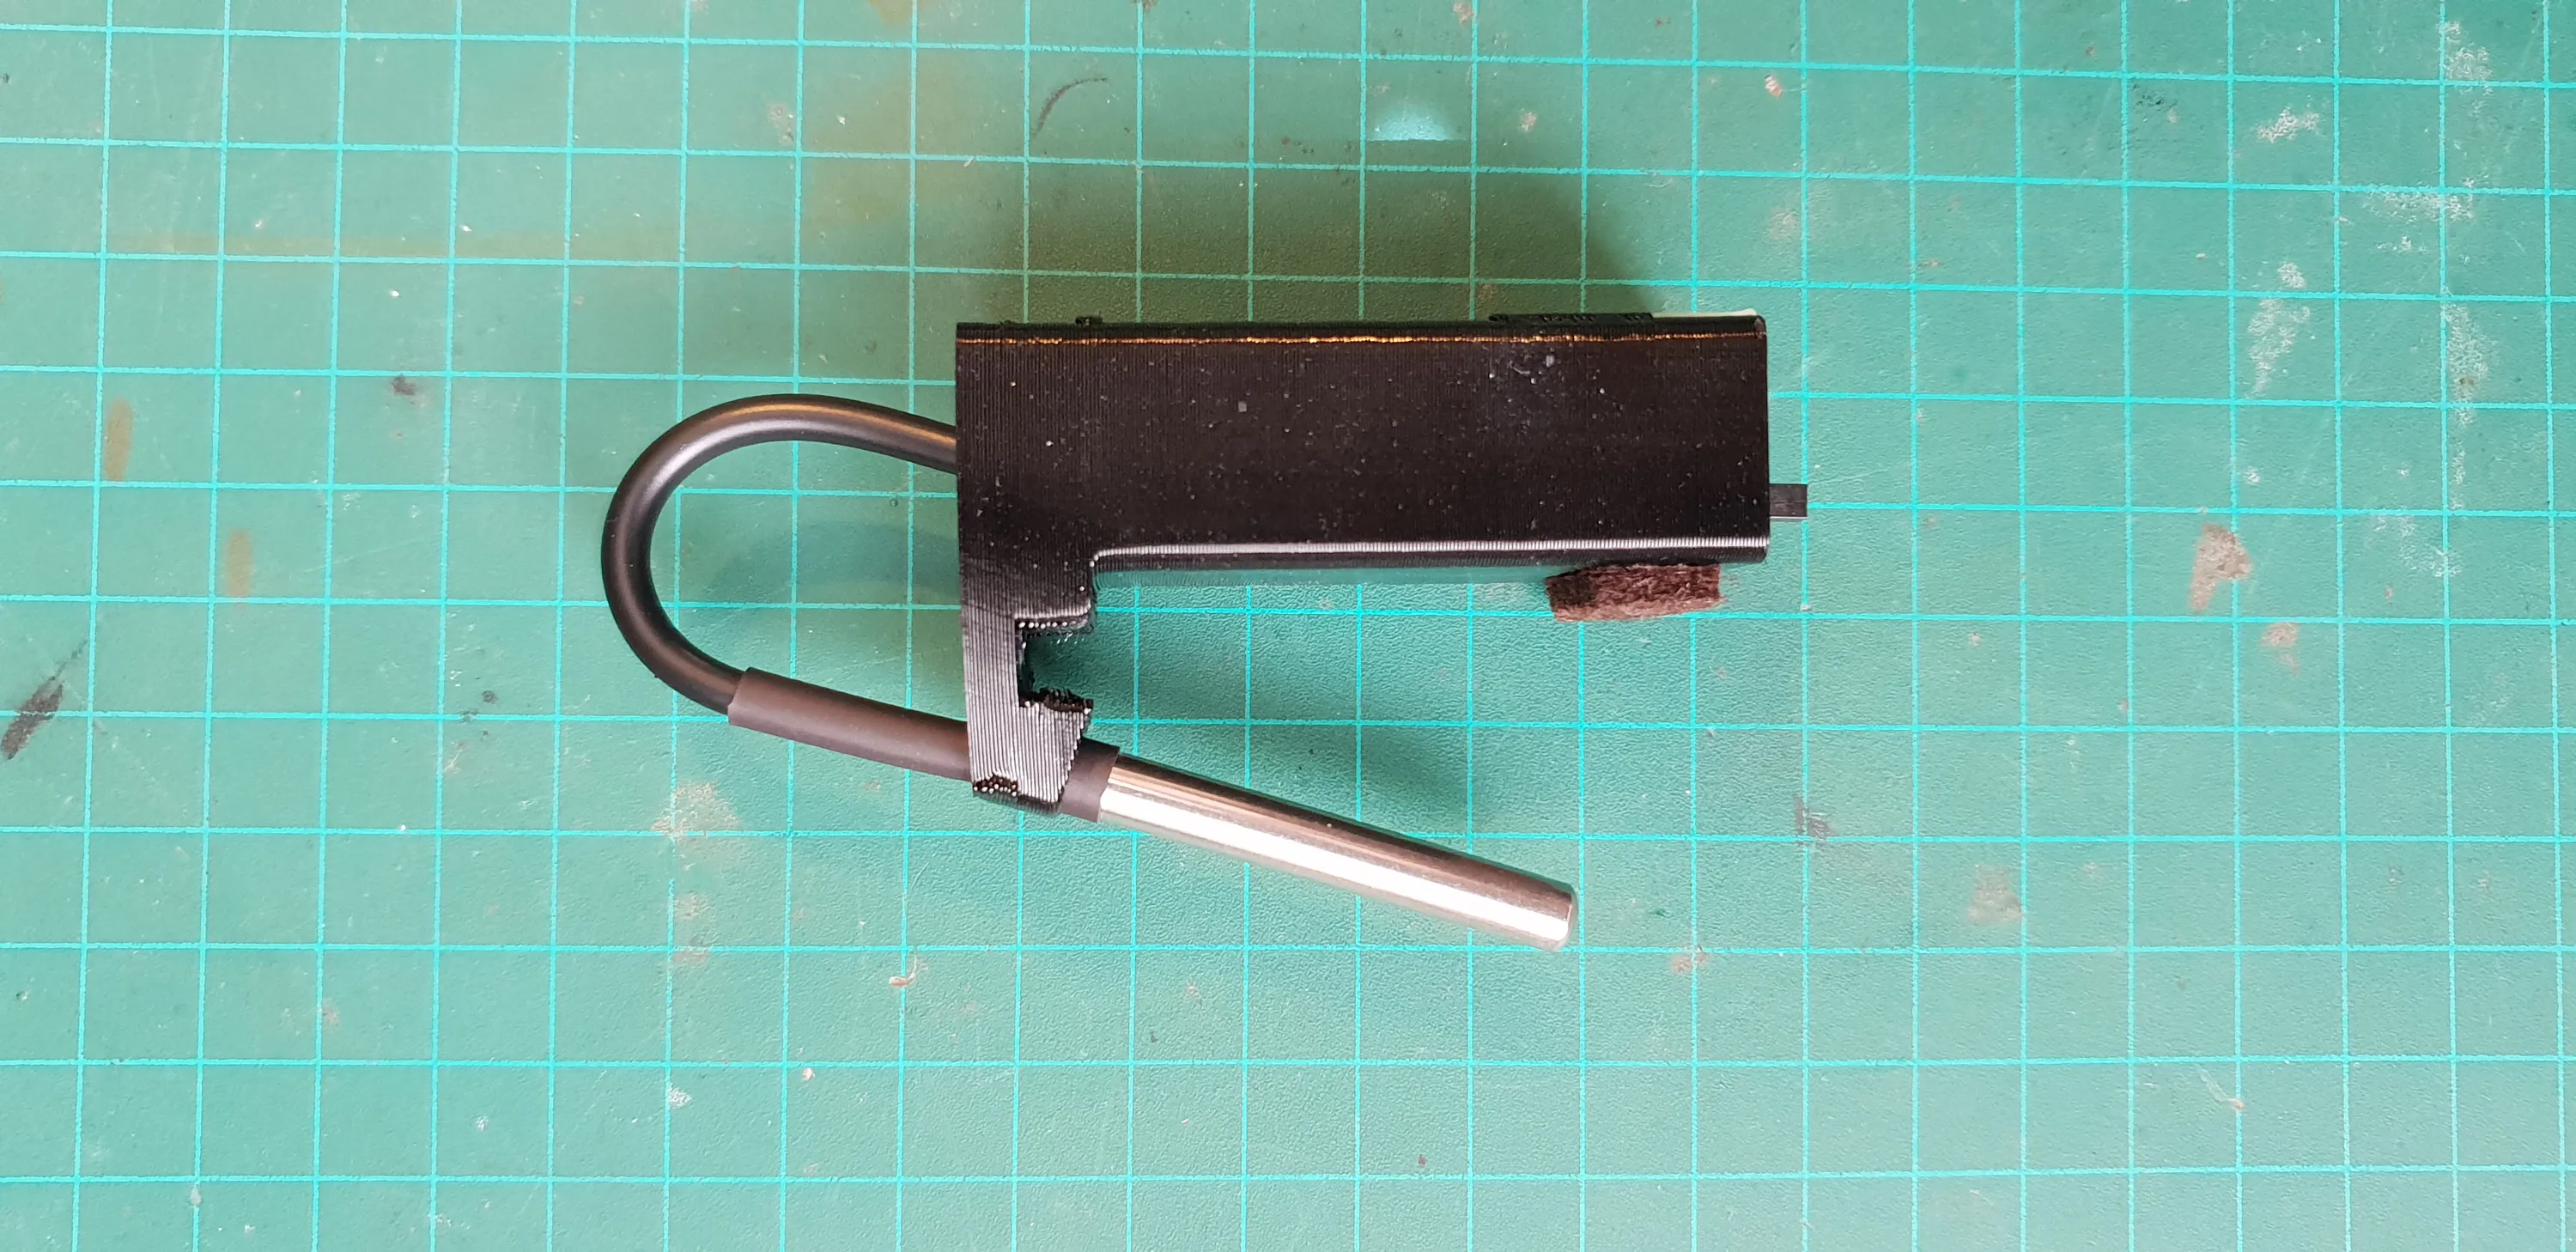
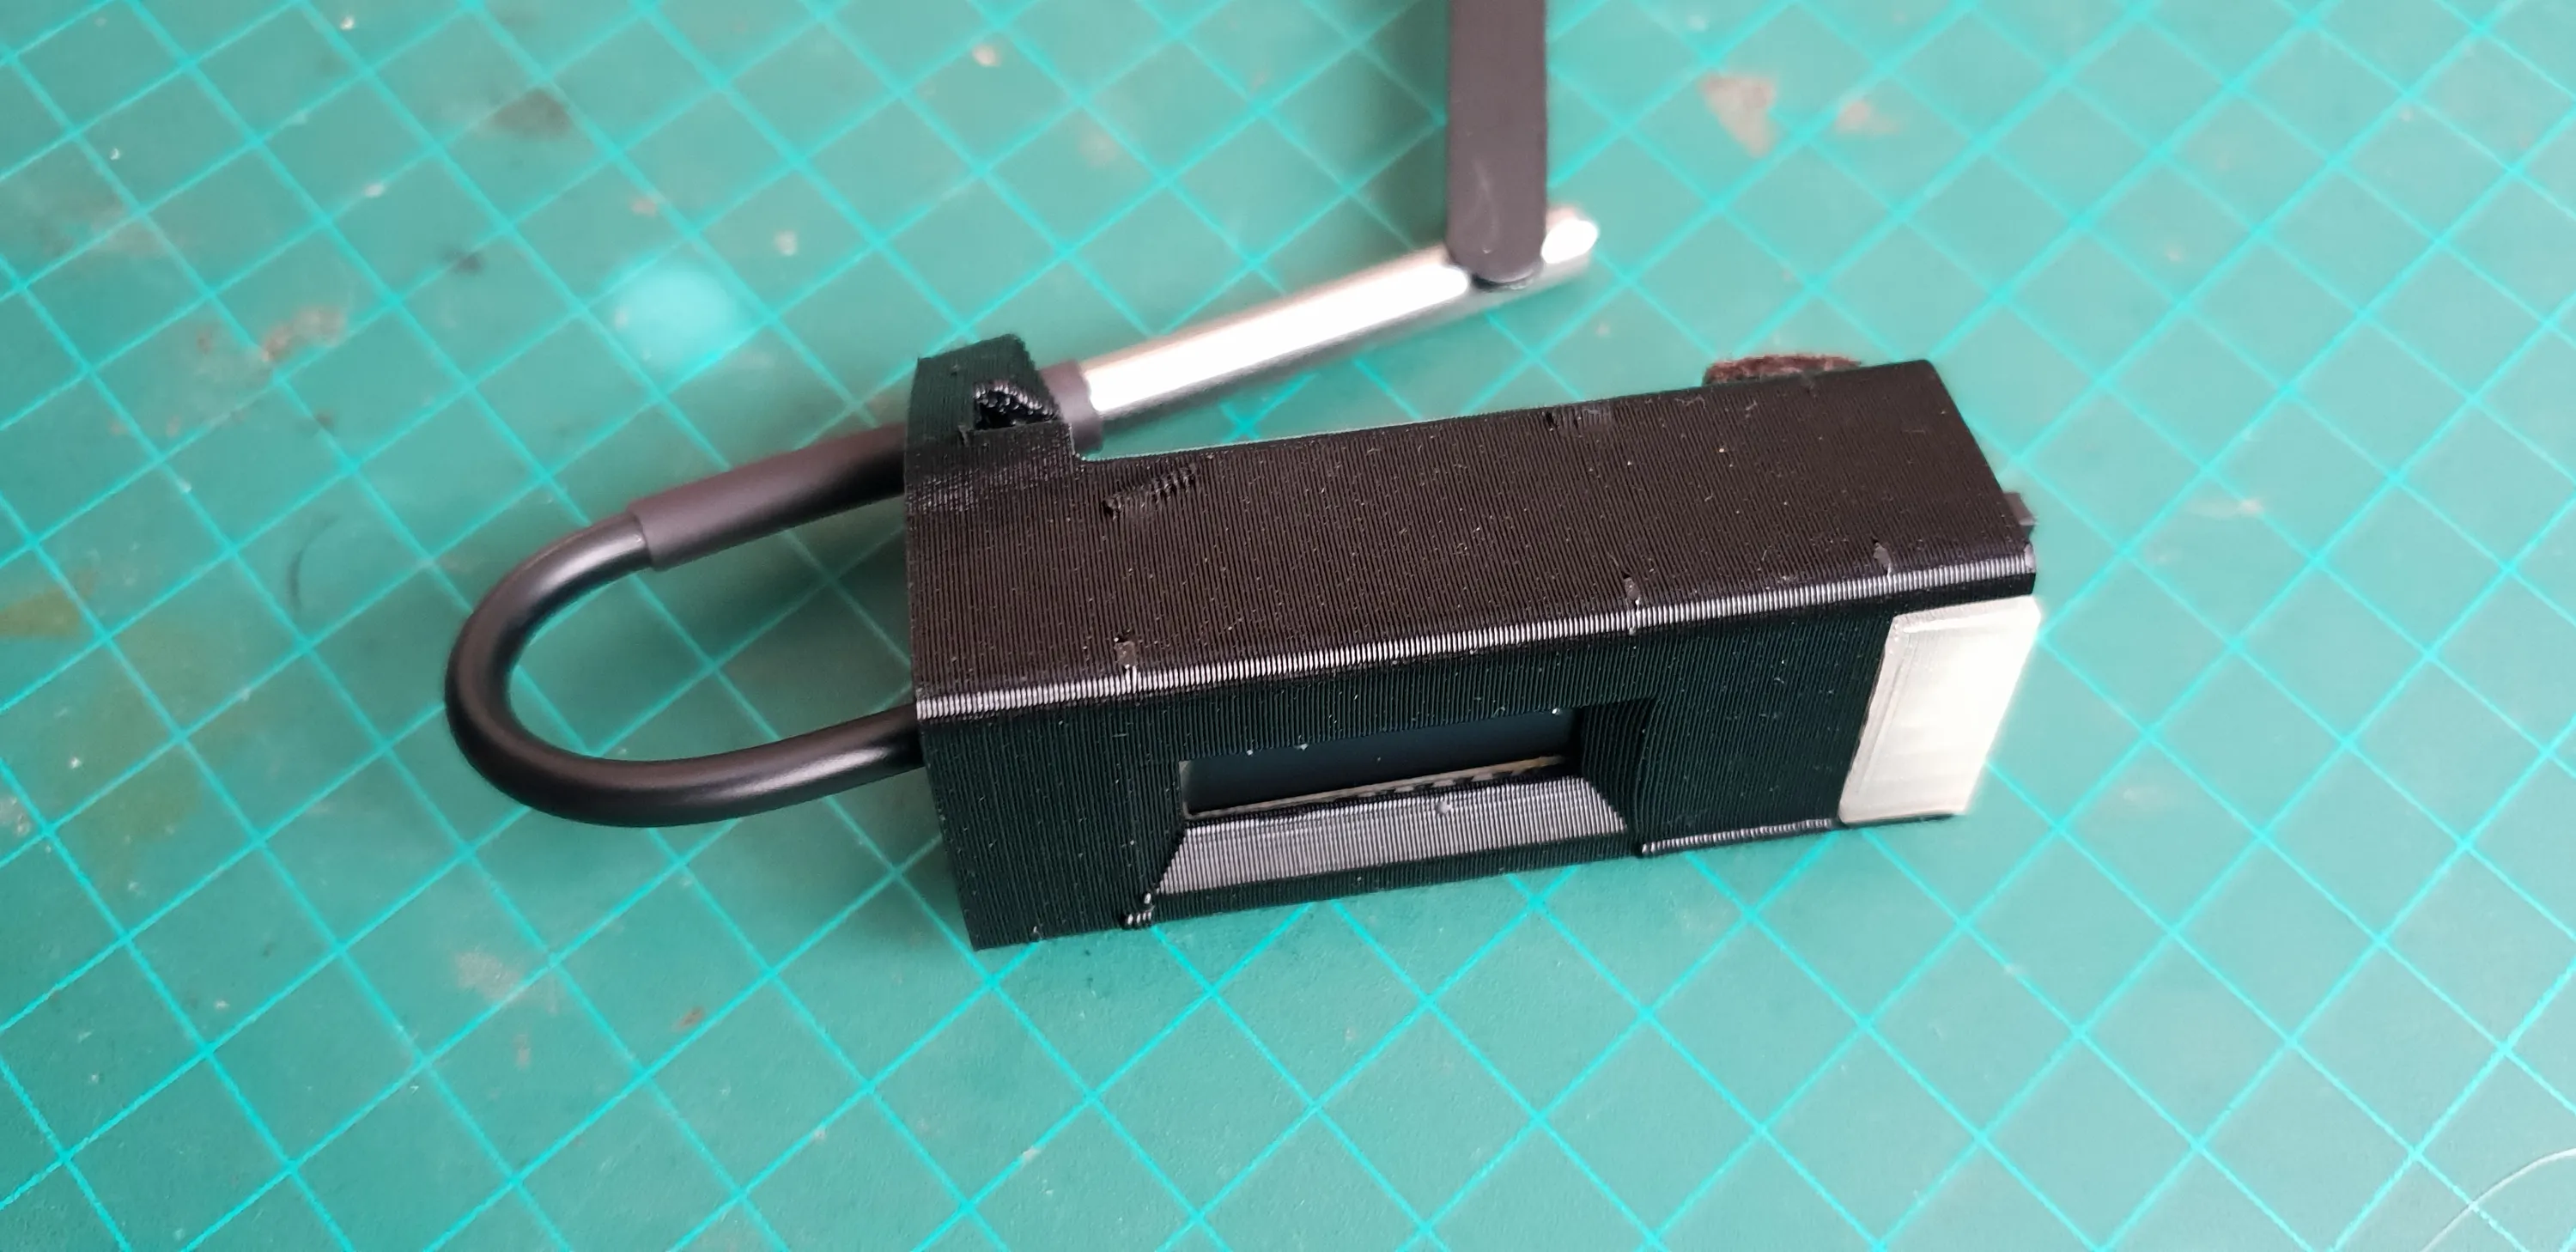
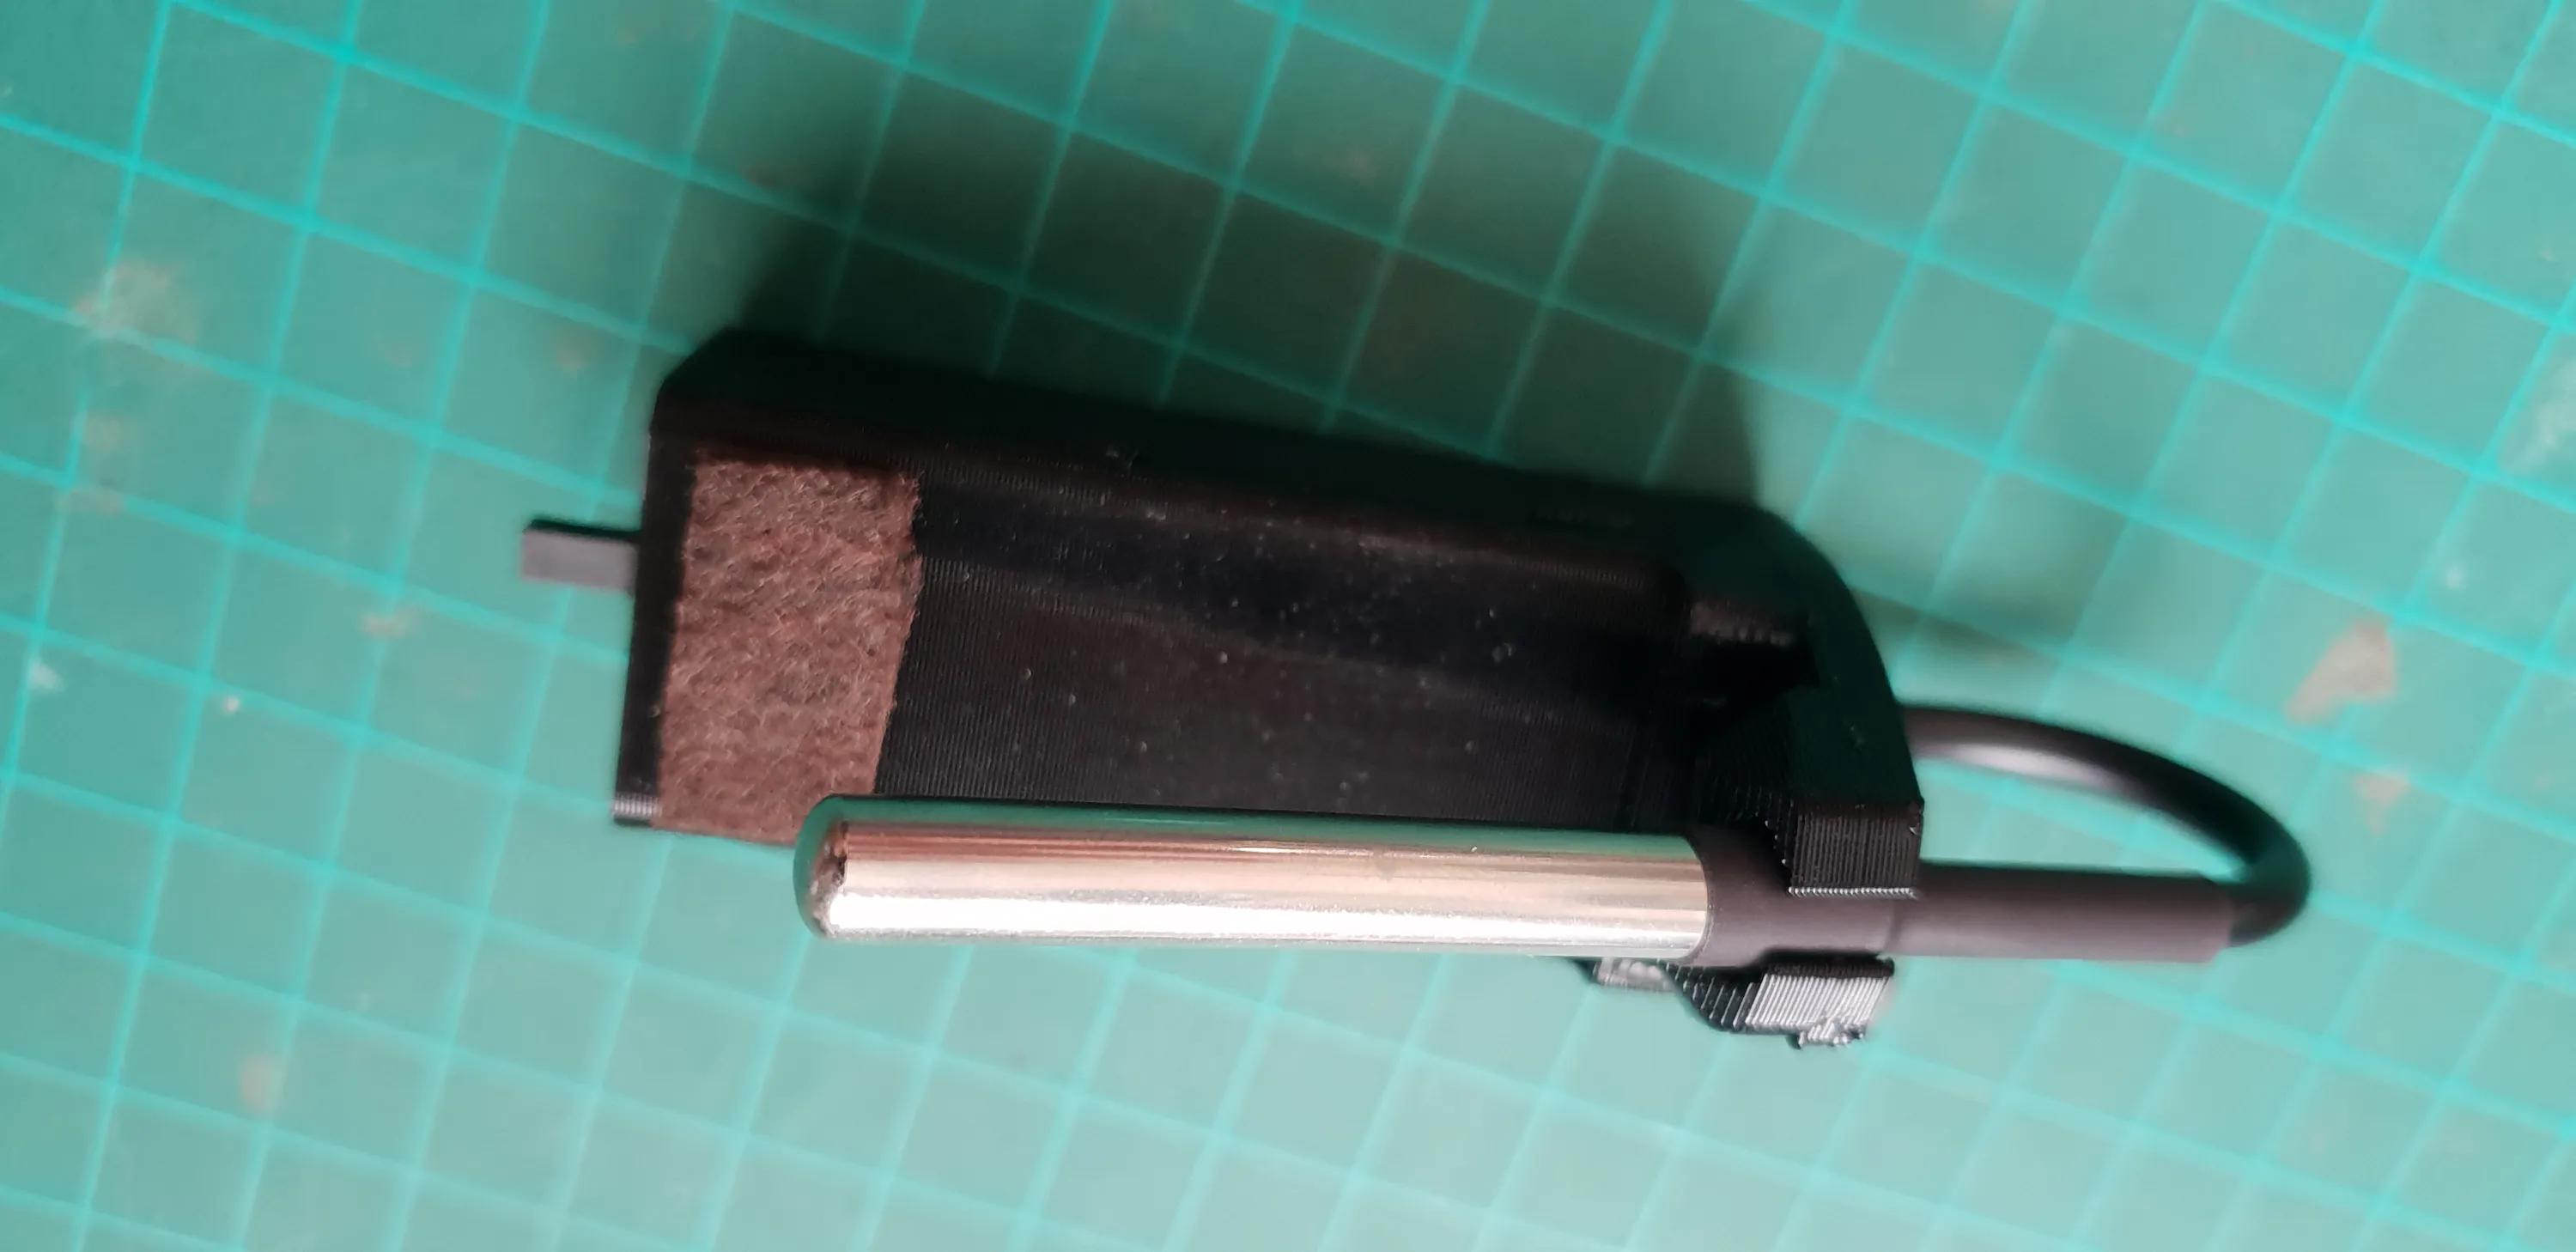
The case is 3D printed out of PLA while the probe holder is TPU. The TPU makes an easy clamp to hold the probe and can withstand higher temperatures, as it needs to touch the hot cup.
I added a felt sticker at the other end of the case to protect it against the heat, as it also touches the cup.

V2
Lessons
Using V1 made some things very clear:
- It has to be smaller. That was obvious from the start. It’s a development board - it has too much things on it by design, but the biggest problem (pun intended) is the battery. It’s just unnecessarily large. I don’t need that much battery life and carrying the device was a hassle.
- The 8 bit RGB LED strip is cool, but people always think it’s broken because it’s not all lit all the time when it’s displaying the binary number. Annoying but I still like it. It’s also too big because it’s using 5050 LEDs. I’ll try to find a smaller one for future iterations.
- After having the temperature displayed as a number on the screen, a binary number via the LEDs and a color representation via the LEDs, I realized that I don’t really need an accurate readout. I just want to know how close the real temperature is to the target to evaluate how much time remains. For this, the color from a single LED is enough.
- I don’t really use the inputs at all. I don’t need the buttons and I didn’t even bother developing the menu system and all the setting I thought I needed. I didn’t feel the need to change the target temperature or any other threshold. Toggling the screen is cool, but it’s just that. It’s unnecessary and adds a lot of code.
- The TPU held up great. It held the probe firmly and didn’t soften of sag over time. Even when contacting the hot cup rim and exposed to hot steam from the tea.
- The buzzer has to go.
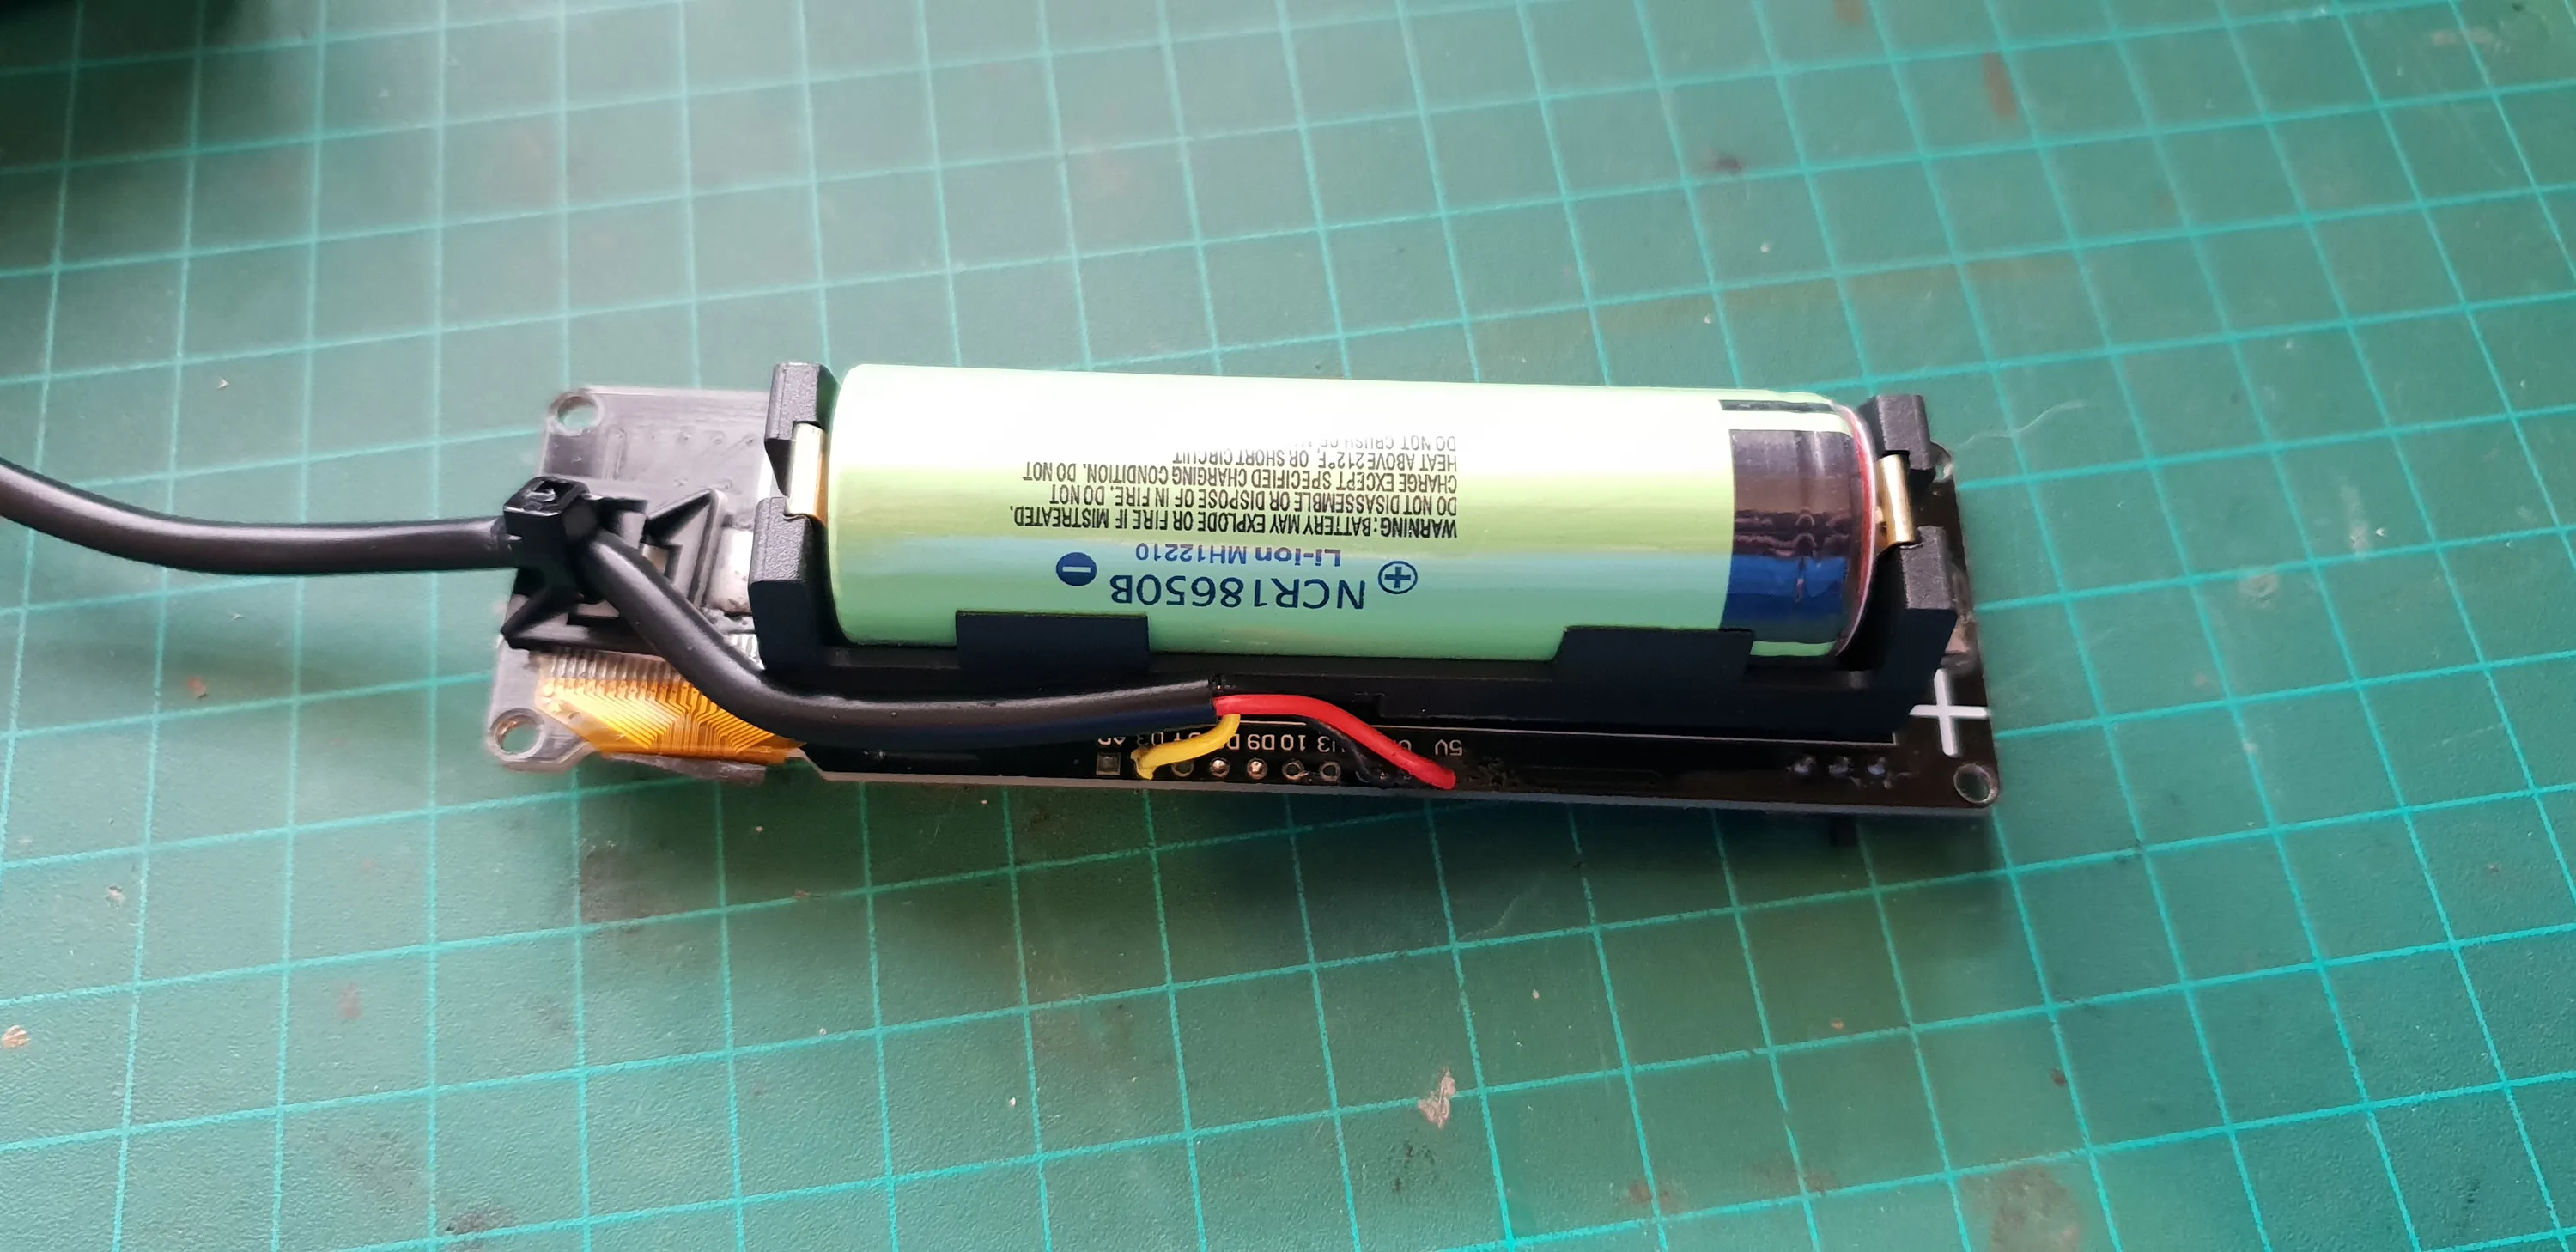
New Board And Battery
For the next version, I looked for another development board that was less bloated with features, but still had what I need.
The most important things for me were size and a built in charging circuit. I’ve built other projects with a separate charging circuit and it ends up having two USB ports - One for the microprocessor board for programming and communication and one for the charging circuit. It makes the hardware design harder and adds more constraints since both ports have to be accessible.
I’d prefer a single port and a single board and at this stage, I still count this as “in development” so I don’t want to invest time into a custom PCB just yet.
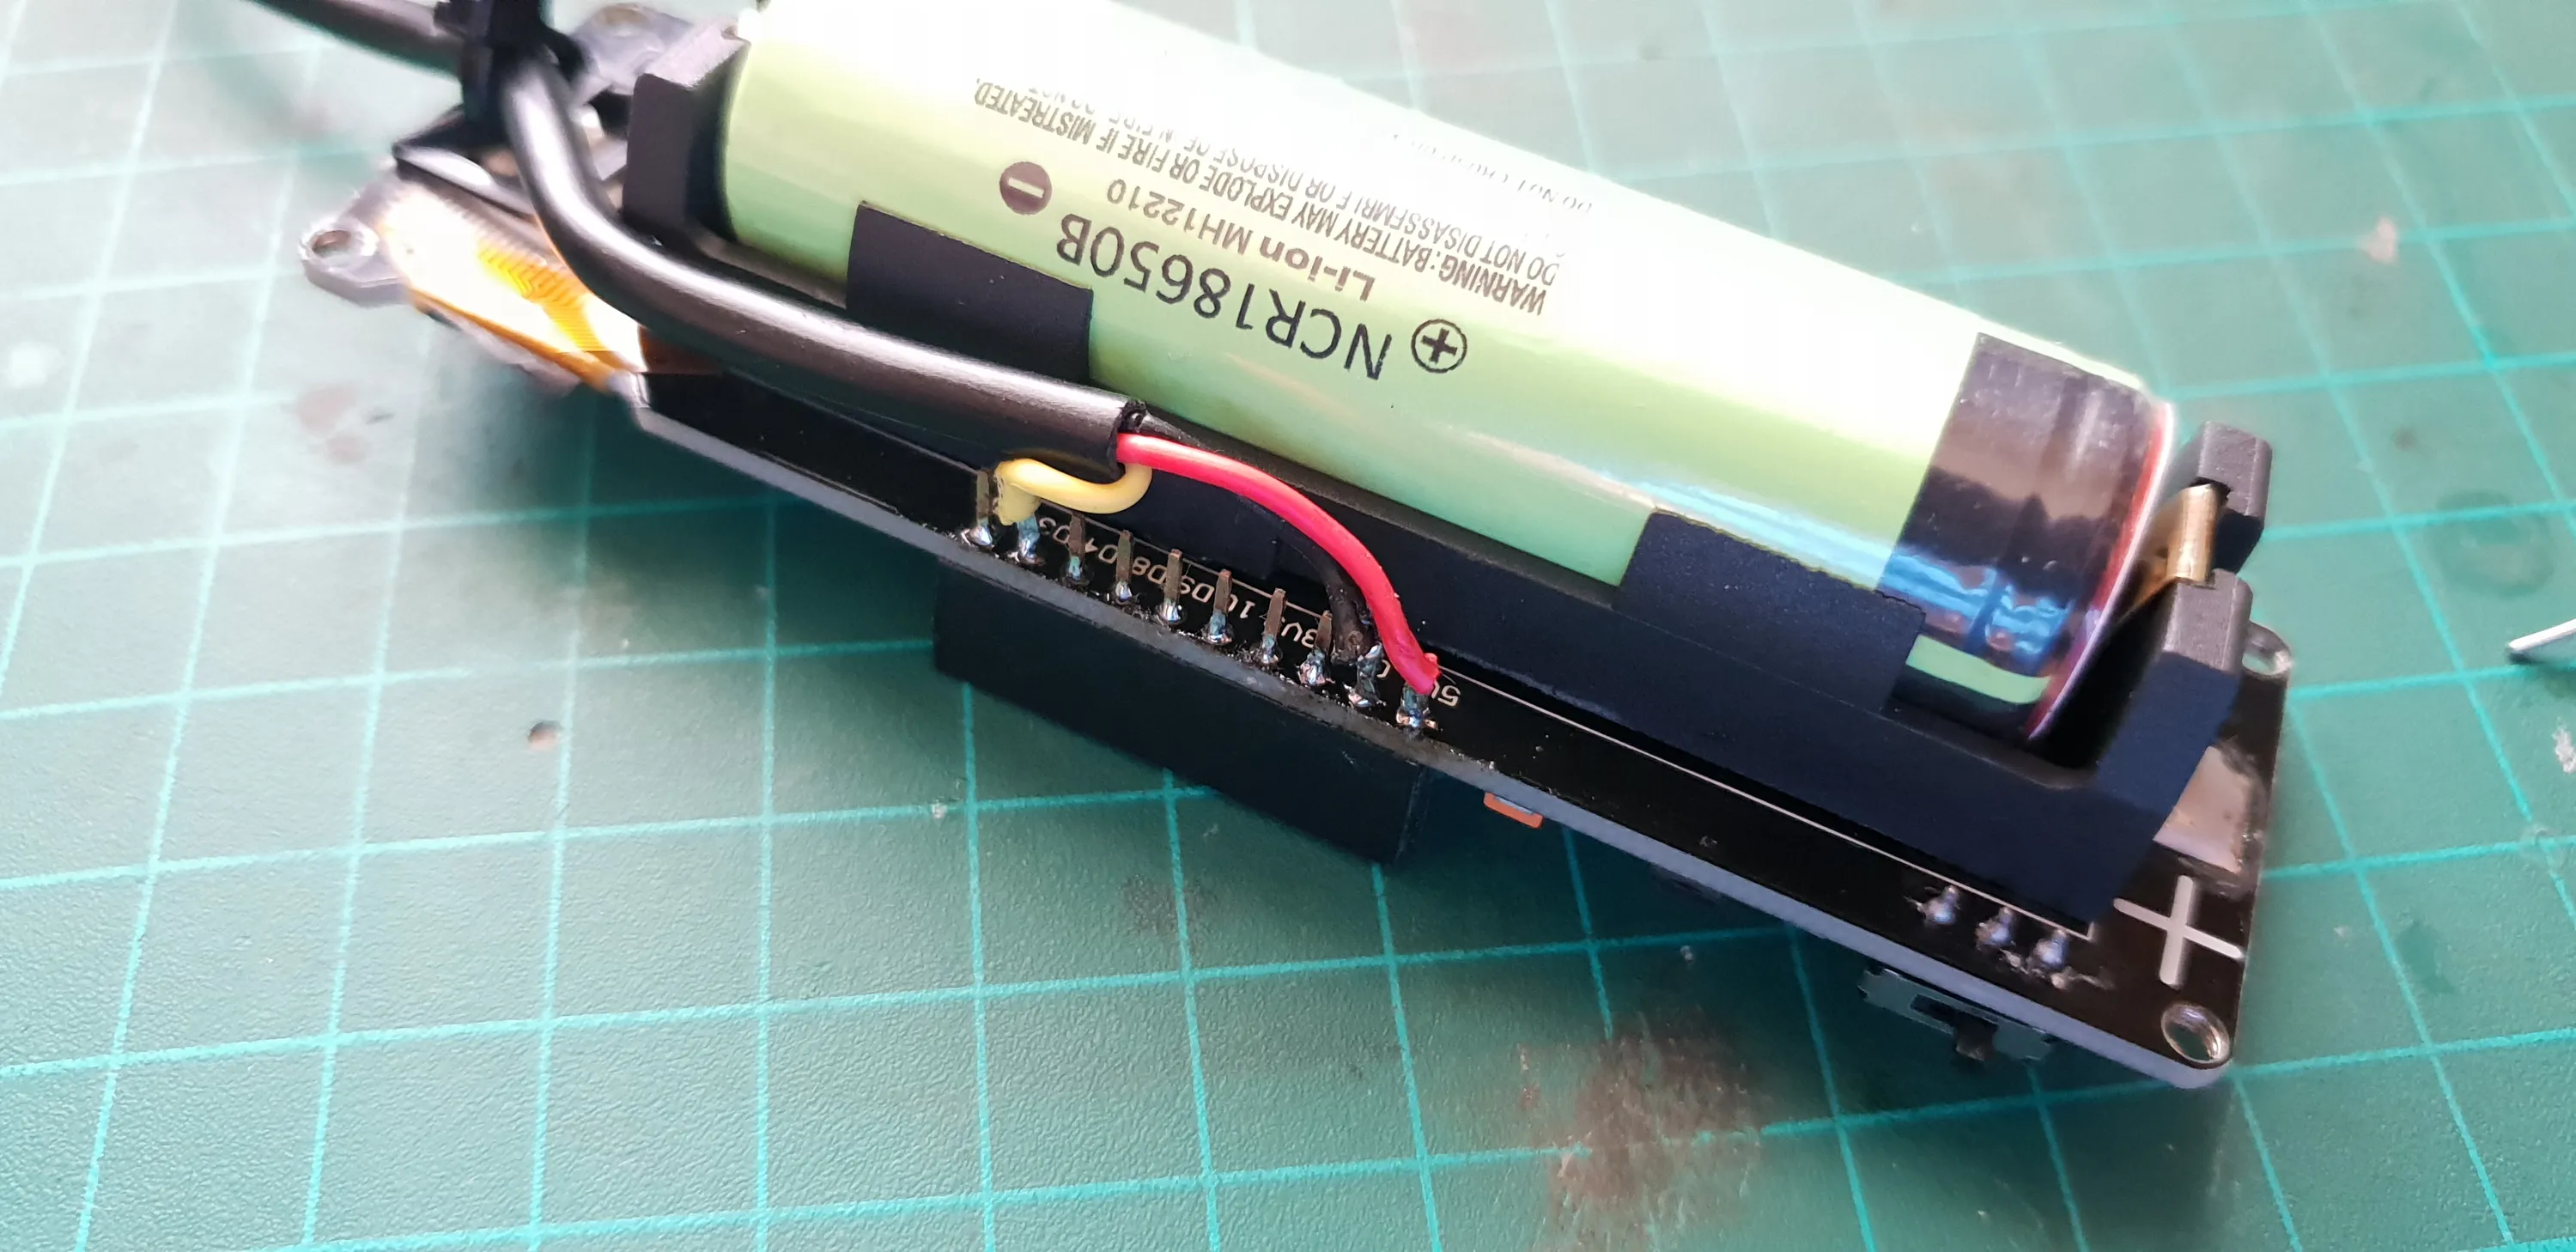
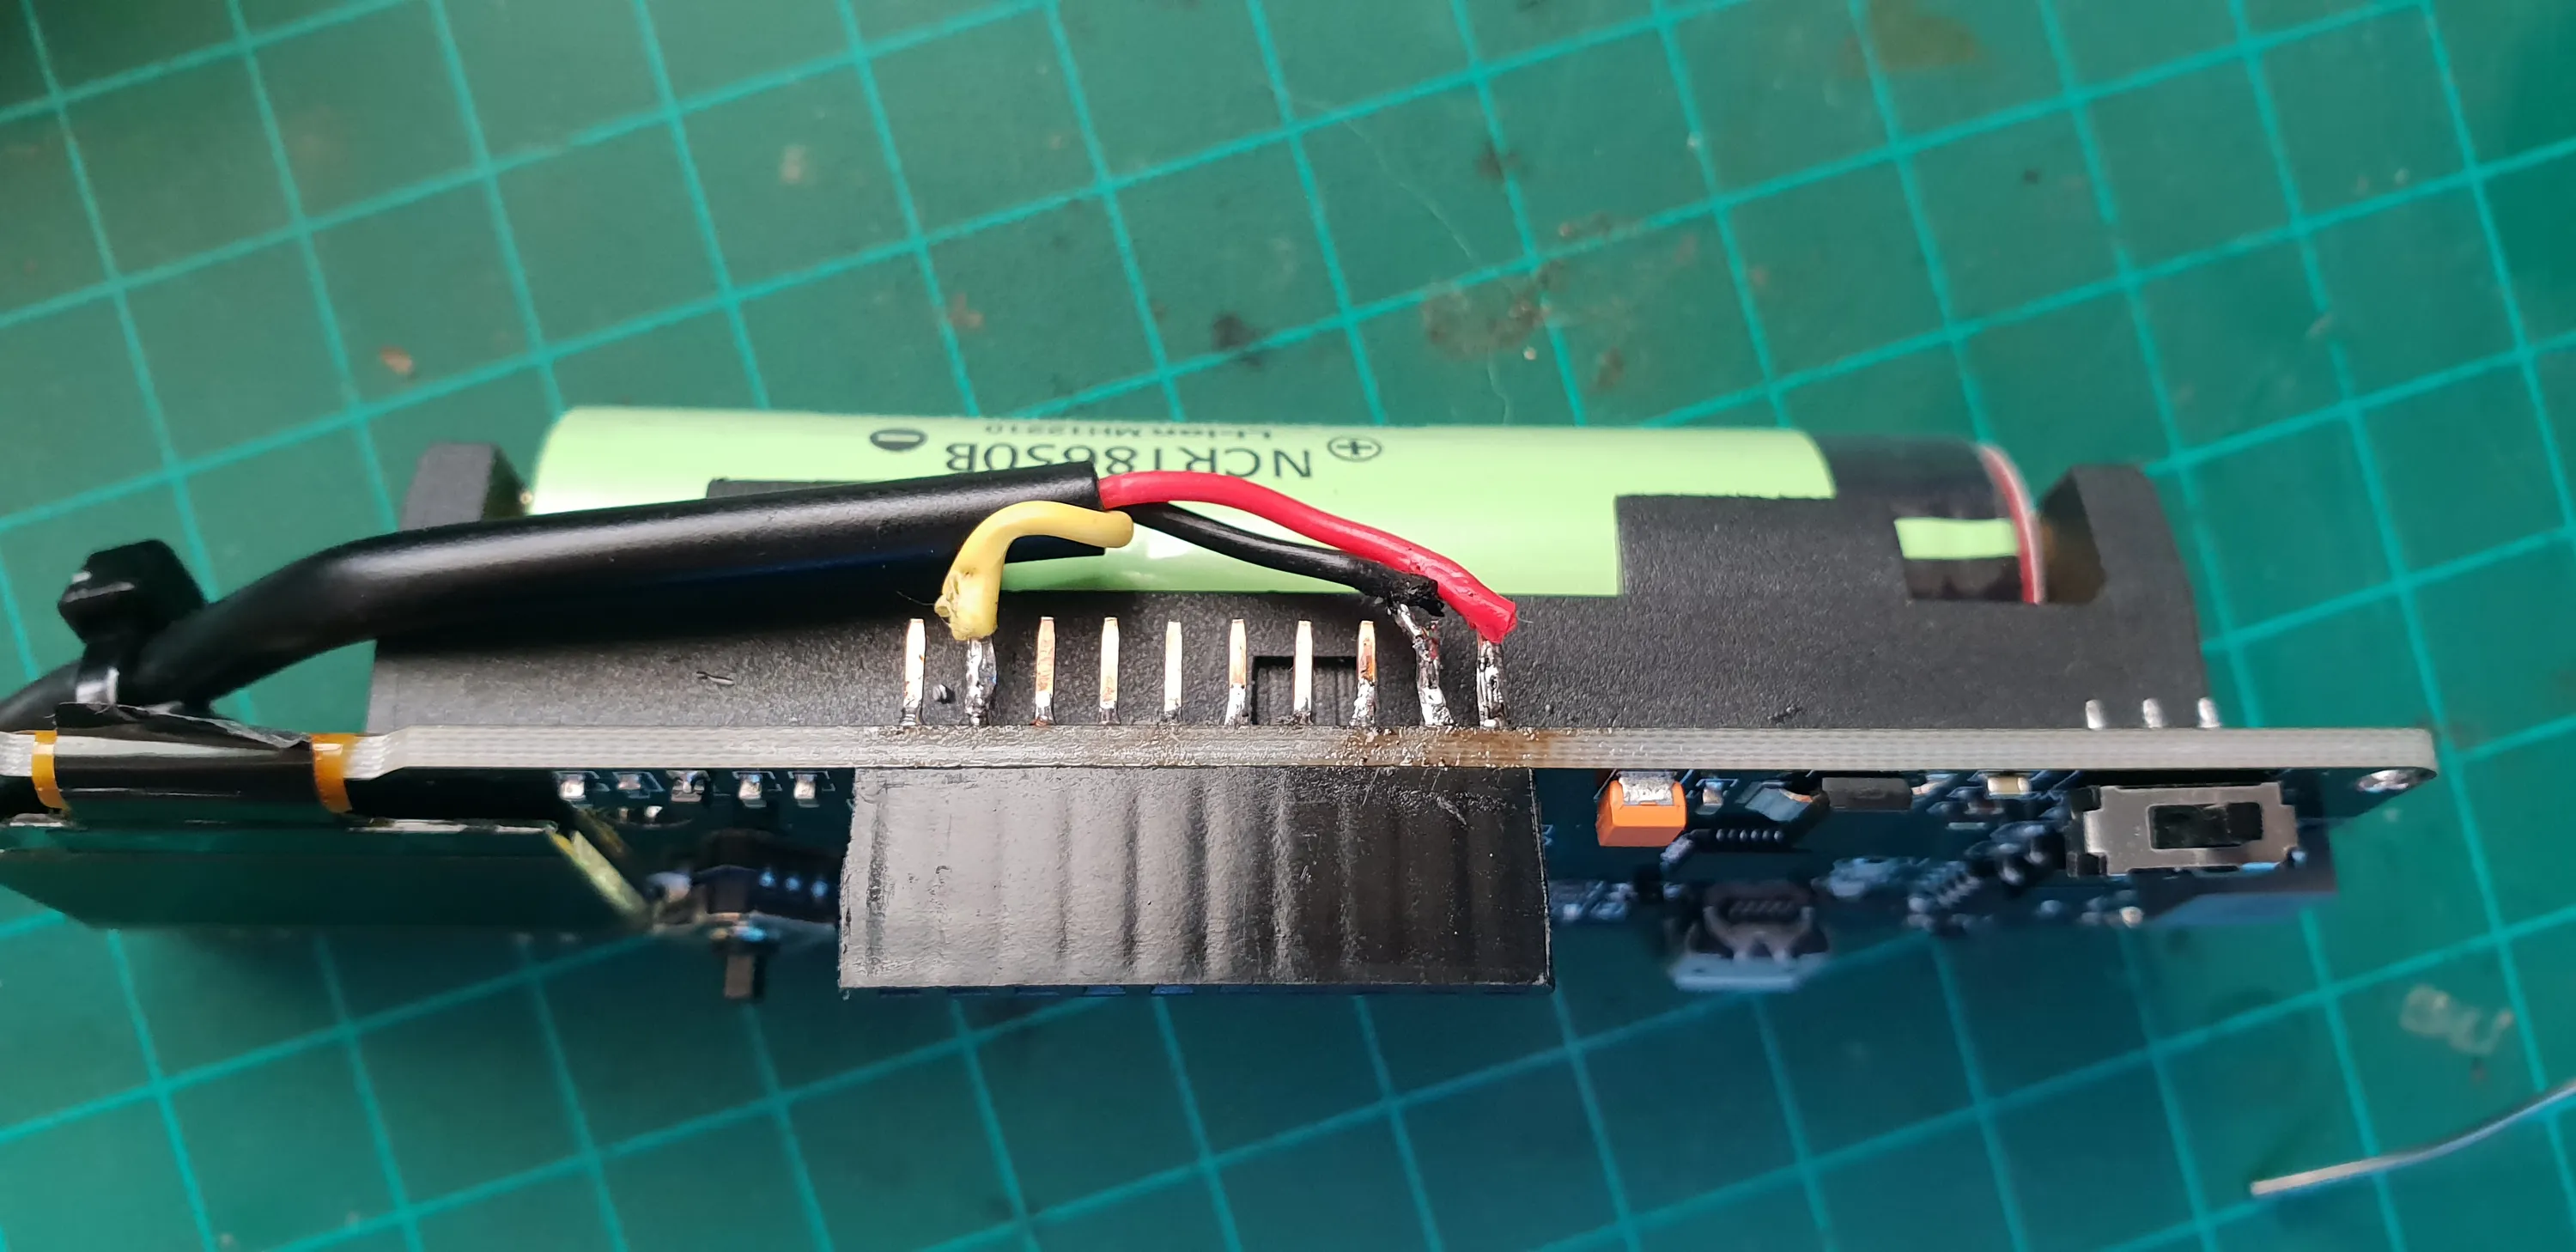
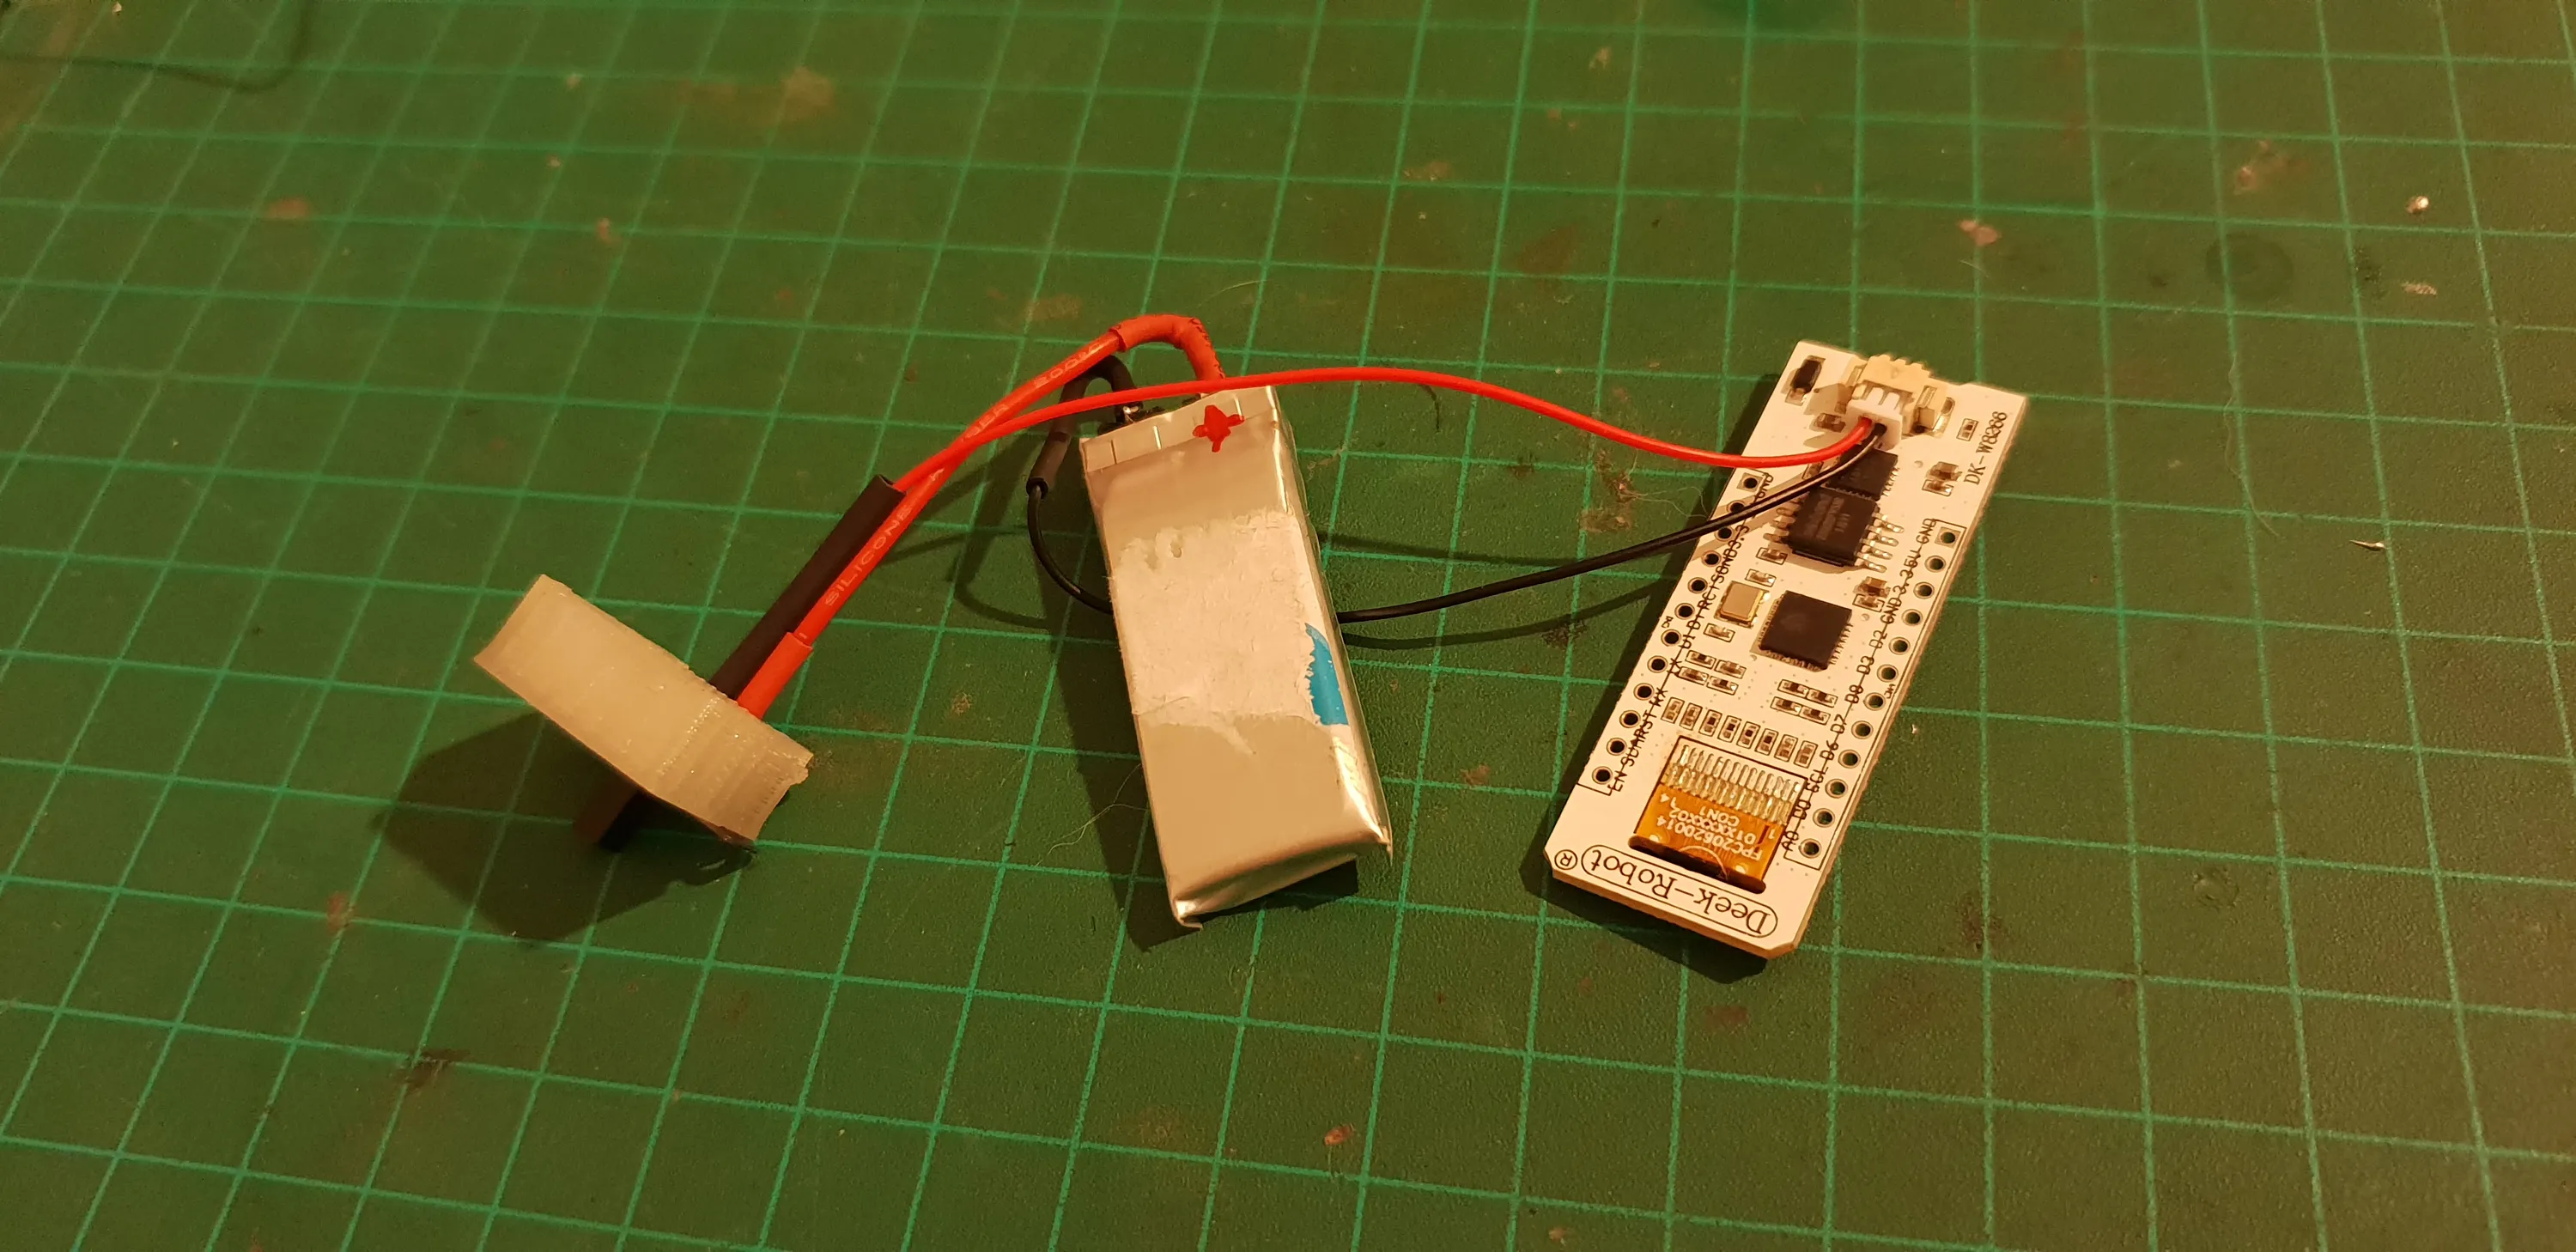
I found this board. It has the same ESP8266, a smaller OLED and a charging circuit with a detachable cable for the battery.
This means that I can source my own battery and have it fit my needs in terms of size an capacity.
The OLED is nice to have at this size. It doesn’t add a lot of bulk and the board is still small enough for my needs.
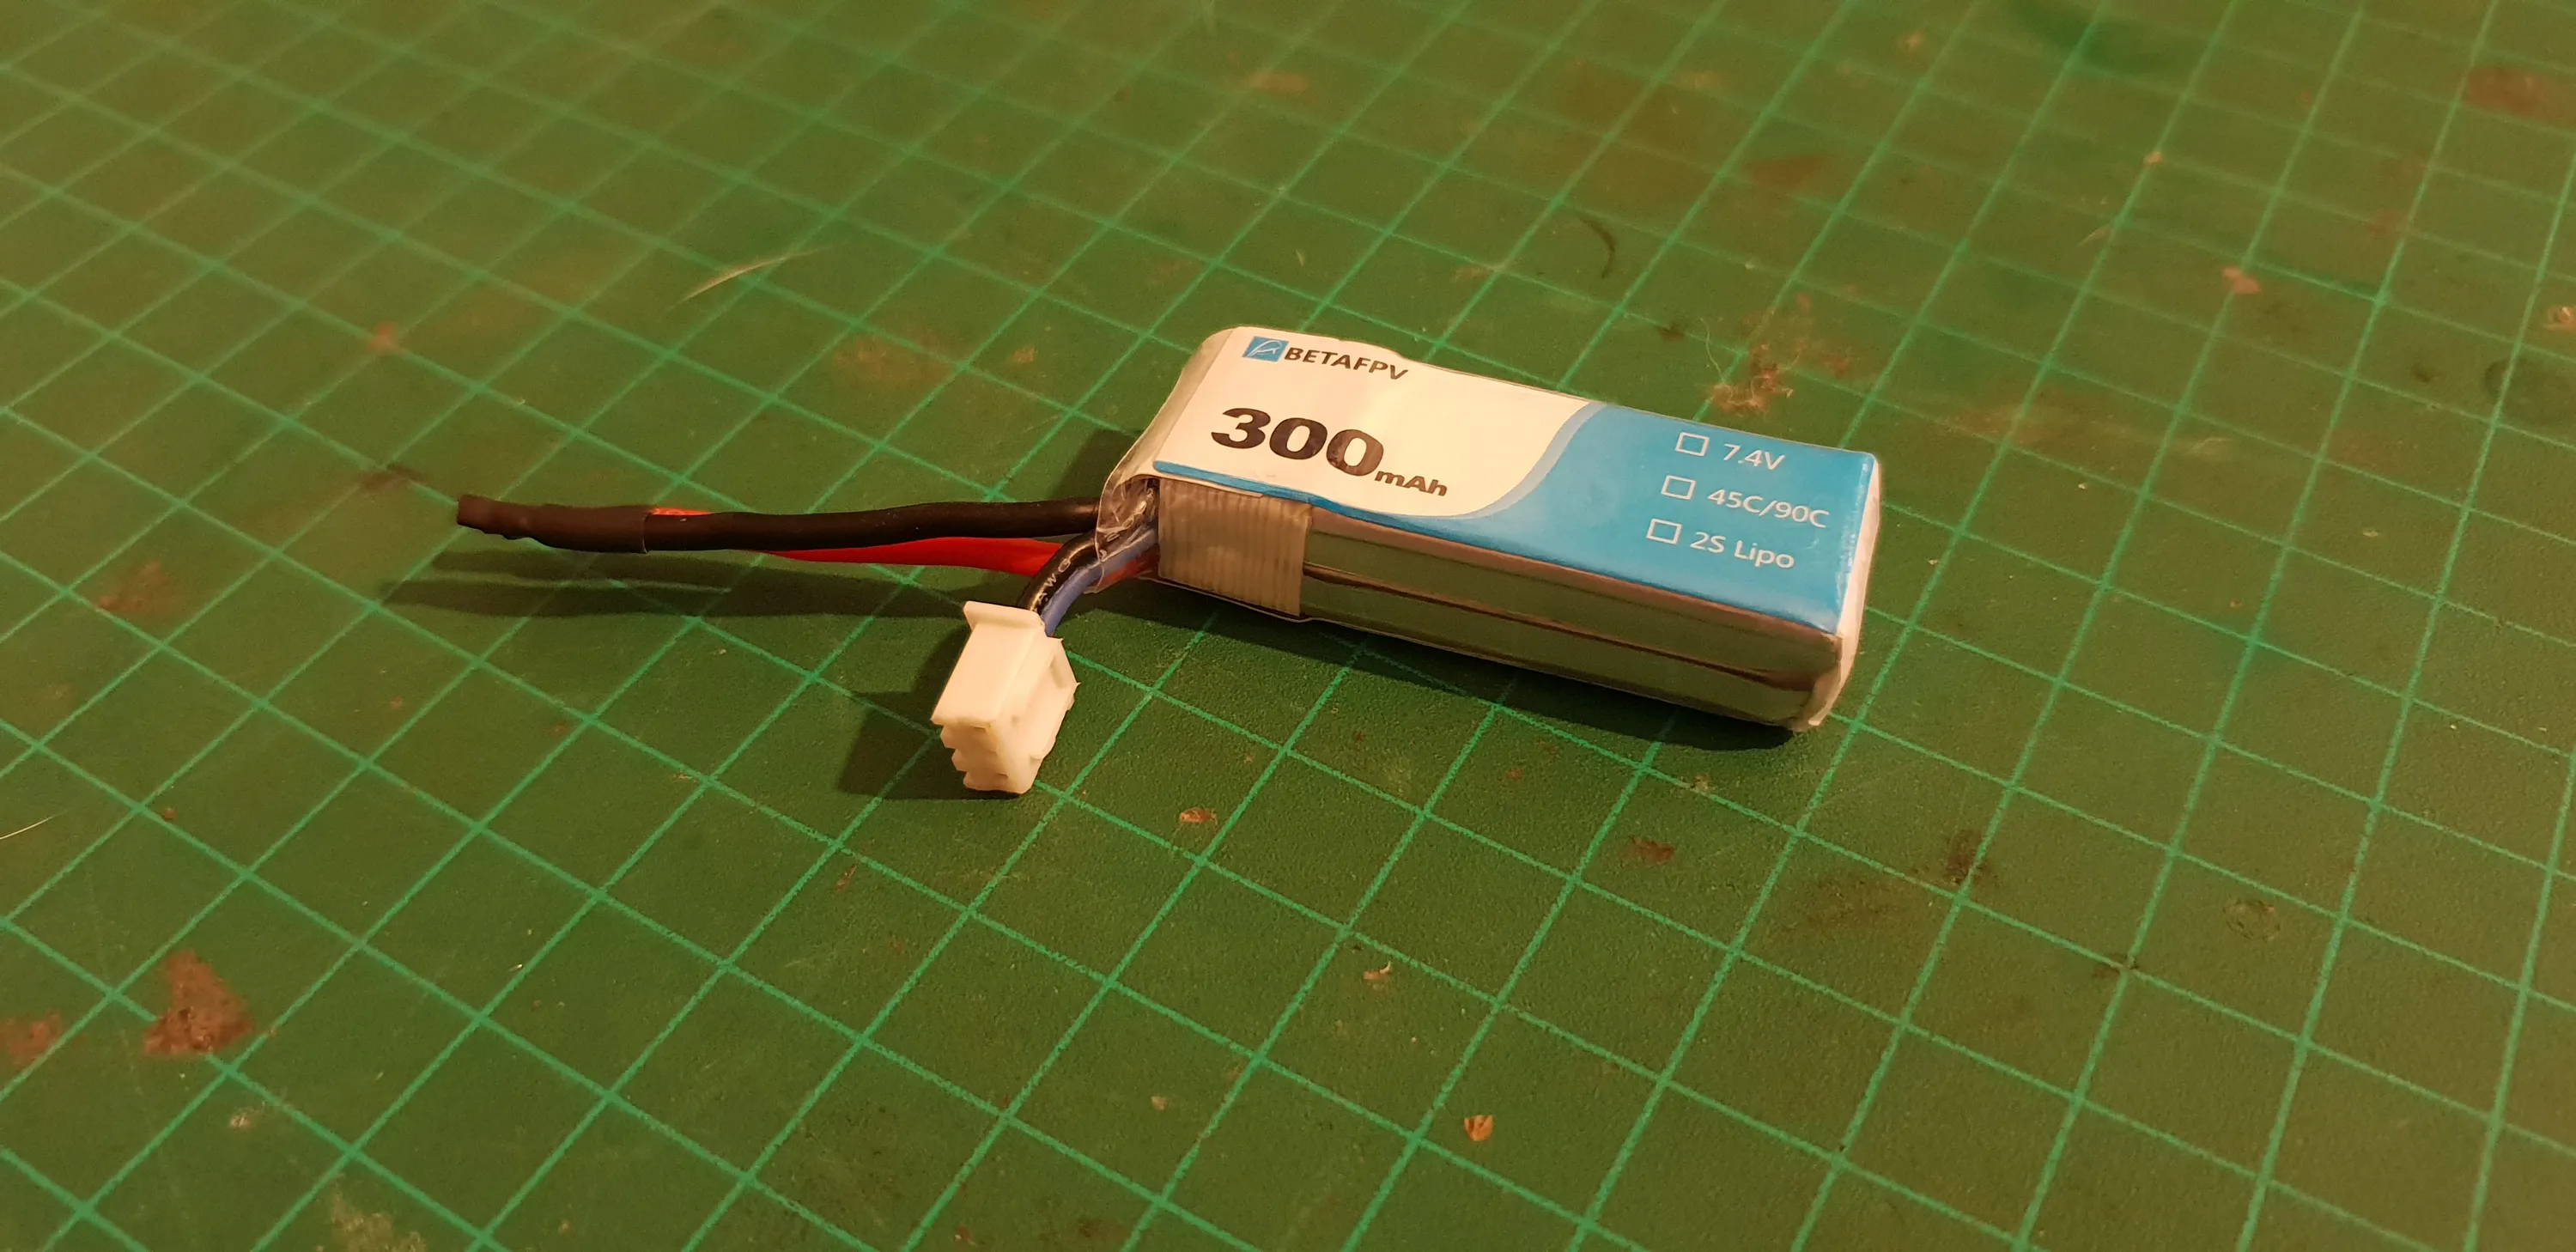
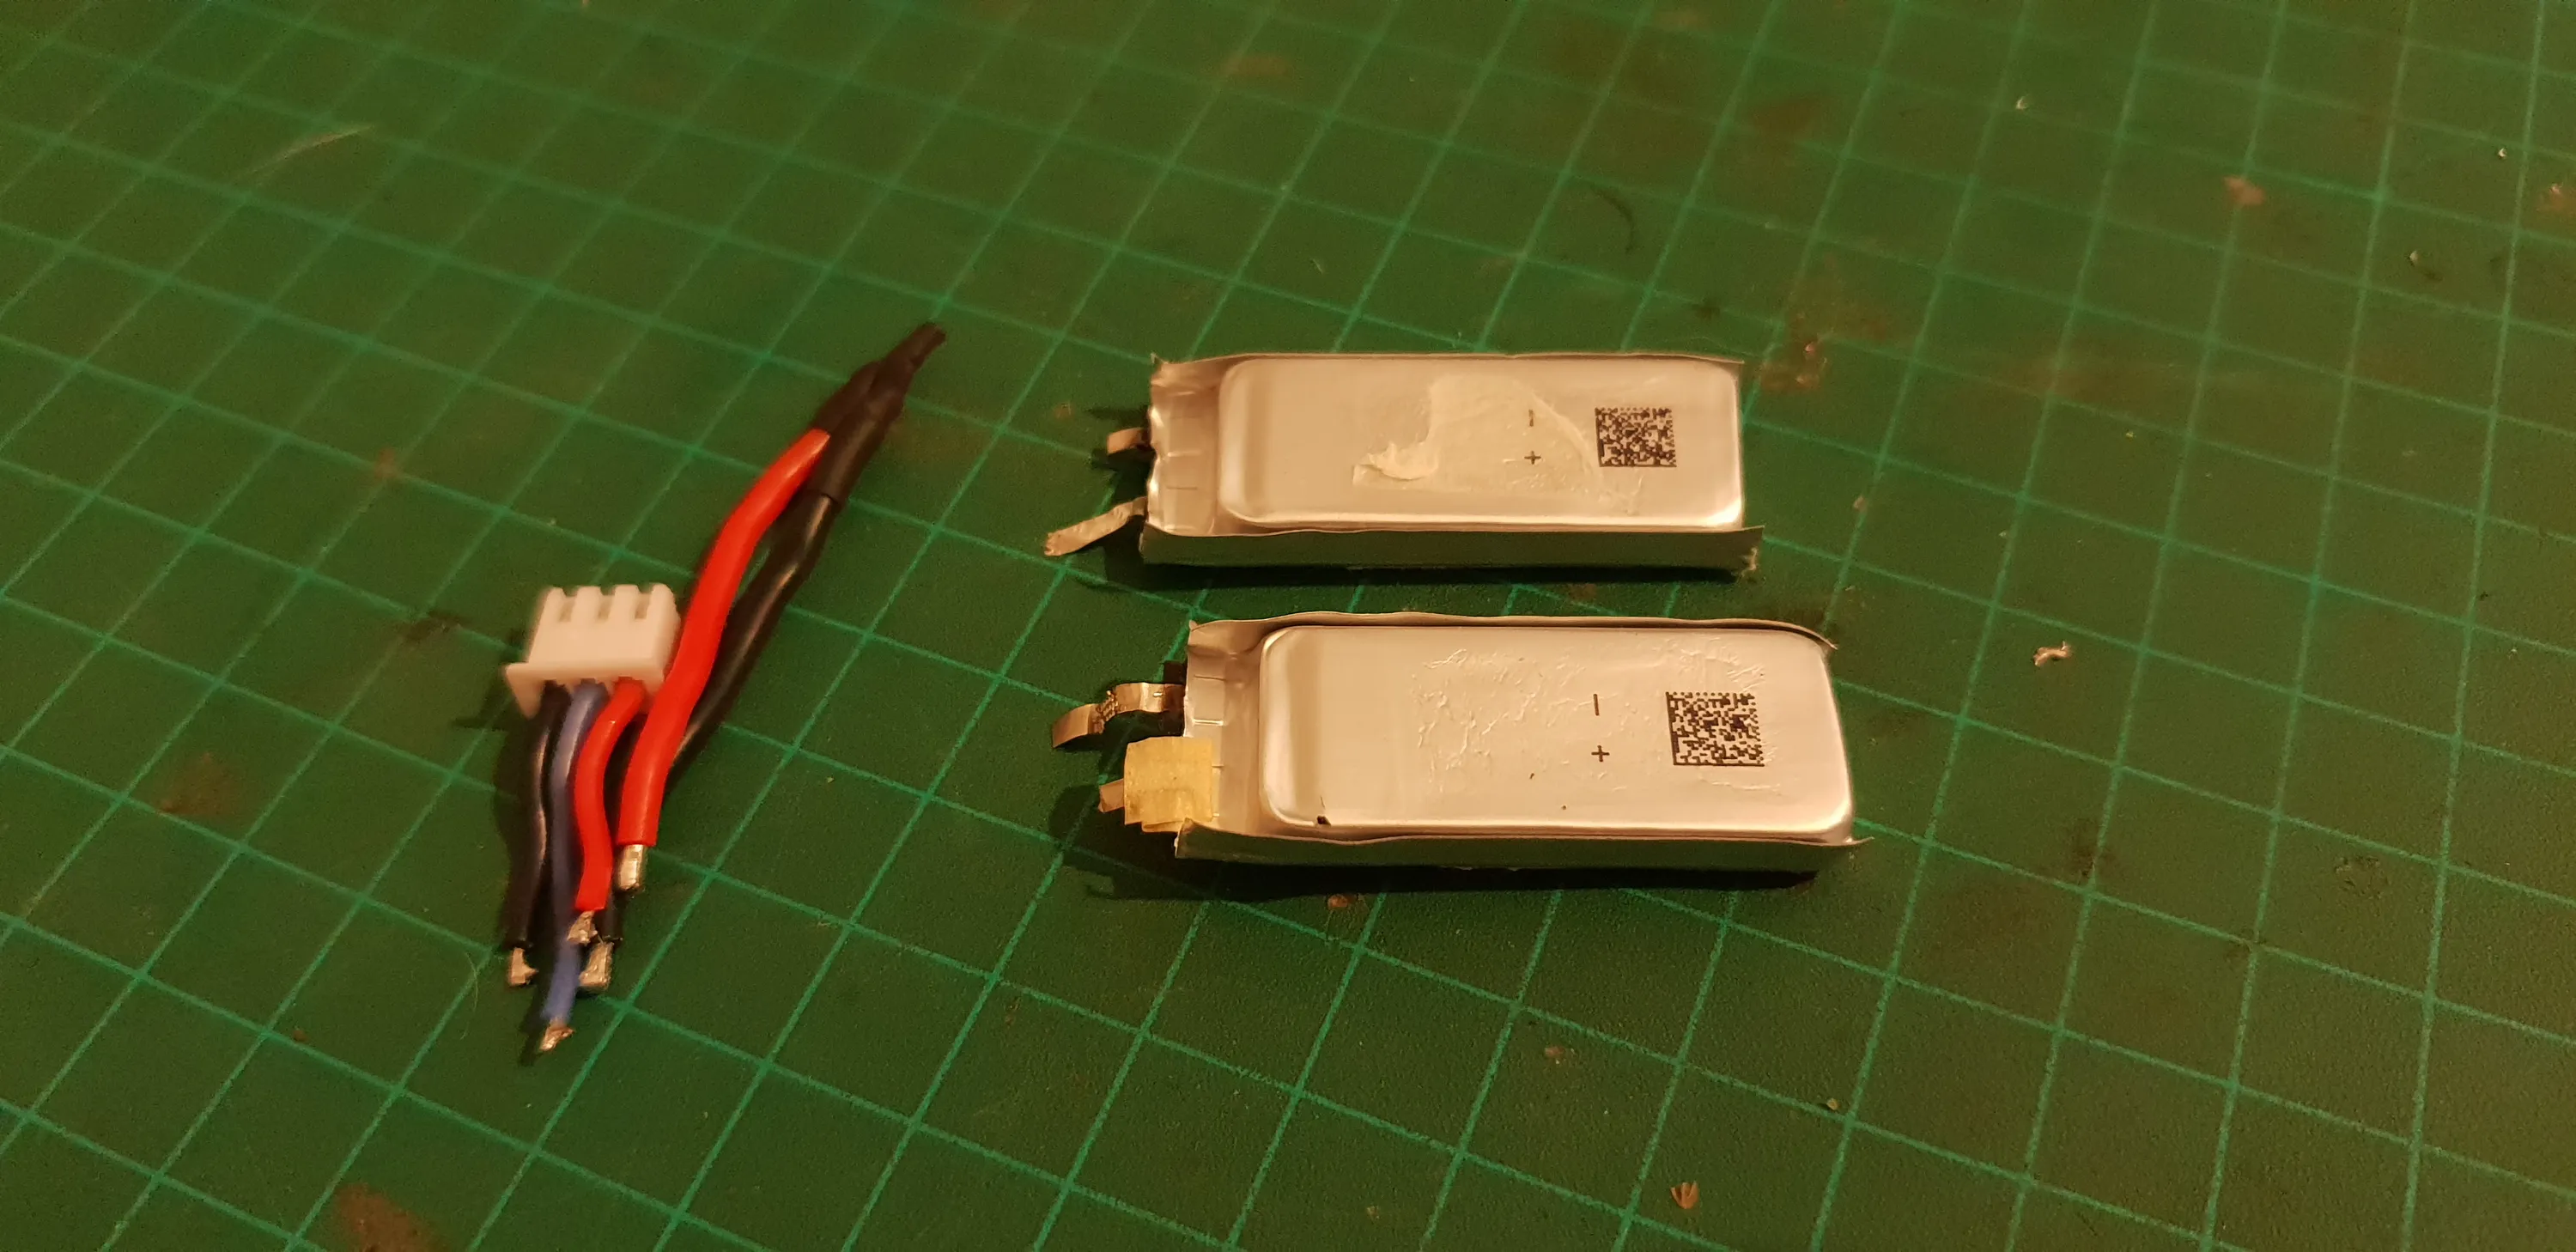
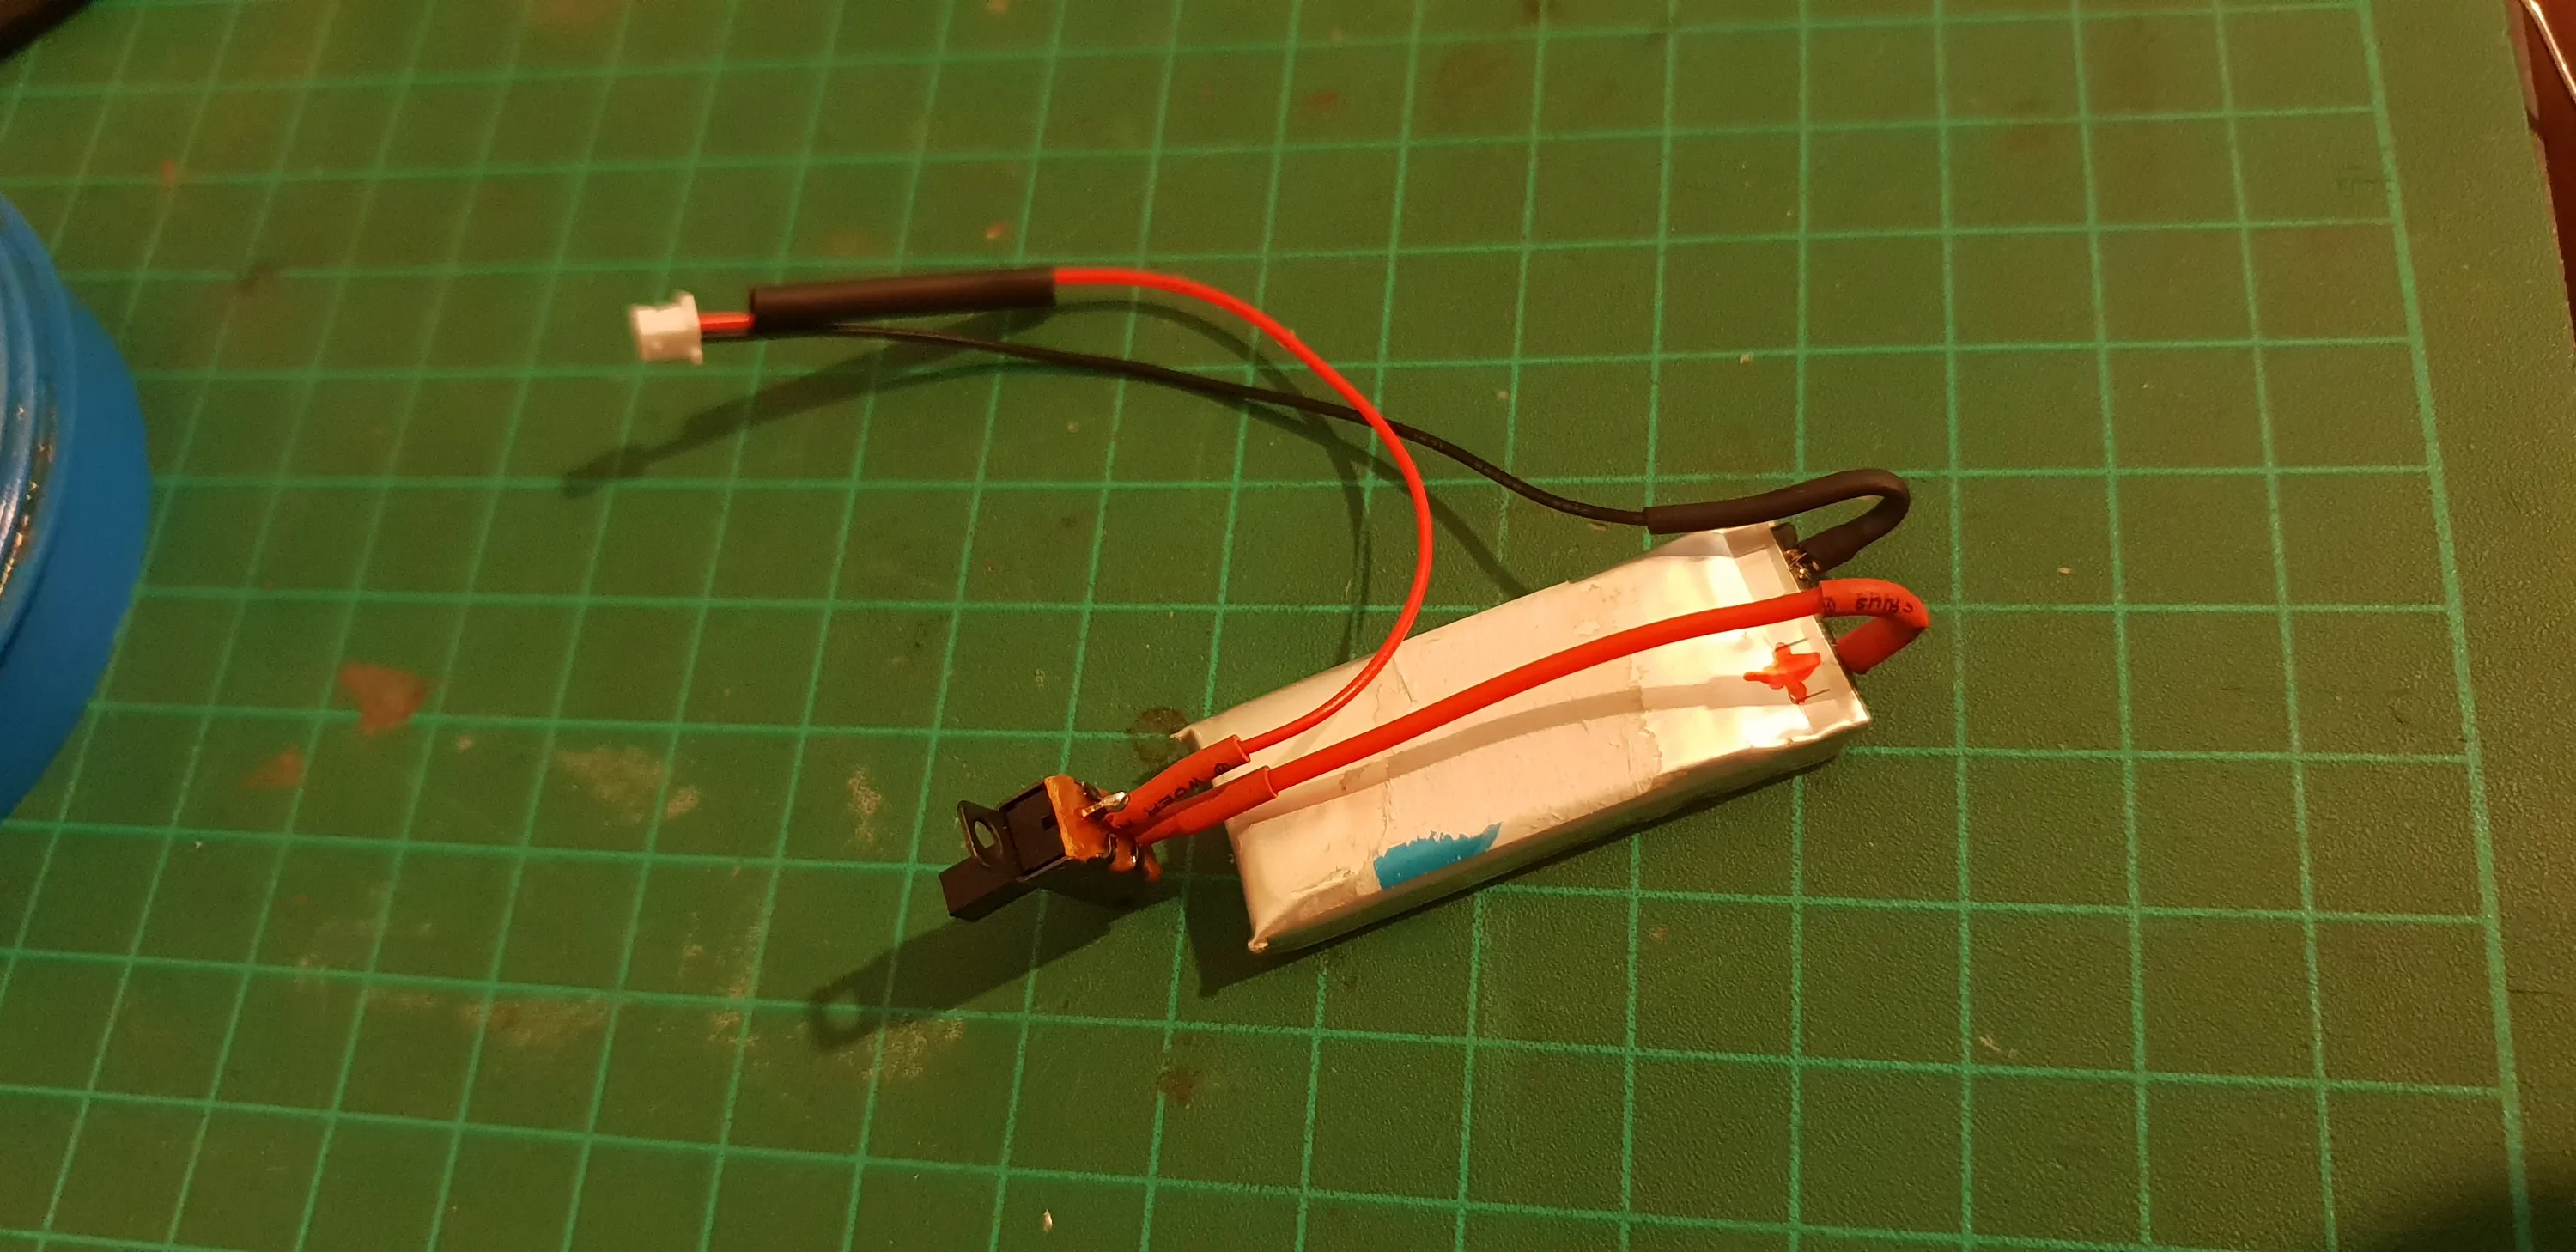
The battery I went with is a single cell from a 2S li-po drone battery I took apart. It’s roughly the same size as the board, so it will fit nicely in a case behind it.
Controls
No controls for this version.
They add complexity in both the software and hardware and provide little value. Especially when the device has WiFi and I can interact with it in other, purely virtual, ways.
Indication
I have decided to go with a single RGB LED for indication. It gives the best balance between footprint and the amount of information it provides. I have also encoded the network connection state to colors and blinks after initialization, so it displays even more now.
I’ll utilize the OLED again because it’s there, but it probably uses a lot more power than the LED and I can get more battery life without it.
I won’t invest too much into the interface, I’m not sure it’ll make it to the final cut.
It’ll just display the temperature and network status to assist in testing.
Case
The case will have a unibody design made out of TPU with a clear PLA diffuser for the LED.
The diffuser will be removable to expose the USB port.
I kept the felt sticker at the bottom to create a gap between the case and the hot cup. While The TPU can withstand the heat, It’s not good for the battery inside.
Probe
The probe is the same, but I tilted it towards the middle of the cup for better measurement.
It makes the device a little bigger and more awkward to store and carry, because the probe is poking outward a bit, bit thanks to the TPU body that holds it, it can flex without damage.
Maybe I’ll add some better strain relief to the cable at the board end and a folding design in the next version.
V3 - Ideas
V2’s size is OK. It fits in my pocket and it’s not too big or heavy to hang off of smaller cups, but it can be smaller with some design tweaks.
One idea I had was to reuse a vape pen’s body and battery. They already fit each other with maximum spatial efficiency and there’s usually a built in charging circuit.
A challenge of this design would be extending the WiFi antenna so it’s outside the metal body.
Like I mentioned before, the way the probe is mounted is not ideal. I’ll want to add more strain relief to the cable and maybe add a folding design where the probe and be held securely to the body when not used.
LEDs are enough. I don’t need the OLED. It’s nice to have, but it adds a lot of complexity and adds little value in return.
The single RGB LED is fine. It gives me all the info I need, but I’d like to experiment with 7 a segment or maybe just bring back a smaller 8 LED row and binary encoding.
No OLED would also mean better battery life and/or a smaller battery and body.
just for fun, I’d like to add temp sensor for the ambient temperature, to measure and track the temperature differences and timing, and maybe try to predict the amount of time it will take to reach the target.