FPV Prank - video jammer
A few friends and I started flying FPV quadcopters.Sometimes, when your VTx frequencies are close to each other you can get your friends feed overpower yours if their signal is stronger and/or closer.
This gave me an idea - what if I could make a device that spams a custom feed at high power to make their receivers lock onto it instead of their own drone’s. I might be able to make them think their drone was hacked.
How It Usually Works
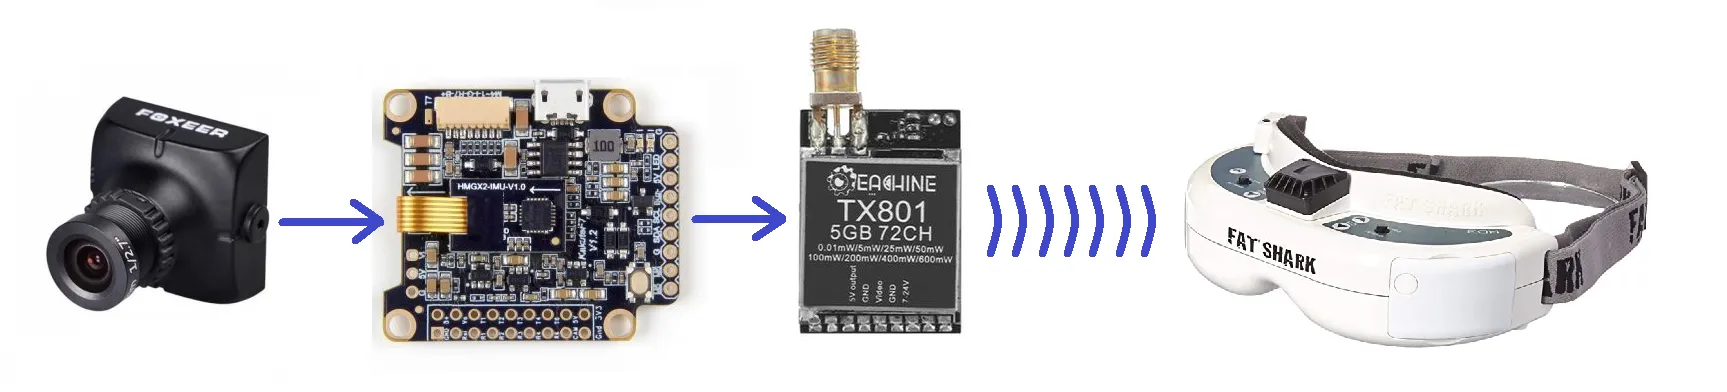
The principle is pretty simple - there’s a camera on the drone that outputs analog composite video.That signal often goes through the flight controller or a dedicated OSD (on screen display) board and gets an overlay with useful live information on it before it gets to the transmitter.The transmitter transmits it over radio at 5.8Ghz to be received by a receiver attached to a screen or FPV goggles.
The transmission frequency can be configured between a certain band. We try to use the entire band and distance our frequencies as much as possible to not interfere with each other’s signal. That way, we can have multiple drones in the air simultaneously.
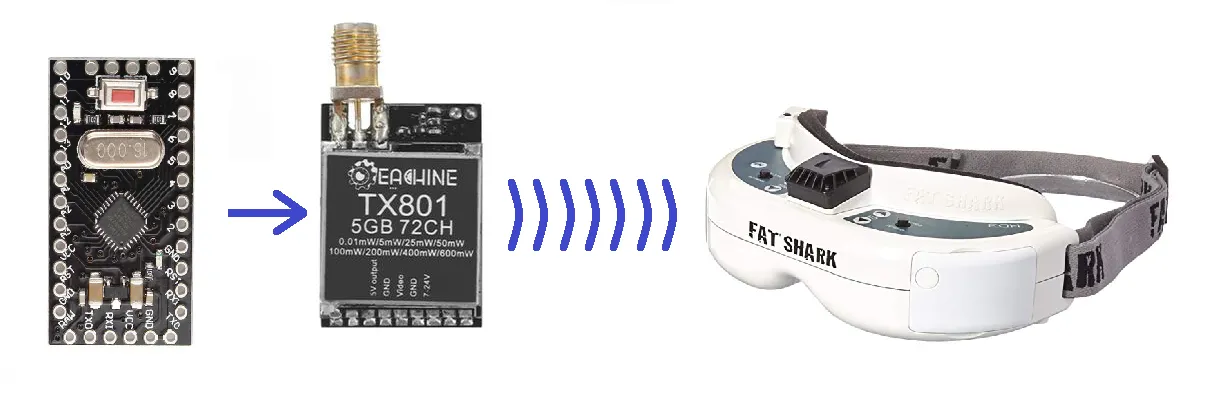
How I Want It To Work
I want to make my friends’ goggles see my image instead of their drone.For that to happen I need my signal to be much stronger than their drone’s at the receiver antenna of their goggles.This can be achieved by either having a transmitter that’s more powerful than theirs or having the transmitter closer to the receiver. I’m going to do both
Proximity
We usually sit pretty close to each other when we fly, so I can easily place the transmitter very close to their receiver without it looking suspicious.I can also just plant it in their bag, but that would make it hard turning it on and off on demand (to add to the frustration when it stops happening when they try to show it to someone else).
Transmission Power
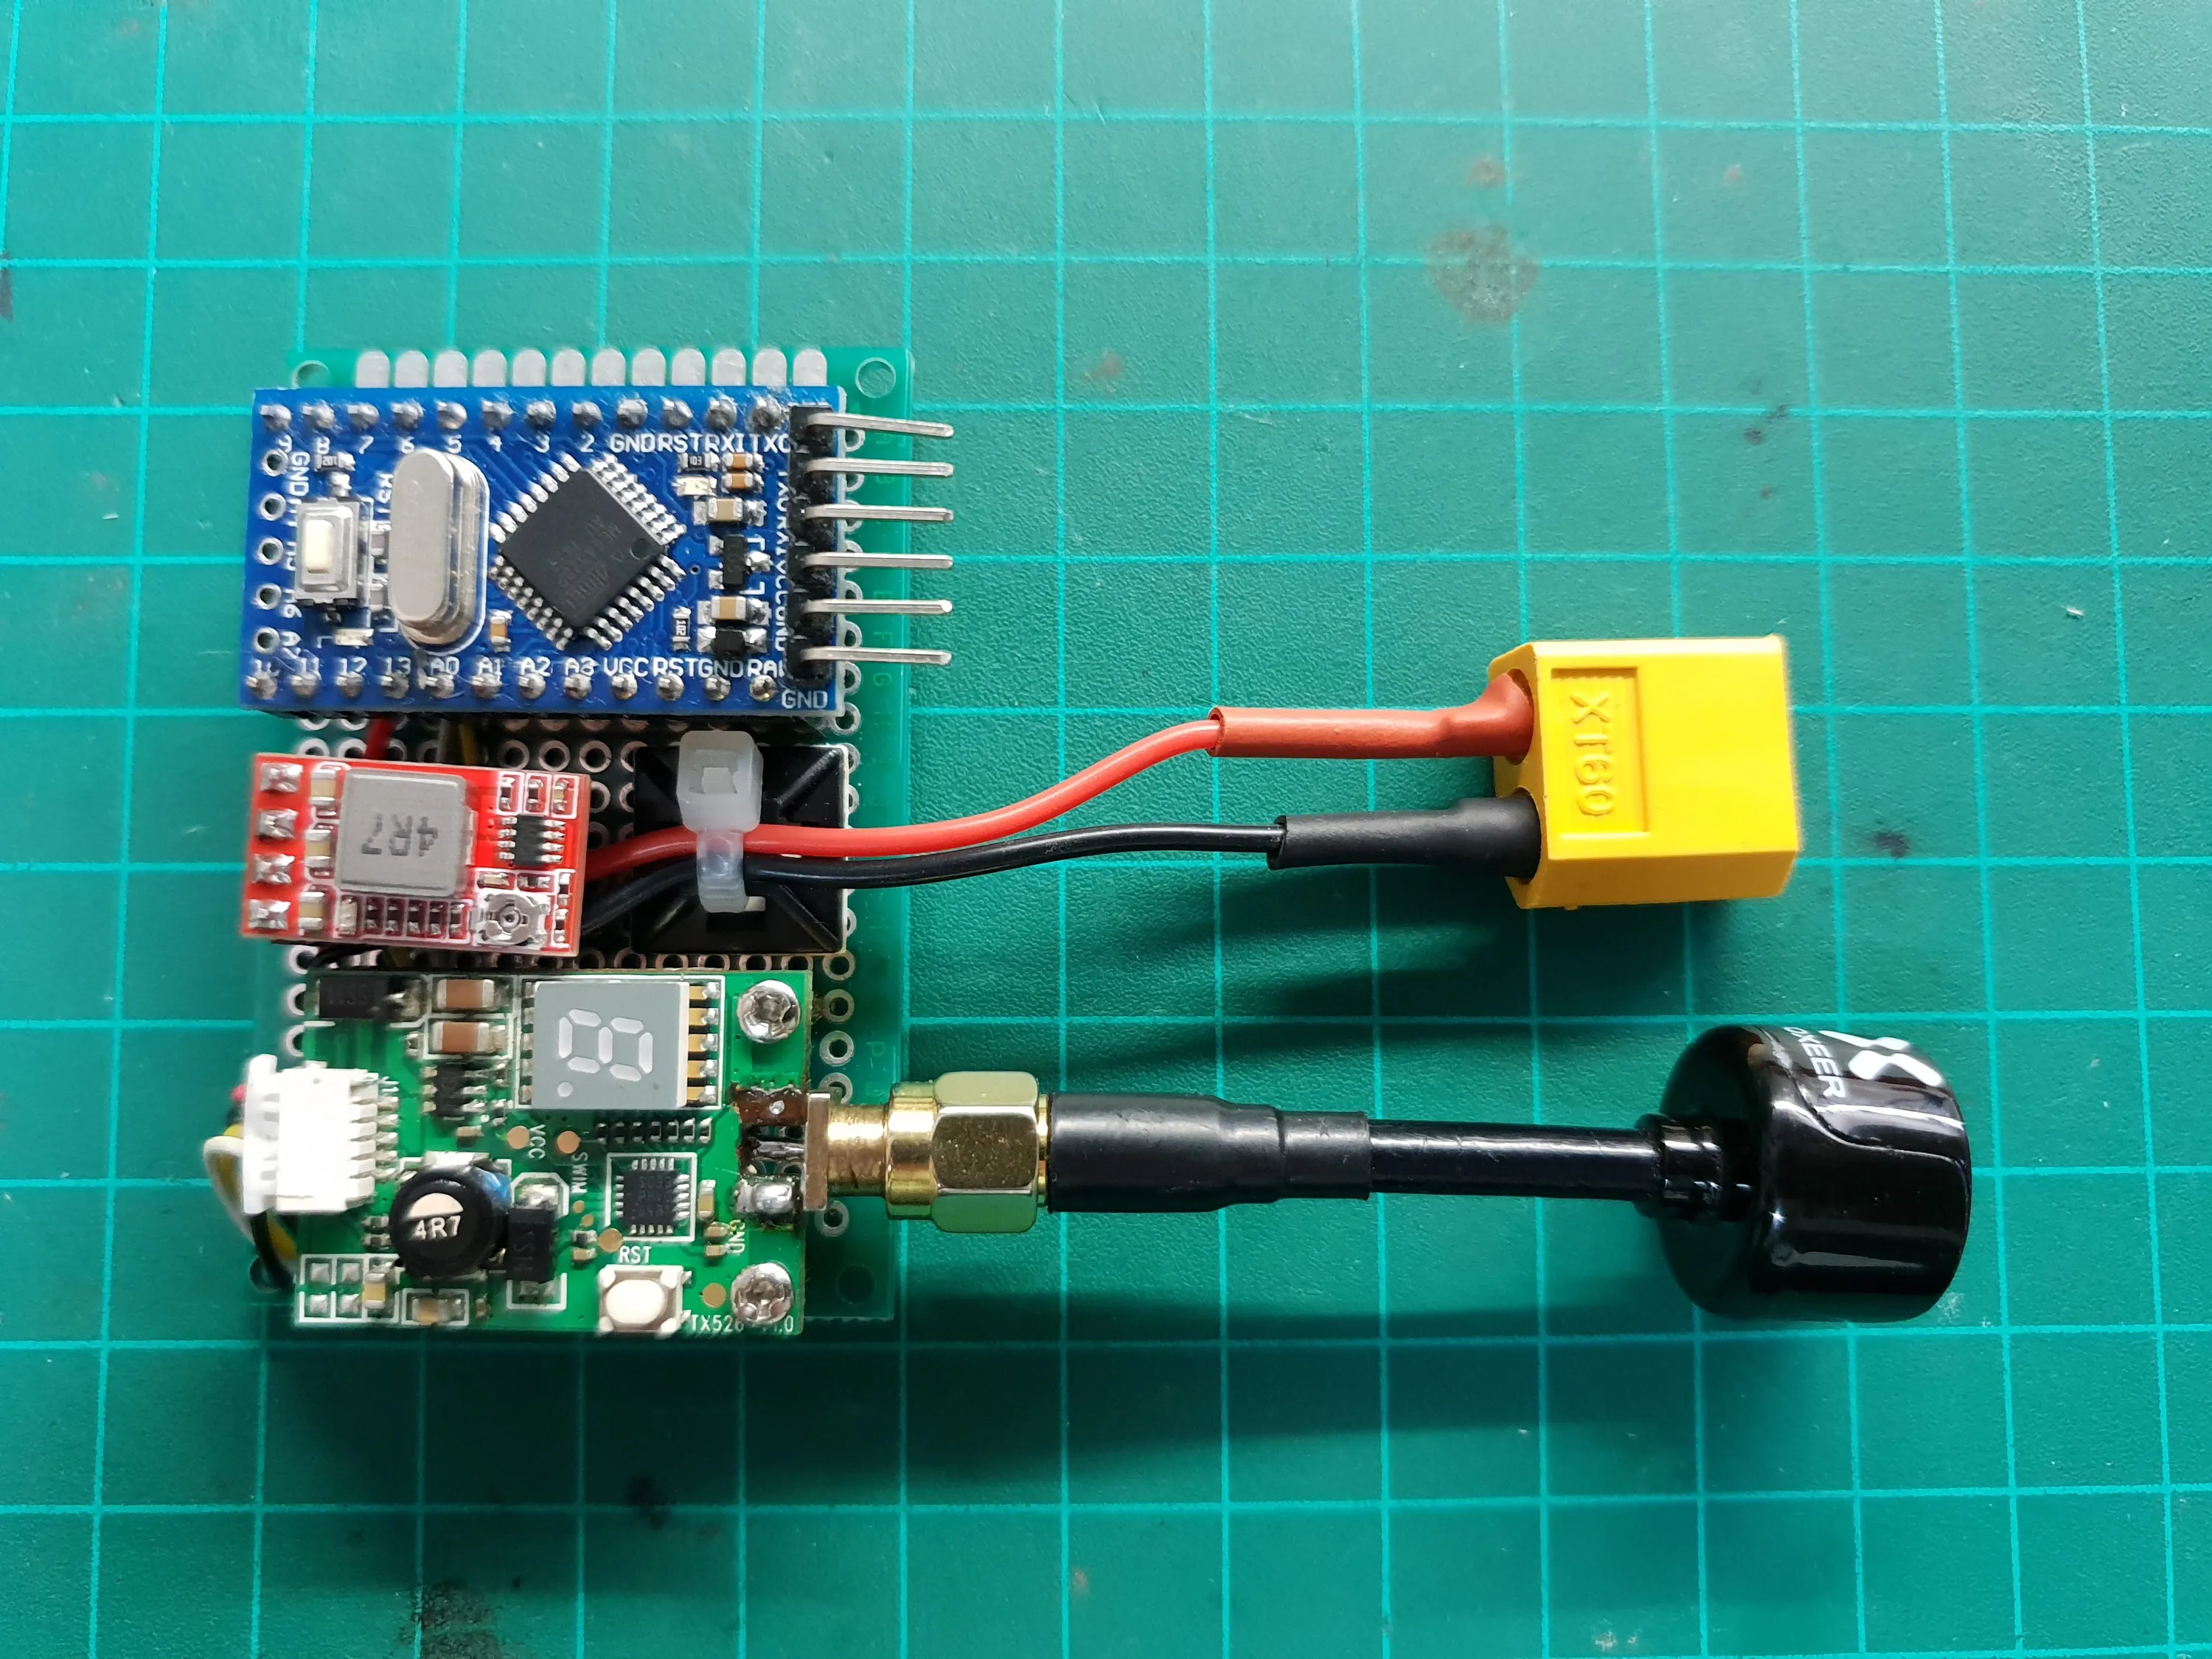
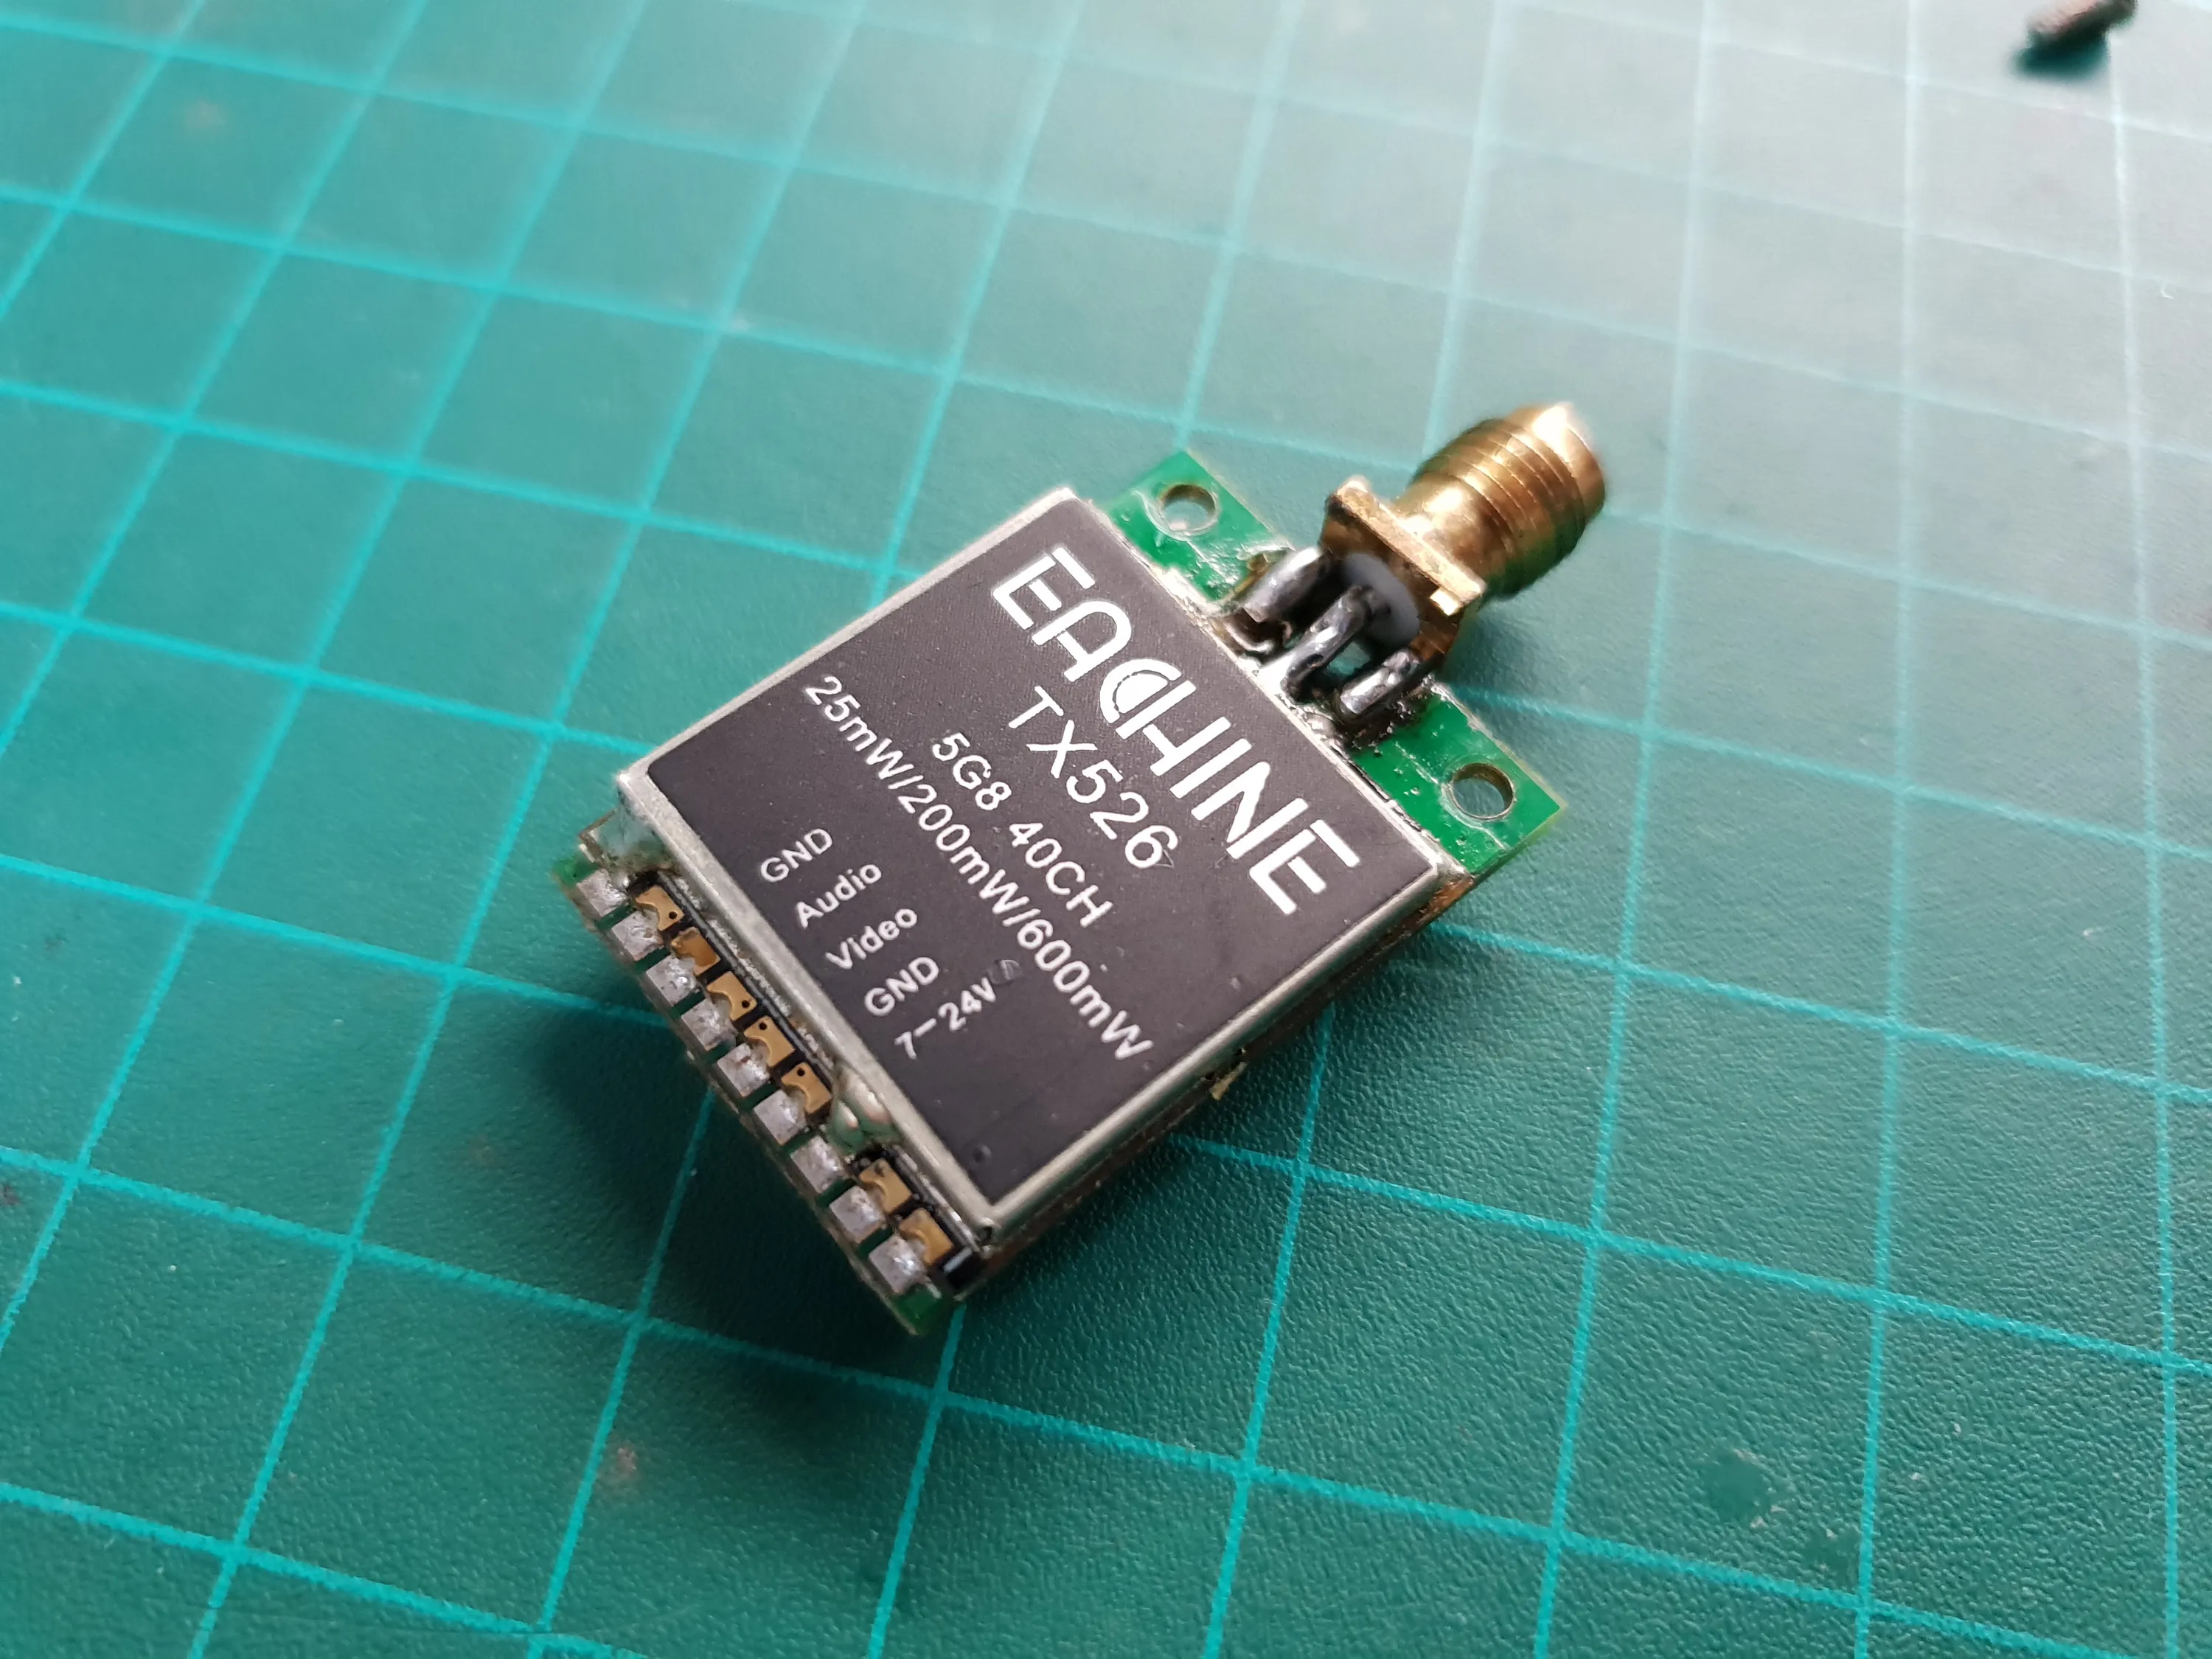
I already have a video transmitter similar to what we have on the drones, It can transmit at 600mW (which is more than what we use regularly, but not more than the maximum of some of our transmitters).I need some way to power it and some way to input the image I want in composite video form.
Input
In order to generate the composite video signal, I used an Arduino Pro Mini and the IMG2TV example for the TVout library.Taken from here : https://github.com/metalx1000/Arduino-TVoutSince the arduino has very limited memory space, it can only store black and white images of size 128X64 pixels.There are some ways to store and generate 8-bit color images, but the resolution drops substantially and I’m afraid it won’t be enough.
Code
I took one of the simple examples and simplified it even further to only show a single static image and some text.In the example, the image is stored in another header file in bitmap format.
Main:
#include <TVout.h>
#include "img.h"
#include <fontALL.h>

TVout TV;

void setup() {

  unsigned char w;
  w = pgm_read_byte(img);
  TV.begin(NTSC);
  TV.select_font(font6x8);
  TV.clear_screen();
  //intro();
}

void loop(){
  TV.bitmap(25,15,img);
  delay(2000);
  TV.clear_screen();
  TV.println("\n\n\n\n\n    YOU GOT HACKED\n     AnonimousFPV");
  delay(2000);
  TV.clear_screen();
}
img.cpp :
#include "img.h"
PROGMEM const unsigned char img[] = {
64,64,
0x00,0x00,0x00,0x00,0x00,0x00,0x00,0x00
,0x00,0x00,0x00,0x00,0x00,0x00,0x00,0x00
,0x00,0x00,0x00,0x00,0x00,0x00,0x00,0x00
,0x00,0x00,0x00,0x00,0x00,0x00,0x00,0x00
,0x00,0x00,0x00,0x00,0x00,0x00,0x00,0x00
,0x00,0x00,0x00,0x00,0x00,0x00,0x00,0x00
,0x00,0x00,0x00,0x00,0x00,0x00,0x00,0x00
,0x00,0x01,0xff,0xff,0xff,0x00,0x00,0x00
,0x00,0x03,0xff,0x7f,0xf0,0x00,0x00,0x00
,0x00,0x07,0xf9,0xff,0xff,0xff,0xc0,0x00
,0x00,0x0f,0xef,0x3f,0xe1,0xe0,0xd8,0x00
,0x00,0x1f,0xd9,0xff,0xff,0xff,0xfe,0x00
,0x00,0x3f,0x6e,0xff,0xff,0xf0,0xff,0x00
,0x00,0x7d,0xd7,0xff,0x7f,0xff,0xff,0x80
,0x00,0x7f,0xaf,0xff,0x7f,0xff,0xdf,0x80
,0x00,0xff,0xdf,0xff,0xff,0xbf,0xff,0xc0
,0x00,0xff,0xbe,0x0f,0xff,0xbf,0xff,0xc0
,0x01,0xff,0xf0,0x01,0xff,0xff,0xff,0xc0
,0x01,0xff,0xe0,0x1c,0x7f,0xe0,0x3f,0xe0
,0x00,0x7e,0x40,0x1e,0x7f,0xc0,0x0f,0xe0
,0x03,0xff,0xc3,0xc1,0x3c,0x00,0x3f,0xd8
,0x07,0x07,0xff,0x70,0x7e,0x0f,0xff,0xec
,0x2e,0x70,0x7c,0x7e,0xff,0x3f,0xff,0xdc
,0x3c,0xfc,0x10,0xff,0xff,0x3f,0xf0,0x38
,0x39,0xef,0x83,0xff,0xff,0xbe,0x27,0x3c
,0x79,0xe3,0xff,0xff,0xff,0x9f,0x0d,0xec
,0x79,0xc1,0xff,0xfc,0x7f,0xc7,0xfd,0xec
,0x78,0x0c,0x3f,0x09,0xff,0xe3,0xf9,0xf8
,0x39,0xcf,0x0f,0xfb,0xff,0xe1,0xf8,0xfc
,0x29,0xef,0x81,0xf9,0x07,0xe2,0x78,0xe8
,0x37,0xe3,0xd8,0x3d,0xfe,0x9f,0xf0,0x70
,0x1b,0xf0,0xcf,0x07,0xfe,0x1f,0xe0,0x70
,0x07,0xf0,0x0f,0xe0,0x3f,0xfe,0x00,0x60
,0x03,0xfb,0x07,0xe4,0x00,0x00,0x34,0x60
,0x03,0xfd,0xc0,0x6f,0xe0,0x06,0x74,0x60
,0x01,0xfc,0xc0,0x0f,0xf7,0x9e,0x30,0x60
,0x01,0xfe,0x4c,0x03,0xf7,0x9f,0x20,0x60
,0x00,0xff,0x1f,0xc0,0x00,0x00,0x00,0x60
,0x00,0xff,0x9f,0xc0,0x00,0x00,0x00,0x60
,0x00,0x7f,0xcf,0xcf,0x00,0x00,0x00,0x60
,0x00,0x7f,0xe3,0xdf,0xc0,0x00,0x02,0xe0
,0x00,0x3f,0xf1,0x9f,0xcf,0x00,0xd0,0xe0
,0x00,0x0f,0xfc,0x3f,0xcf,0xb9,0x91,0xe0
,0x00,0x0d,0xdf,0x1f,0xcf,0x39,0xb1,0xe0
,0x00,0x03,0xf7,0xc0,0xcf,0x3a,0x07,0xe0
,0x00,0x00,0xfc,0xfc,0x00,0x00,0x3f,0xe0
,0x00,0x00,0x77,0x7f,0xf0,0x0f,0xff,0xe0
,0x00,0x00,0x1e,0xef,0xff,0xff,0xff,0xe0
,0x00,0x00,0x07,0x3b,0xff,0xff,0xff,0xe0
,0x00,0x00,0x00,0xf3,0xc0,0xff,0x3f,0x70
,0x00,0x00,0x00,0x7e,0x3f,0xff,0xfe,0xf0
,0x00,0x00,0x00,0x1f,0xf8,0xff,0xfb,0xf0
,0x00,0x00,0x00,0x03,0xff,0xff,0xff,0xe0
,0x00,0x00,0x00,0x00,0xff,0xff,0xff,0xe0
,0x00,0x00,0x00,0x00,0x0f,0xff,0xff,0x80
,0x00,0x00,0x00,0x00,0x00,0xff,0xff,0x00
,0x00,0x00,0x00,0x00,0x00,0x0f,0xfc,0x00
,0x00,0x00,0x00,0x00,0x00,0x00,0x00,0x00
,0x00,0x00,0x00,0x00,0x00,0x00,0x00,0x00
,0x00,0x00,0x00,0x00,0x00,0x00,0x00,0x00
,0x00,0x00,0x00,0x00,0x00,0x00,0x00,0x00
,0x00,0x00,0x00,0x00,0x00,0x00,0x00,0x00
,0x00,0x00,0x00,0x00,0x00,0x00,0x00,0x00
,0x00,0x00,0x00,0x00,0x00,0x00,0x00,0x00
};
img.h :
#include <avr/pgmspace.h>
#ifndef img_H
#define img_H
extern const unsigned char img[];
#endif
Image Conversion
As mentioned, The image needs to be converted to an array of values representing a bitmap of the image. For that, I used an online converter.
Before the conversion, the image was resized using Microsoft Paint.

Connection
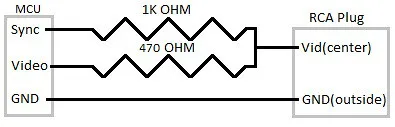
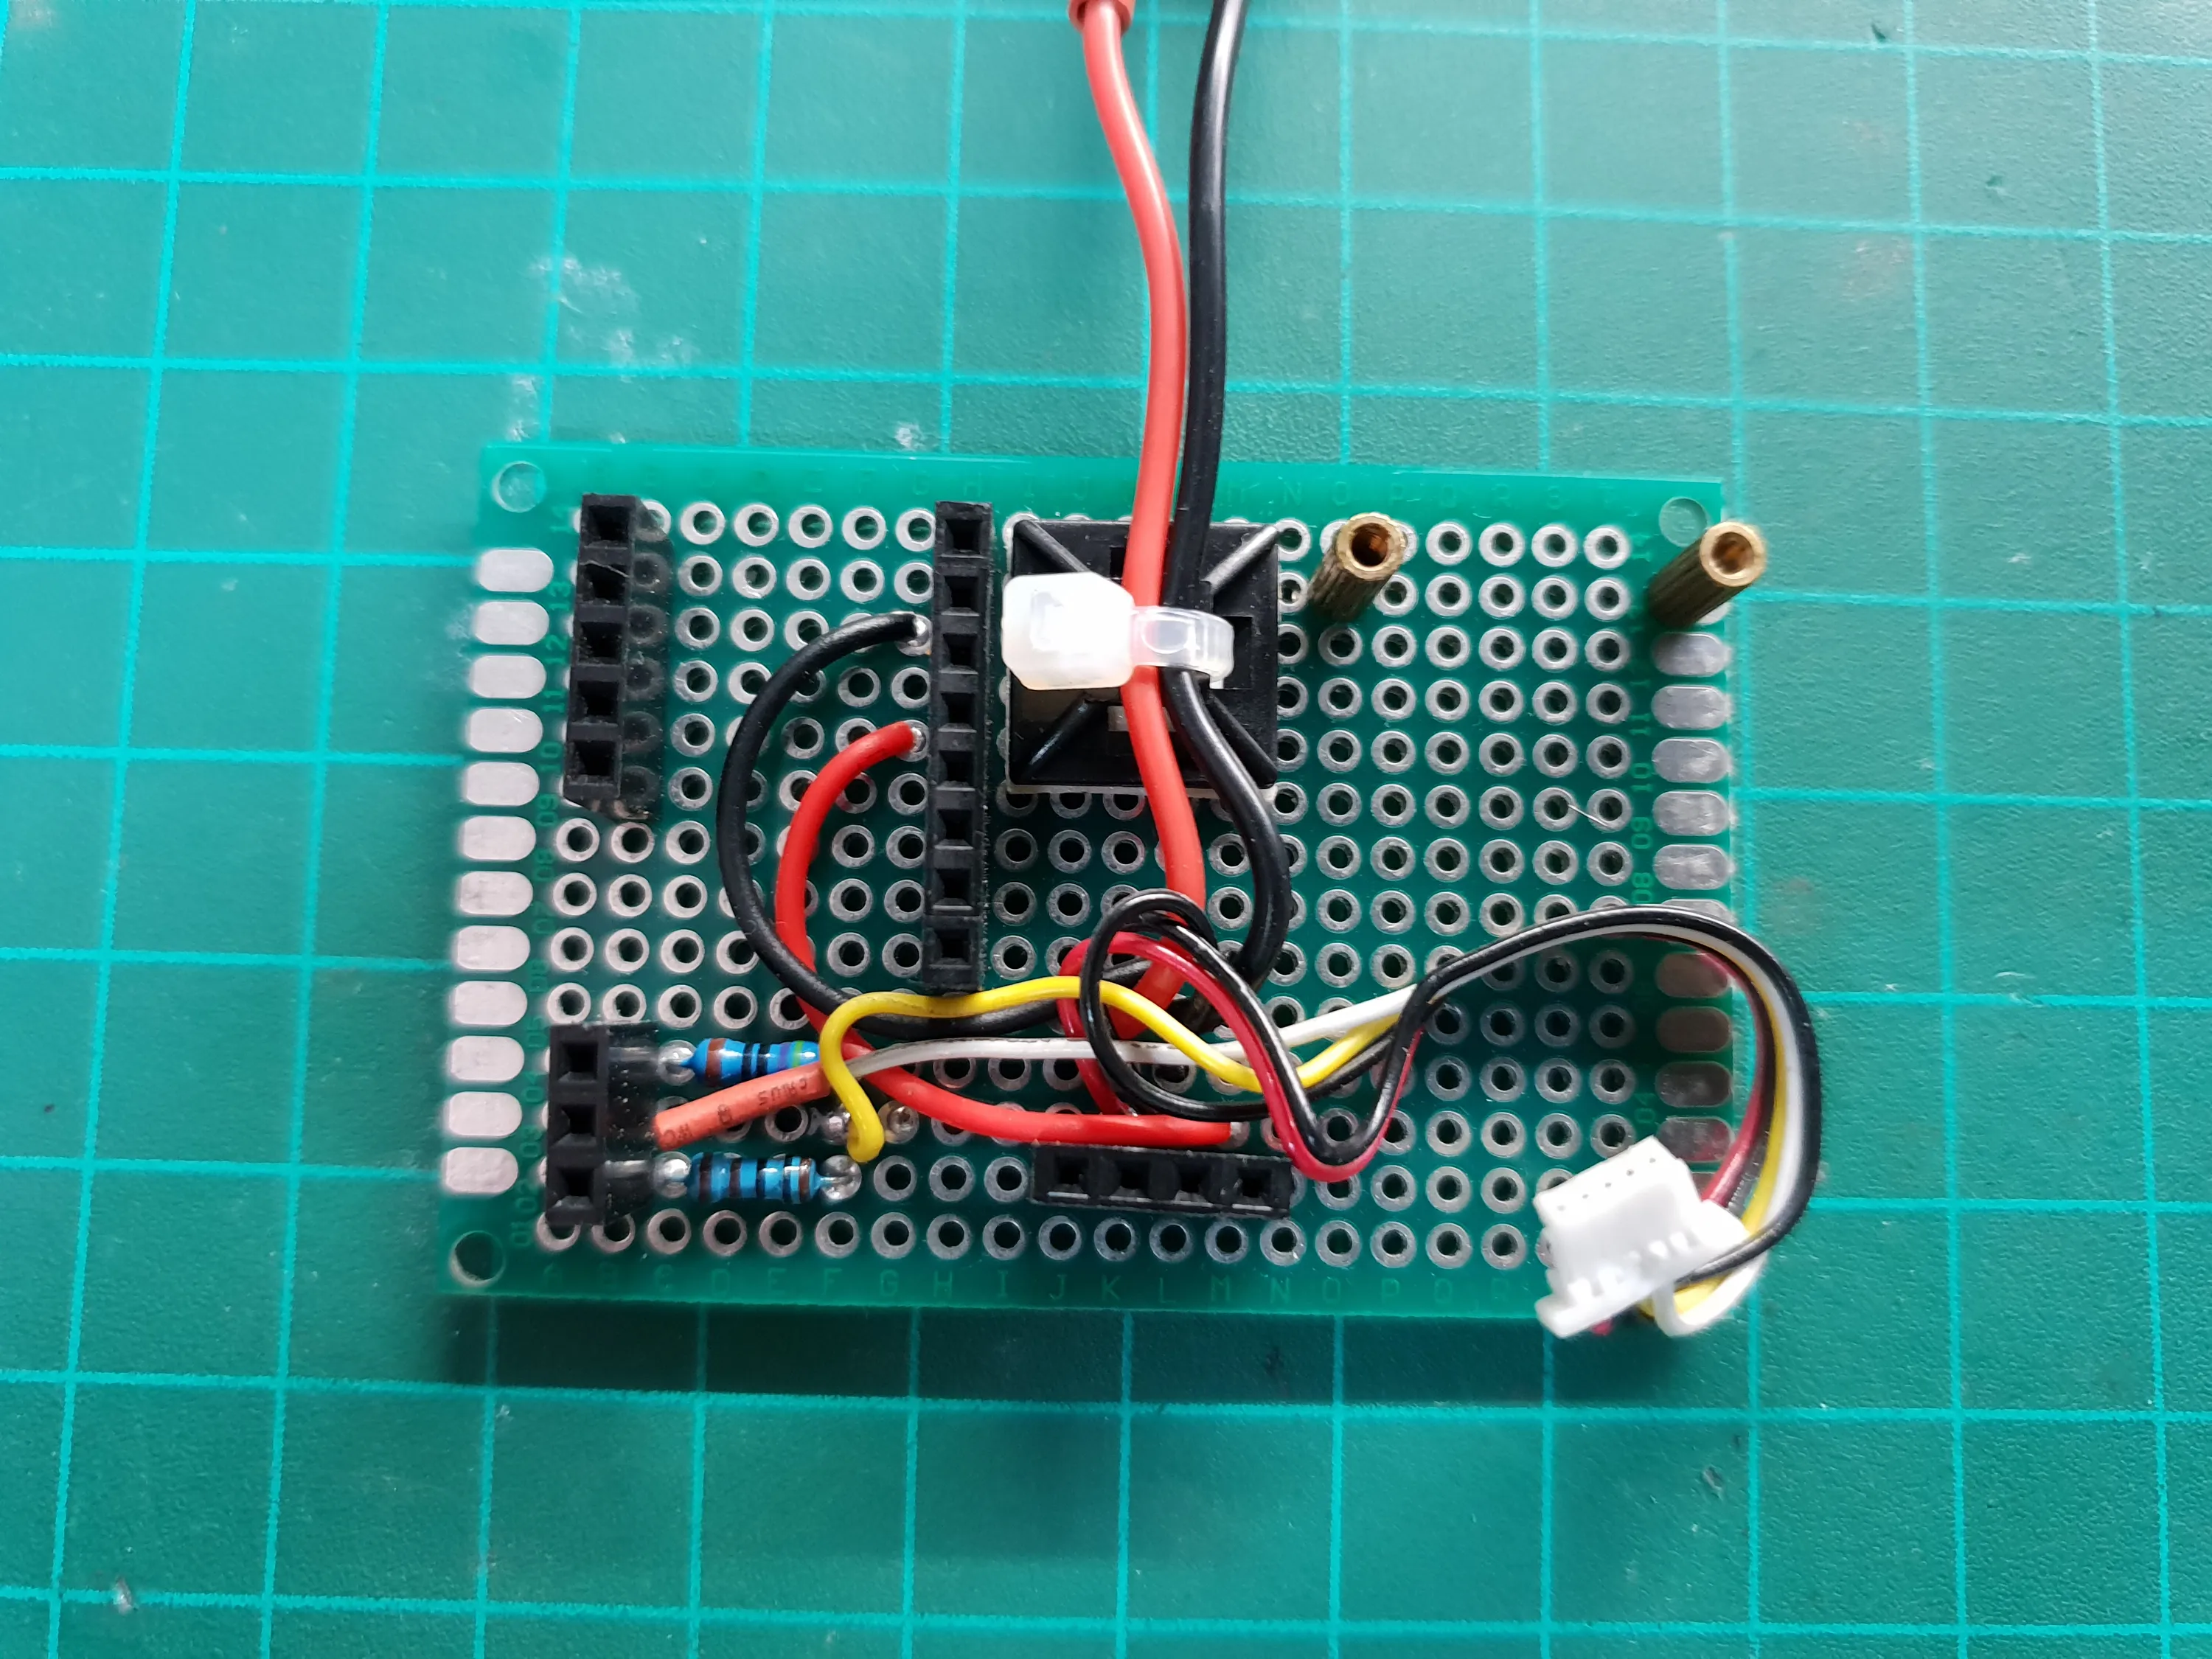
The TVout library documentation shows how the arduino needs to be connected to the composite input. There are two pins that are connected via two resistors to the output wire. From what I understand, the resistors form a voltage divider to lower the arduino’s 5V range to what the transmitter expects to see at it’s input.
Here’s the schematic from the Arduino playground :
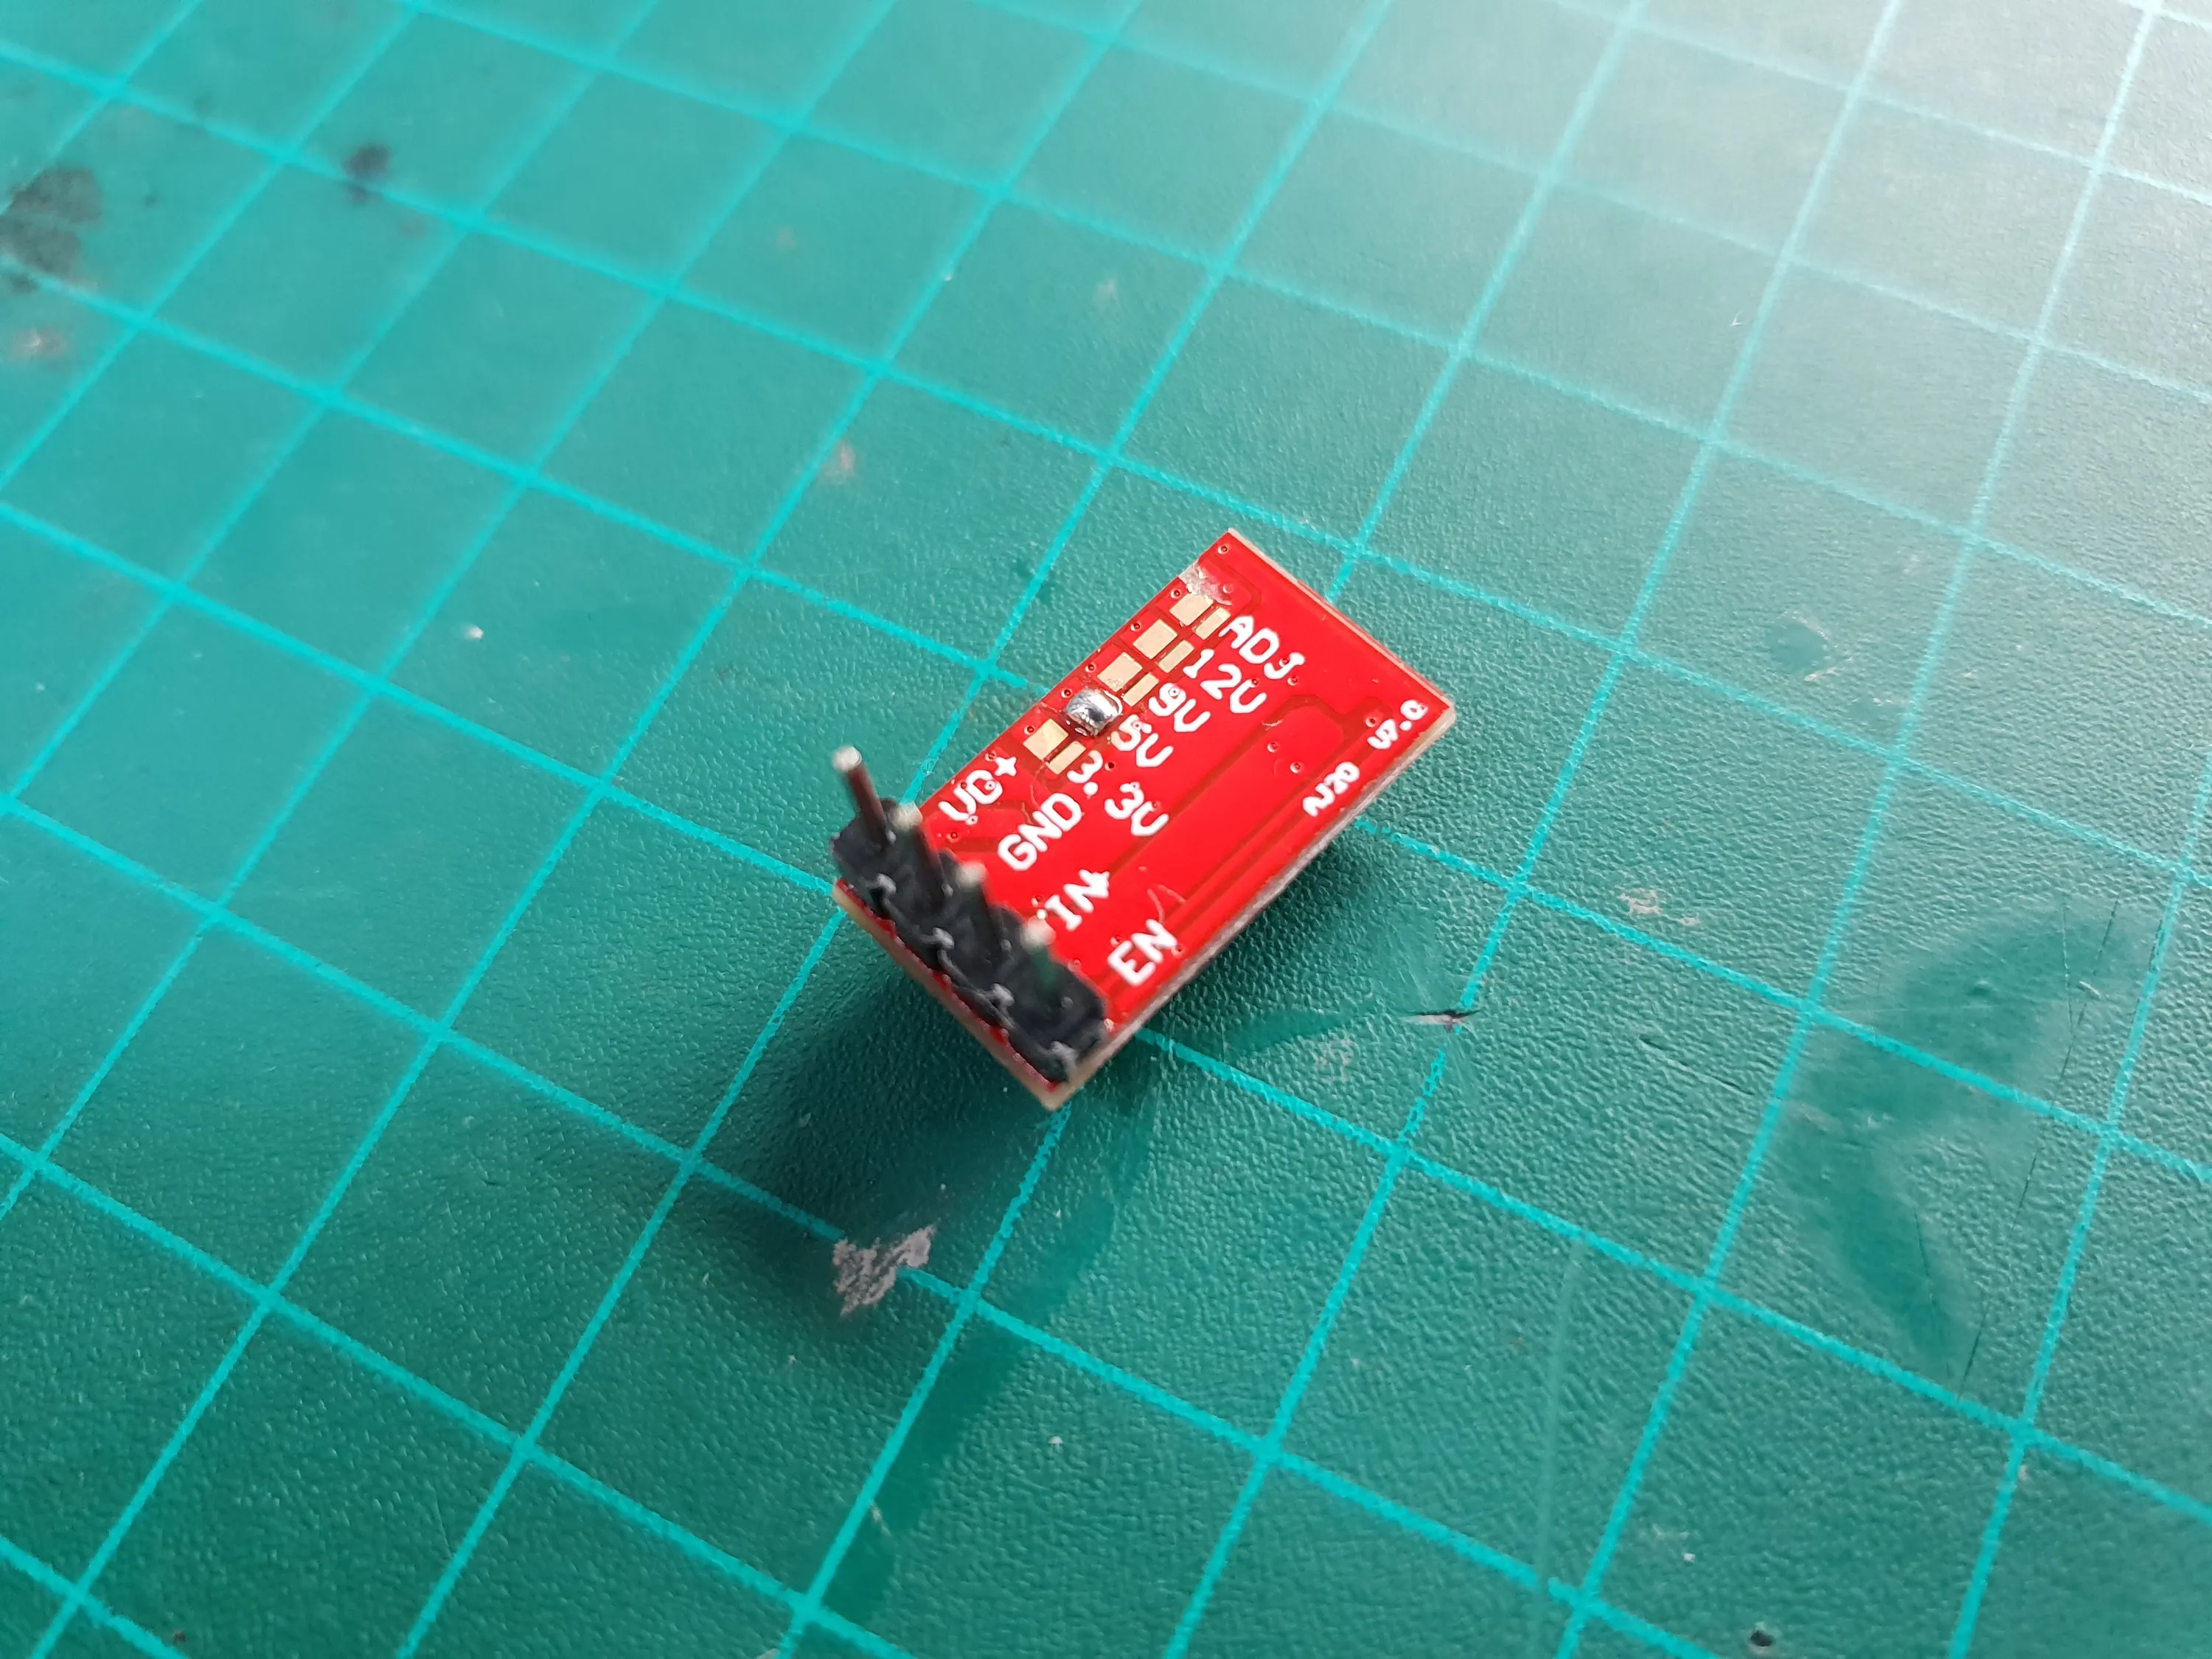
Power
The Arduino Pro Micro doesn’t have a regulator on board, so it need regulated 5V at it’s input.The transmitter itself operates at 5V, but it has a regulator on board and a 5V output. I can, theoretically, supply 5V to the transmitter via its output, but I don;t know if the circuit can survive such back-driving and for how long.
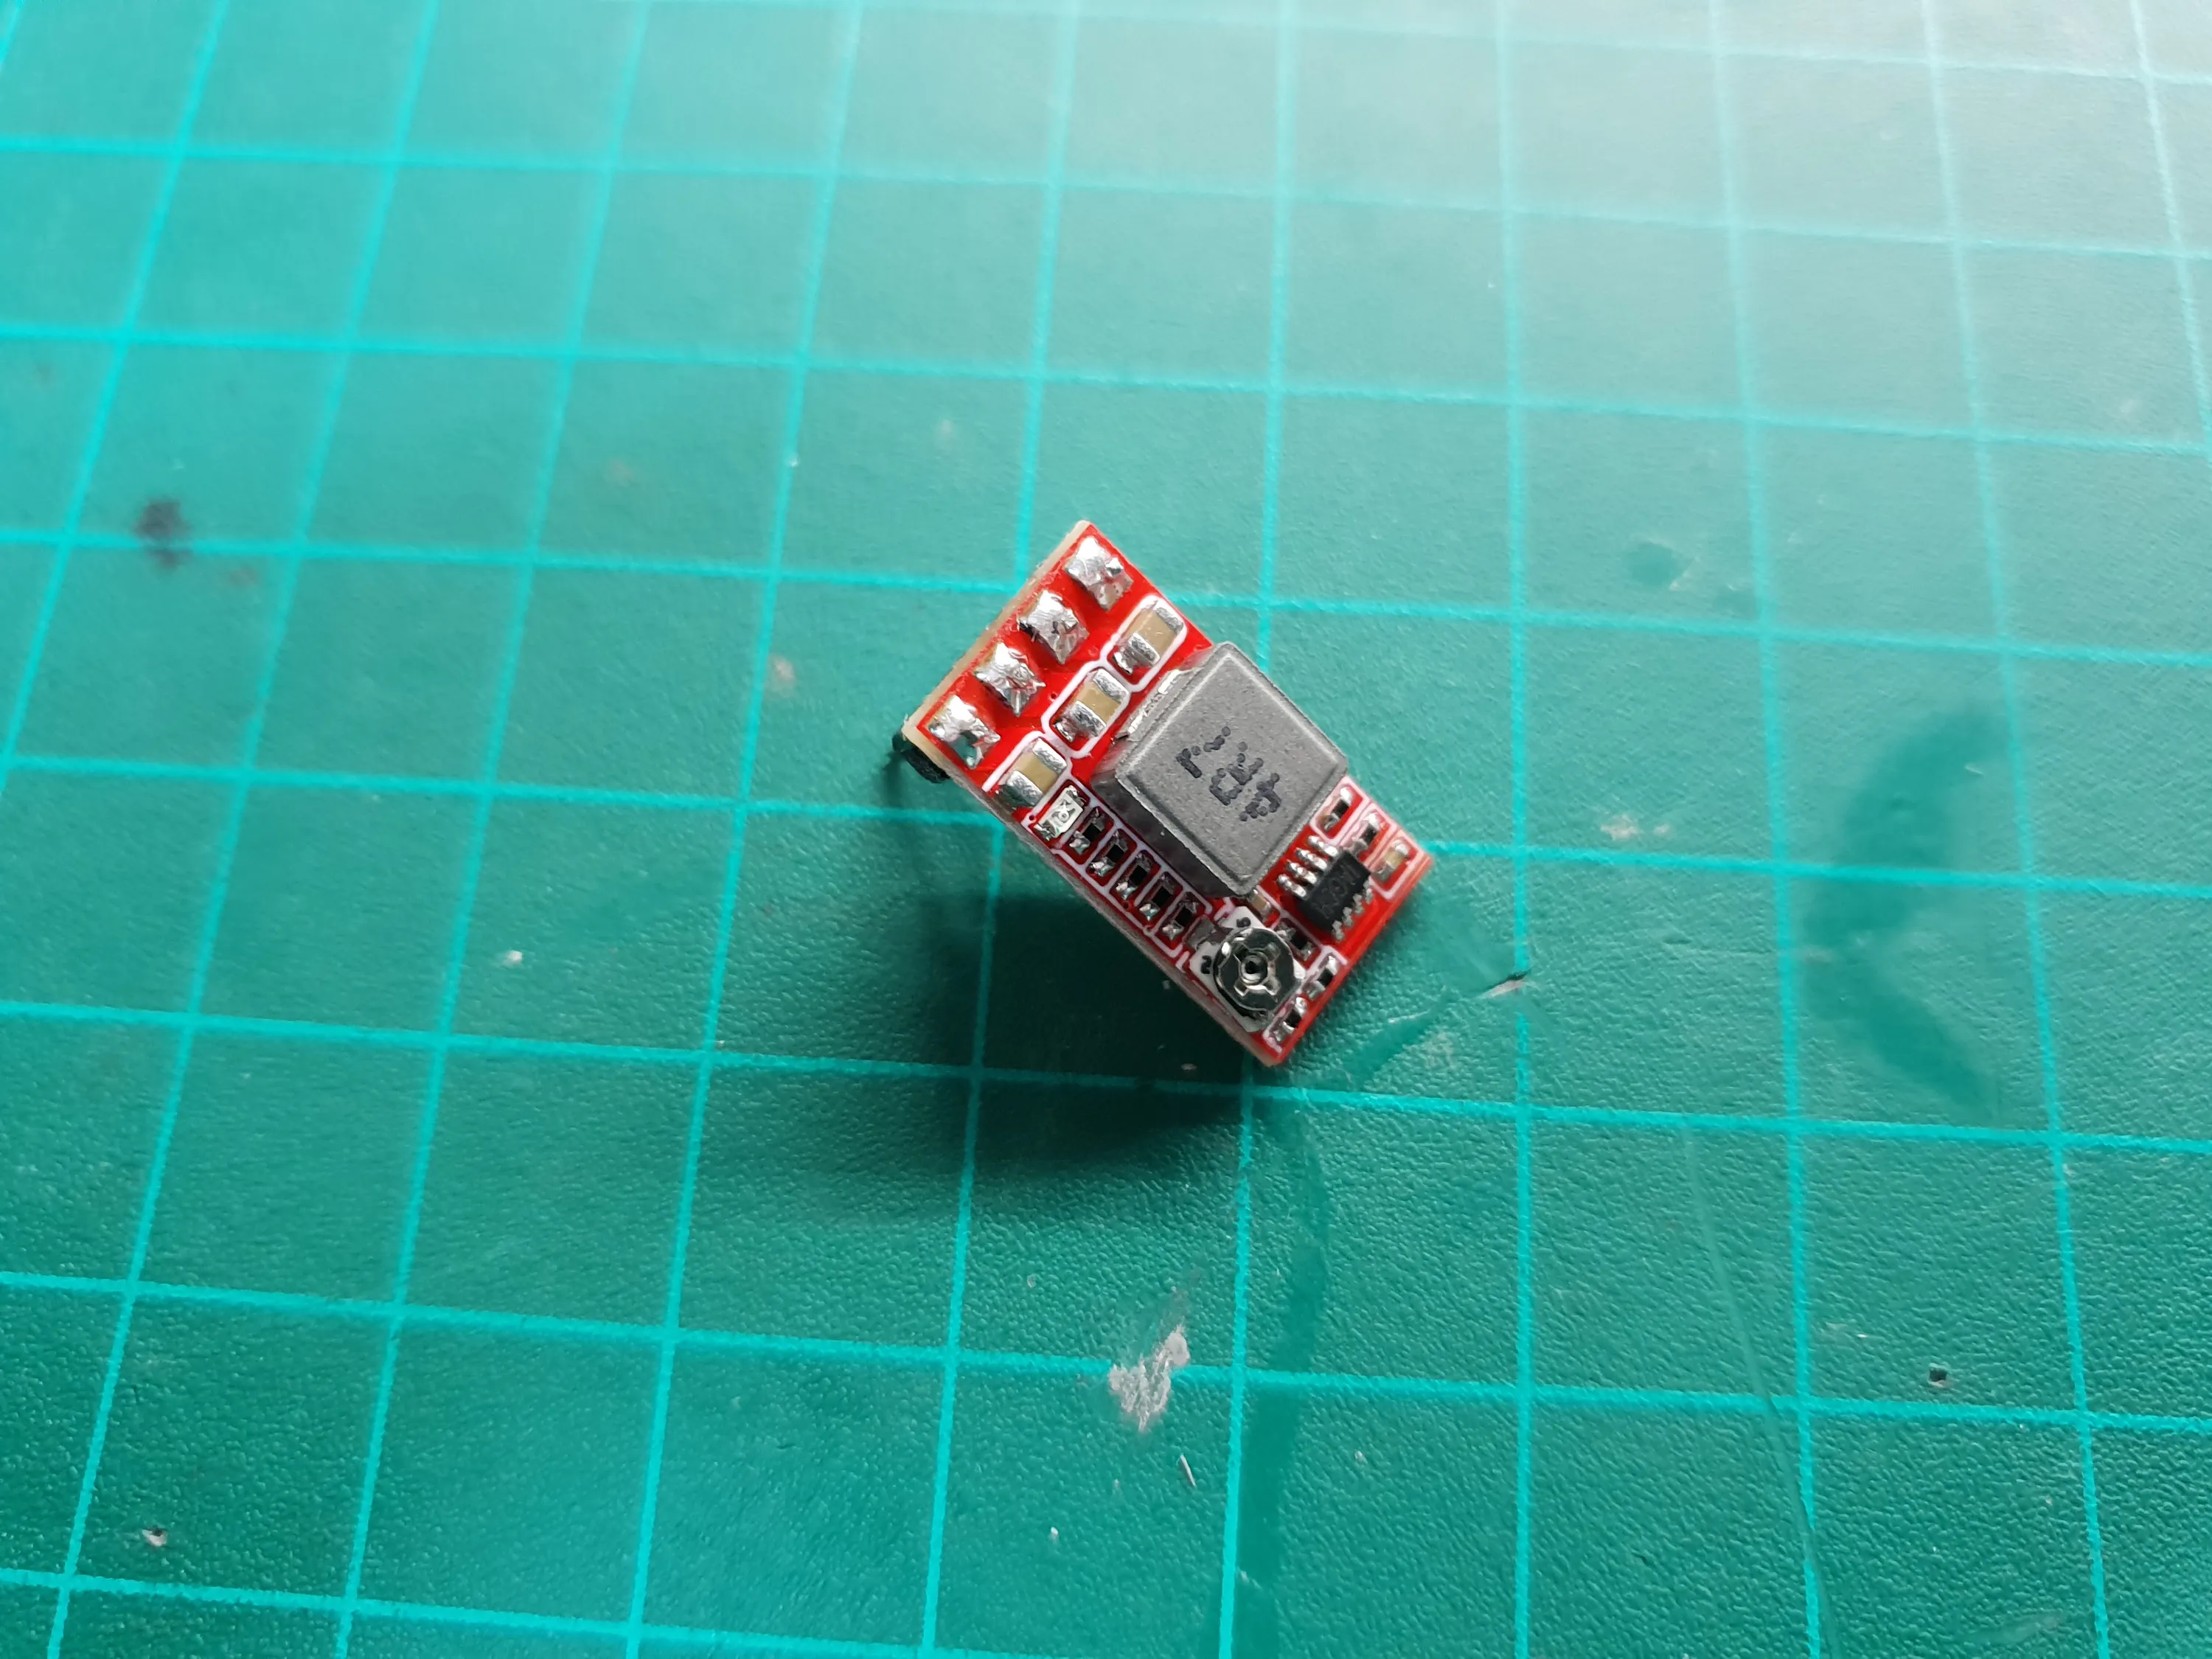
I decided to power the transmitter straight from a li-po battery, like it was intended, and also have a 5V regulator for the arduino.
Improvements
This is not a project I intend on using often or for long, so I’m not sure if I’ll continue developing it, but there are a few ideas that can make it even cooler.
Colorful Images and Videos
It would be cool to be able to show higher resolution and colorful images and videos. Like I already mentioned, The Arduino is capable of some of that, but if I really wanted to take advantage of the maximum composite video can give me, I could use a Raspberry Pi which has a composite video output built in and is more than capable of getting nice video out of it.
The only problem I see with a Raspberry Pi is that it doesn’t start working immediately like an Arduino. It needs to boot into the operating system and run the script or program. This is not _that _big of a deal if you have a way to turn the transmitter off without cutting power to the Raspberry Pi.
I recently came across a project using ESP32 for color composite video generation which looks nice, that could be a good update to my project in the future.
Different images
instead of it transmitting a single static image, I could have a button or a screen and menu system to select different images and videos without reprogramming the controller or having an external SD card.
Preview Screen
It would be nice having a small LCD or even a tiny OLED display to show the image before transmitting it instead of having to transmit it and review it in the goggles where I could get caught red-handed.
Smart Audio
Newer video transmitter support a protocol called smart audio which lets you send commands to the video transmitter via its audio output as if it was a UART port. This lets you change power and frequency settings without pressing buttons on the transmitter itself.
There are some libraries that allow an Arduino to send Smart Audio commands.
Remote control
It would be nice to hook the device up, stash it somewhere and control it remotely. That way, I won’t have to make suspicious moves in order to make it stop or change it’s settings.
This can be done in many ways, but I think the most elegant way is to have a radio control receiver (like the one on the drone receiving control signals) hooked up to the Arduino (libraries for this already exist, of course) which would control transistors to power the transmitter.That way, I could have a couple of switches in my radio transmitter that set the frequency and power it on and off.
This, along with Smart Audio would make it fully remotely operated.
Enclosure
The device is pretty bare-bones right now.Having it in an enclosure that hides all the lights, has maybe a velcro strap and a magnet so it can be placed on and attached to many different things would be very useful and help keep it hidden.
DISCLAIMER
This is a stupid project. It can be VERY dangerous to turn it on when someone is in the air. DO NOT follow any steps if you don’t understand the risks.I may not be held responsible to any damages or injuries caused by using the information in this project.Have fun and be safe.